
Arduino UNO Controlled Interactive Display with Servos, Ultrasonic Sensor, and RGB LED Strip
View and Edit Project In Cirkit Designer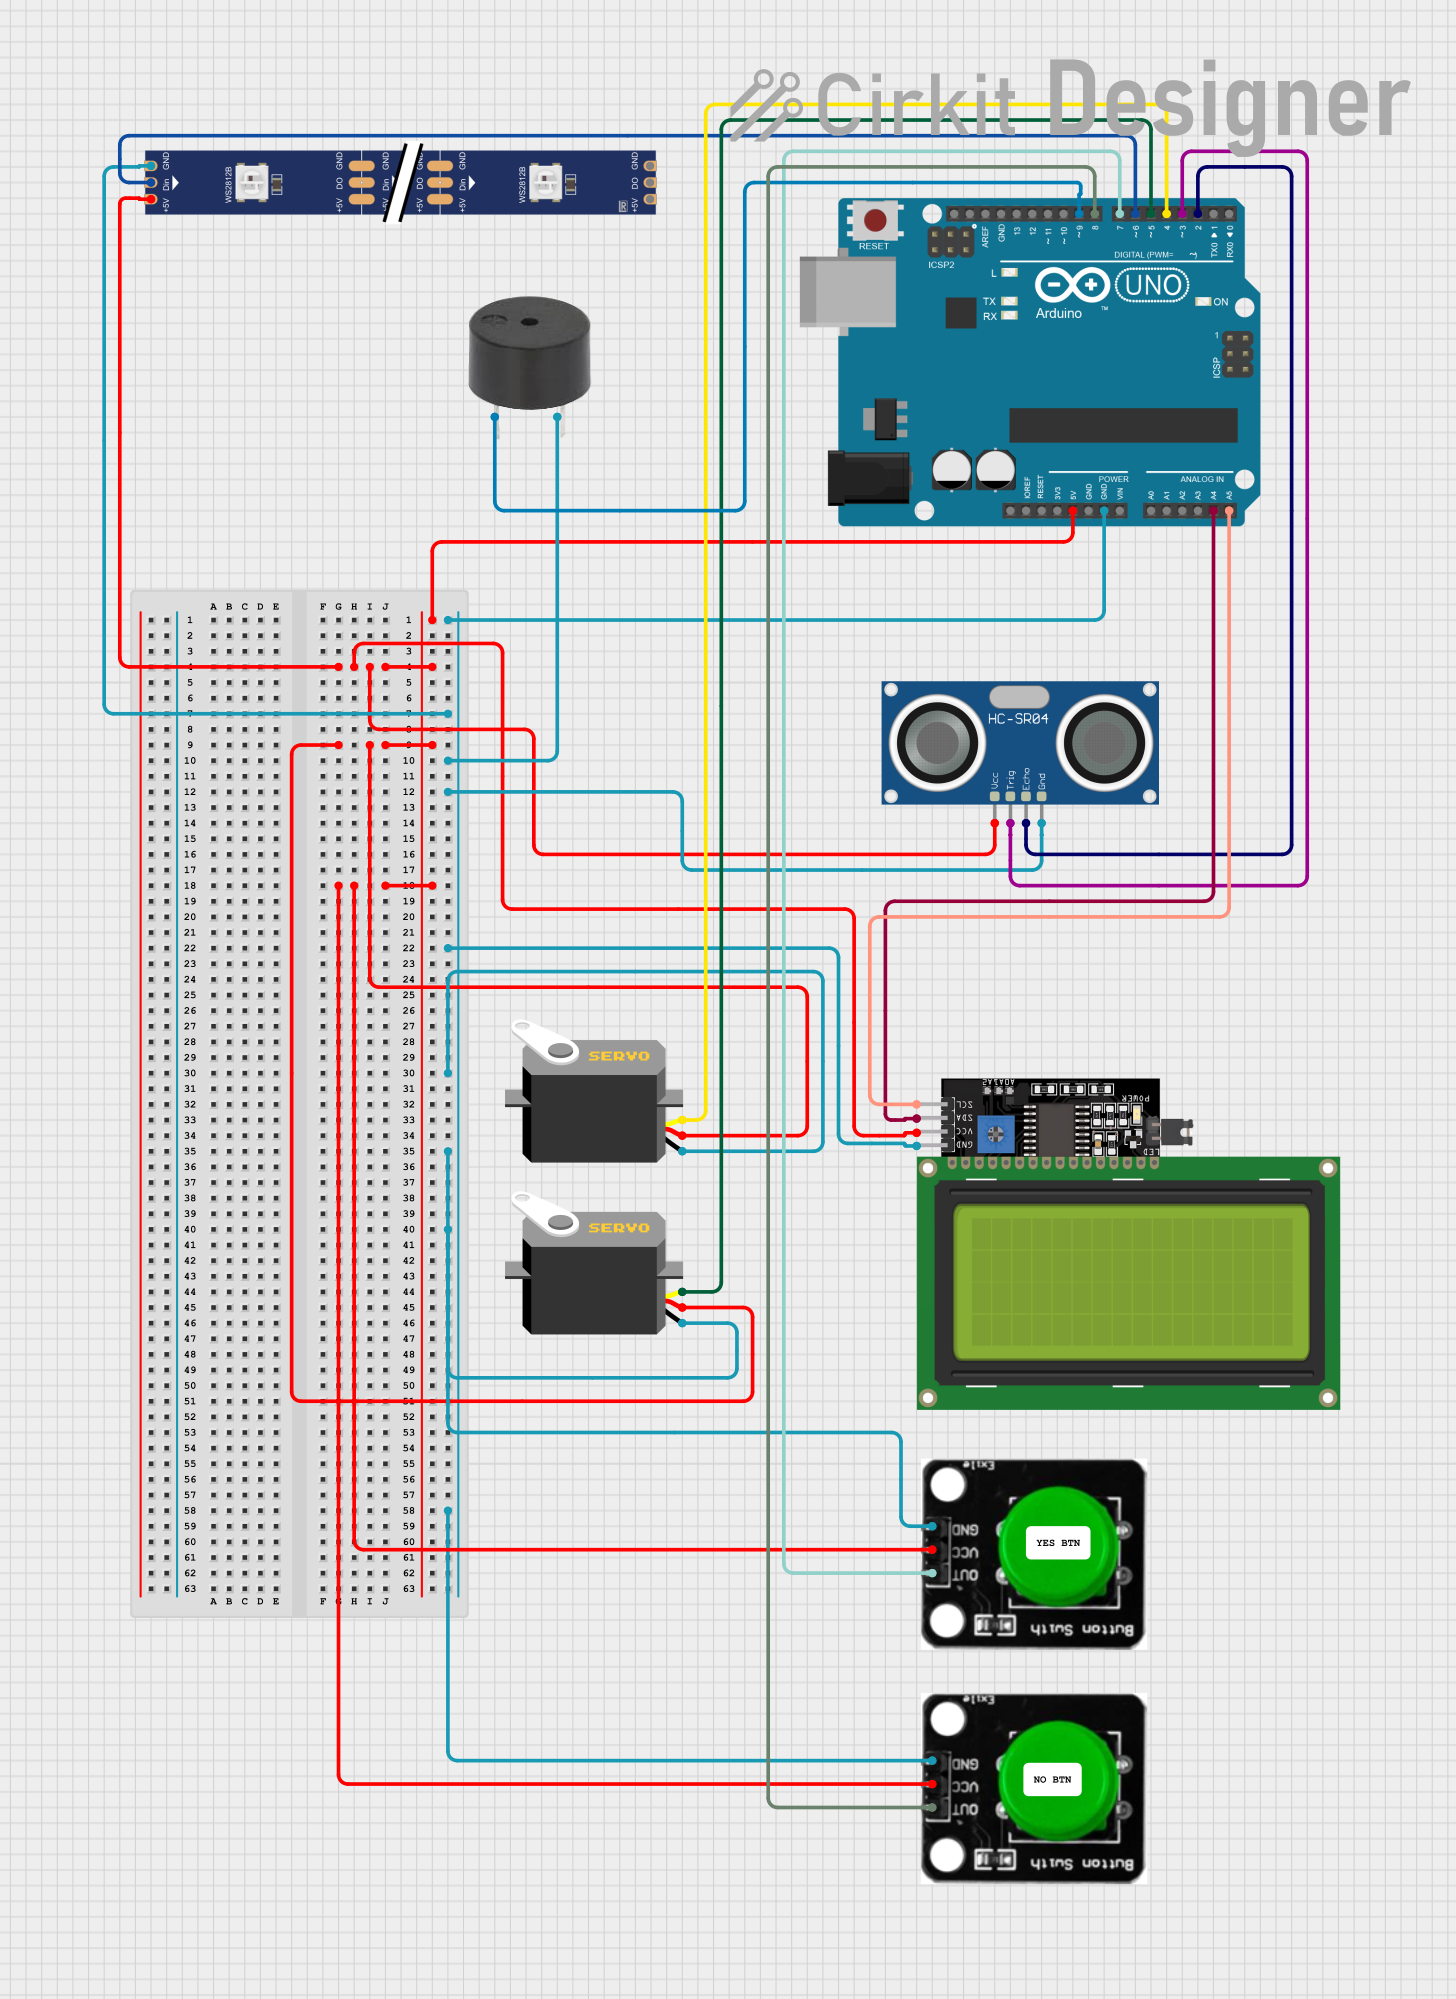
Circuit Documentation
Summary
This circuit is designed to interface various components with an Arduino UNO microcontroller. The components include two servo motors, an LCD Display (20x4) with I2C interface, an HC-SR04 Ultrasonic Sensor, a WS2812 RGB LED strip, two green buttons, and a buzzer. The Arduino UNO serves as the central processing unit, controlling the servos, reading sensor data, driving the LED strip, displaying information on the LCD, and responding to button presses. The circuit is powered through the Arduino's 5V and GND pins, which are distributed to the other components.
Component List
- Servo Motors: These are used for precise control of mechanical movement.
- LCD Display 20x4 I2C: This display provides a user interface to show messages, sensor readings, or other information.
- HC-SR04 Ultrasonic Sensor: This sensor measures distance by emitting ultrasonic waves and measuring the time taken for the echo to return.
- WS2812 RGB LED strip: This LED strip can display multiple colors and is used for visual feedback or aesthetic purposes.
- Arduino UNO: The main microcontroller board that controls all the peripherals and processes the sensor data.
- Green Buttons: These are input devices that allow the user to interact with the circuit.
- Buzzer: An audio signaling device that can be used for alerts or notifications.
Wiring Details
Servo Motors
- VCC: Connected to the 5V power rail.
- GND: Connected to the ground rail.
- Pulse: One servo's pulse pin is connected to the Arduino's digital pin D5, and the other to digital pin D4.
LCD Display 20x4 I2C
- VCC: Connected to the 5V power rail.
- GND: Connected to the ground rail.
- SDA: Connected to the Arduino's analog pin A4.
- SCL: Connected to the Arduino's analog pin A5.
HC-SR04 Ultrasonic Sensor
- VCC: Connected to the 5V power rail.
- GND: Connected to the ground rail.
- TRIG: Connected to the Arduino's digital pin D3.
- ECHO: Connected to the Arduino's digital pin D2.
WS2812 RGB LED strip
- 5V: Connected to the 5V power rail.
- GND: Connected to the ground rail.
- DIN: Connected to the Arduino's digital pin D6.
Green Buttons
- VCC: Connected to the 5V power rail.
- GND: Connected to the ground rail.
- OUT: One button's OUT pin is connected to the Arduino's digital pin D7, and the other to digital pin D8.
Buzzer
- PIN: Connected to the Arduino's digital pin D9.
- GND: Connected to the ground rail.
Documented Code
void setup() {
  // put your setup code here, to run once:

}

void loop() {
  // put your main code here, to run repeatedly:

}
The provided code is a template with empty setup() and loop() functions, which are the standard structure for Arduino sketches. The setup() function is intended to contain initialization code that runs once when the microcontroller is powered on or reset. The loop() function is for code that runs continuously, allowing the microcontroller to respond to changes in inputs and control outputs like LEDs, motors, and displays.
Further implementation details would be required to provide specific functionality to the components connected to the Arduino UNO.