Cirkit Designer
Your all-in-one circuit design IDE
Home /
Project Documentation
Arduino Mega 2560 Controlled I2C LCD Display
Circuit Documentation
Summary of the Circuit
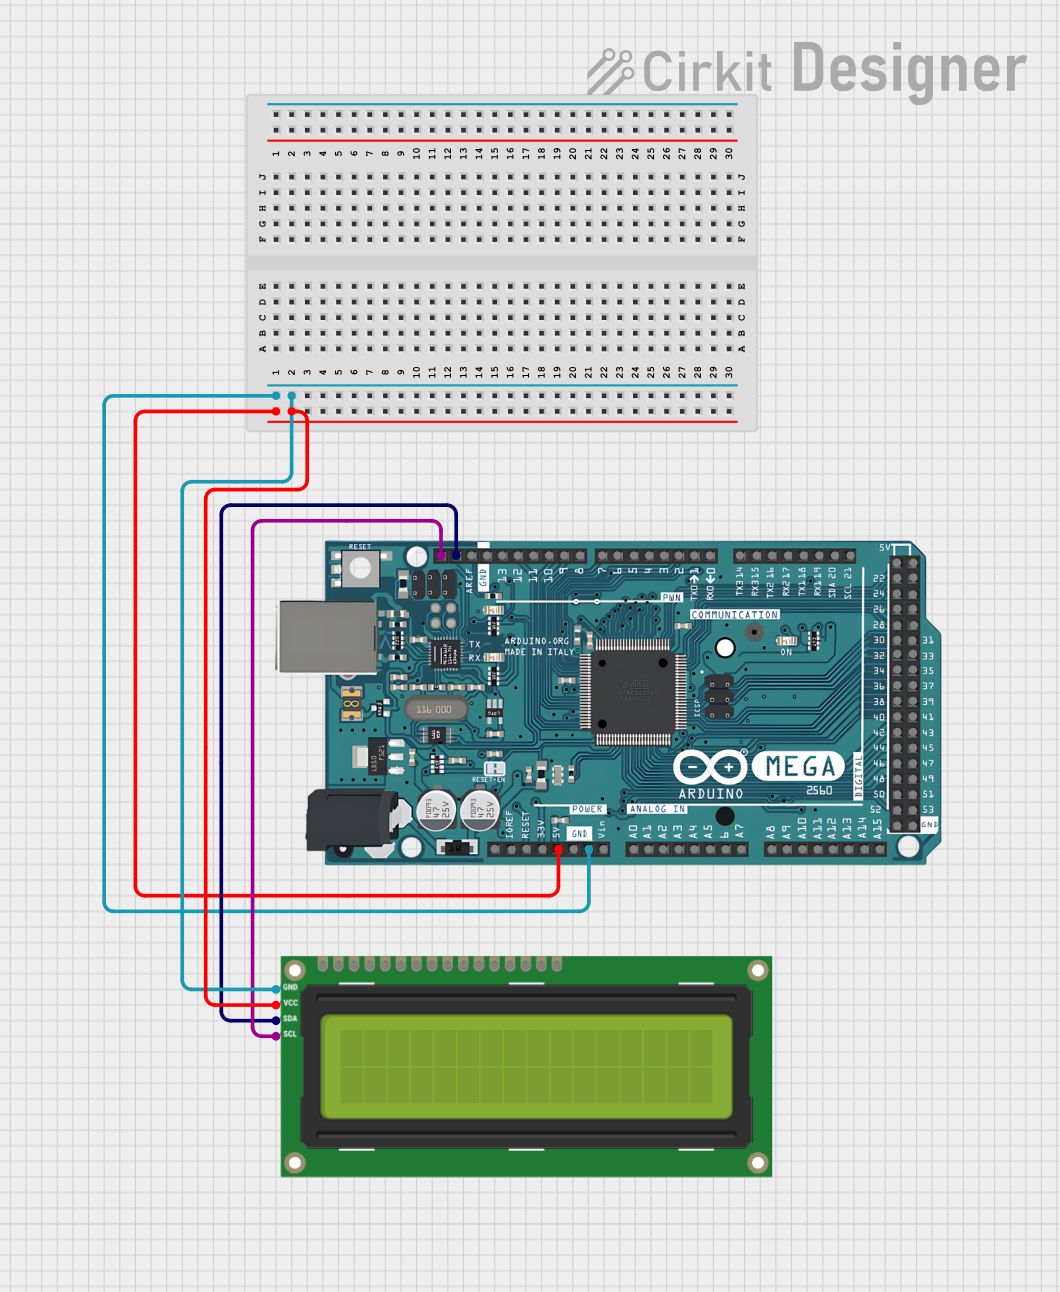
This circuit consists of an Arduino Mega 2560 microcontroller board interfaced with an I2C LCD 16x2 screen. The Arduino Mega 2560 is responsible for controlling the operations of the LCD, including sending data to be displayed. The LCD screen is used to display text or numbers, which can be dynamically updated by the Arduino. The communication between the Arduino and the LCD is established via the I2C protocol, which minimizes the number of pins used for interfacing.
Component List
Arduino Mega 2560
- Description: A microcontroller board based on the ATmega2560.
- Pins: IOREF, RESET, 3V3, 5V, GND, VIN, Analog Pins (A0-A15), Digital Pins (D0-D53), Communication Pins (SCL, SDA, TX, RX), PWM Pins, AREF.
- Purpose: Acts as the central processing unit of the circuit, running the embedded code to interact with the I2C LCD screen.
I2C LCD 16x2 Screen
- Description: A 16-character by 2-line display that communicates over the I2C bus.
- Pins: SCL, SDA, VCC (5V), GND, VDD, VO, RS, RW, E, Data Pins (D0-D7), Backlight Pins (BLA, BLK).
- Purpose: To display information sent from the Arduino Mega 2560.
Wiring Details
Arduino Mega 2560
- 5V connected to I2C LCD 16x2 Screen VCC (5V) for power supply.
- GND connected to I2C LCD 16x2 Screen GND for common ground reference.
- SDA connected to I2C LCD 16x2 Screen SDA for I2C data line.
- SCL connected to I2C LCD 16x2 Screen SCL for I2C clock line.
I2C LCD 16x2 Screen
- VCC (5V) connected to Arduino Mega 2560 5V for power supply.
- GND connected to Arduino Mega 2560 GND for common ground reference.
- SDA connected to Arduino Mega 2560 SDA for I2C data line.
- SCL connected to Arduino Mega 2560 SCL for I2C clock line.
Documented Code
Arduino Mega 2560 Code (sketch.ino)
void setup() {
  // put your setup code here, to run once:

}

void loop() {
  // put your main code here, to run repeatedly:

}
This code template provides the basic structure for an Arduino sketch with setup() and loop() functions. The setup() function is intended for initialization code that runs once at the start, while the loop() function contains code that runs continuously.
Additional Notes
- The provided code is a template and does not contain specific instructions for interacting with the I2C LCD screen. To complete the functionality, code for initializing the I2C communication and commands to send data to the LCD should be added.
- The
documentation.txtfile is empty and thus not included in this documentation. It is intended for additional explanatory notes or detailed documentation of the code logic and functionality.