
ESP32-Based Solar-Powered System with ATS and Charge Control
View and Edit Project In Cirkit Designer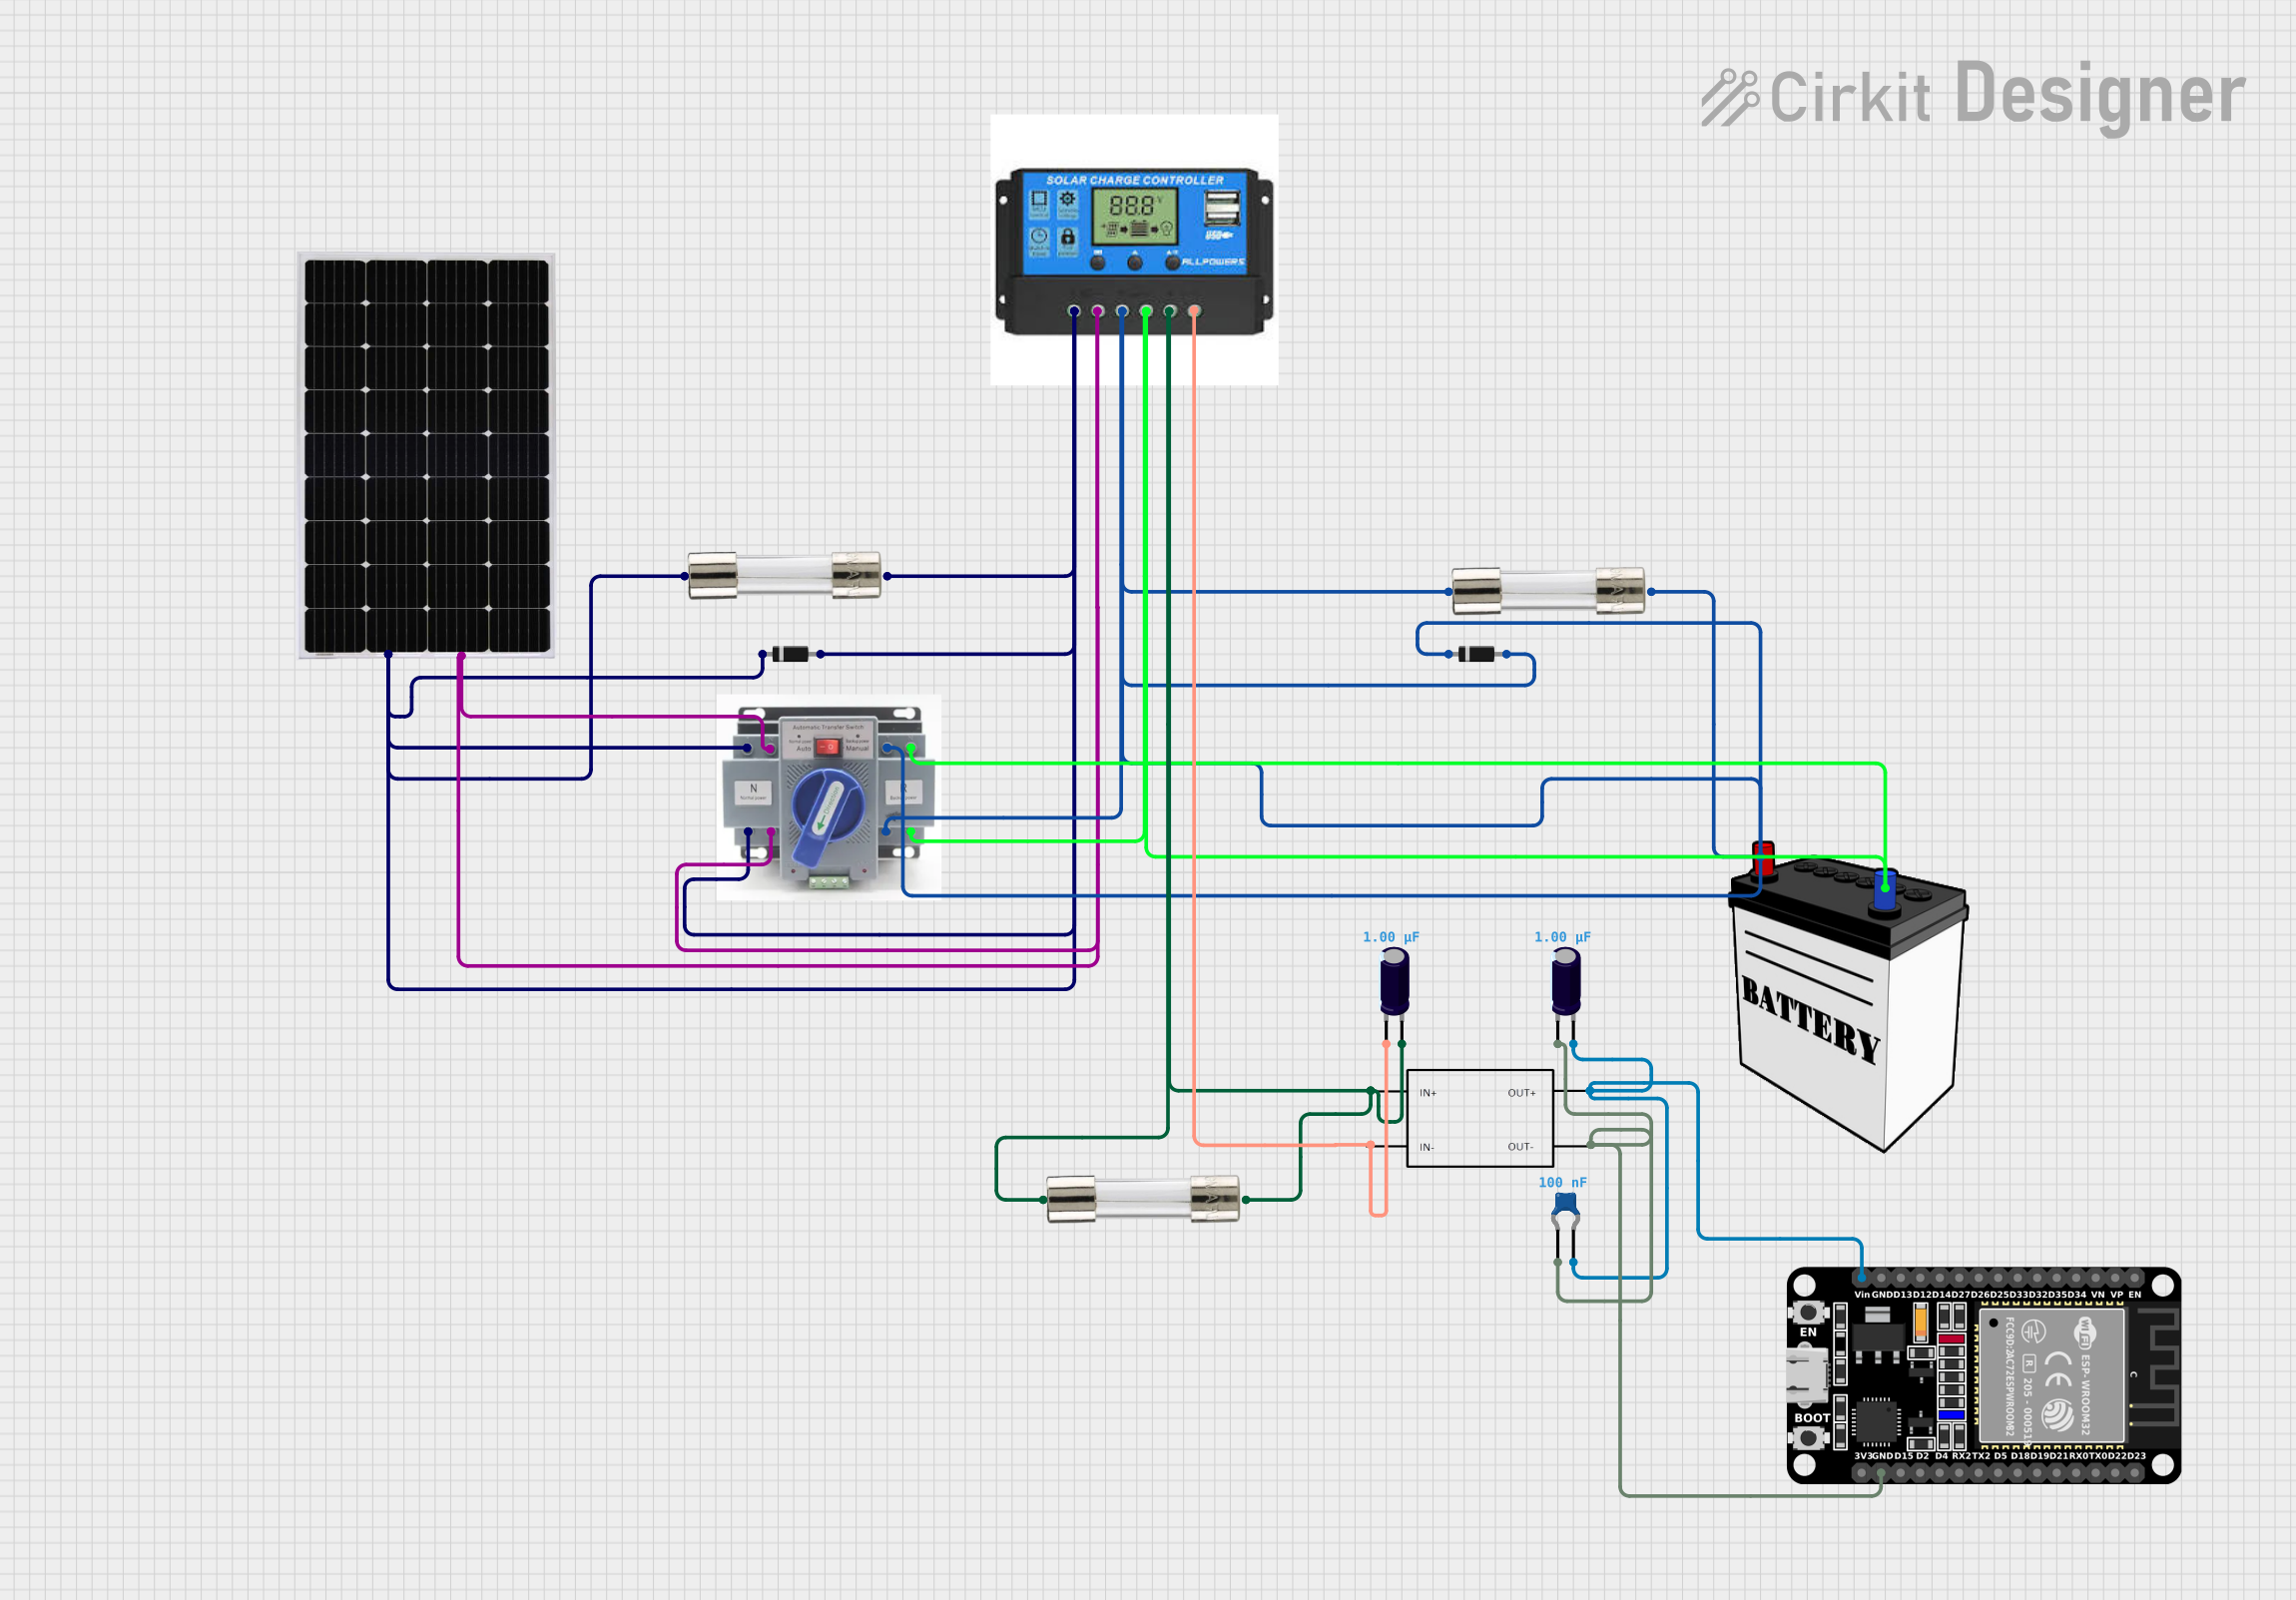
Circuit Documentation
Summary
This circuit is designed to harness solar energy to power an ESP32 microcontroller through a step-down converter, with a 12V battery serving as an energy storage component. The system includes a charge controller to manage the power flow from the solar panel to the battery and the load. Protection is provided by fuses and diodes to prevent overcurrent and reverse current flow, respectively. Capacitors are used for voltage smoothing and stabilization.
Component List
Microcontroller
- ESP32 (30 pin): A microcontroller with Wi-Fi and Bluetooth capabilities, featuring a wide range of GPIO pins for interfacing with various peripherals.
Power Sources
- Solar Panel: Converts sunlight into electrical energy, providing a renewable energy source for the circuit.
- 12V Battery: Stores electrical energy for use when solar power is insufficient or unavailable.
Power Management
- Step-Down Converter: Converts higher voltage levels to a lower voltage suitable for the ESP32 microcontroller.
- Charge Controller: Manages the charging of the battery from the solar panel and controls the power supply to the load.
- ATS (Automatic Transfer Switch): Automatically switches between solar power and battery power, ensuring a continuous power supply.
Protection
- Fuses: Provide overcurrent protection to prevent damage to the circuit components.
- Diodes: Prevent reverse current flow, protecting the circuit from potential damage.
Energy Storage and Filtering
- Electrolytic Capacitors: Used for voltage smoothing and energy storage, with a higher capacitance value.
- Ceramic Capacitor: Provides decoupling and noise reduction with a lower capacitance value.
Wiring Details
ESP32 (30 pin)
- Vin: Connected to the positive output of the step-down converter, ceramic capacitor, and electrolytic capacitor.
- GND: Connected to the negative output of the step-down converter, ceramic capacitor, and electrolytic capacitor.
Solar Panel
- +: Connected to the solar positive of the charge controller, fuse, and ATS. Also connected to the cathode of a diode.
- -: Connected to the solar negative of the charge controller and ATS.
12V Battery
- VCC: Connected to the battery positive of the charge controller, ATS, and the anode of a diode. Also connected to a fuse.
- GND: Connected to the battery negative of the charge controller and ATS.
Step-Down Converter
- IN+: Connected to the load positive of the charge controller and an electrolytic capacitor.
- IN-: Connected to the load negative of the charge controller and an electrolytic capacitor.
- OUT+: Connected to the Vin of the ESP32, ceramic capacitor, and electrolytic capacitor.
- OUT-: Connected to the GND of the ESP32, ceramic capacitor, and electrolytic capacitor.
ATS
- +: Connected to the solar panel, diodes, and battery through the charge controller.
- -: Connected to the solar panel and battery through the charge controller.
Charge Controller
- Solar Positive: Connected to the solar panel, fuse, and ATS.
- Solar Negative: Connected to the solar panel and ATS.
- Battery Positive: Connected to the battery, ATS, and diode.
- Battery Negative: Connected to the battery and ATS.
- Load Positive: Connected to the step-down converter and an electrolytic capacitor.
- Load Negative: Connected to the step-down converter and an electrolytic capacitor.
Fuses
- Connected in series with the solar panel, battery, and load lines for overcurrent protection.
Diodes
- Connected in series with the solar panel and battery lines to prevent reverse current flow.
Electrolytic Capacitors
- Connected across the power lines for voltage smoothing and stabilization.
Ceramic Capacitor
- Connected across the power lines for noise reduction and decoupling.
Documented Code
Microcontroller Code (ESP32)
void setup() {
  // put your setup code here, to run once:

}

void loop() {
  // put your main code here, to run repeatedly:

}
Filename: sketch.ino
(Note: The provided code is a template and does not contain any functional code specific to the operation of the circuit. Additional code is required to control and monitor the circuit components.)
Additional Documentation
Filename: documentation.txt
(Note: The additional documentation file is mentioned but no content was provided in the input.)