
Arduino Nano-Based Multi-Sensor Controller with Joystick and Accelerometer
View and Edit Project In Cirkit Designer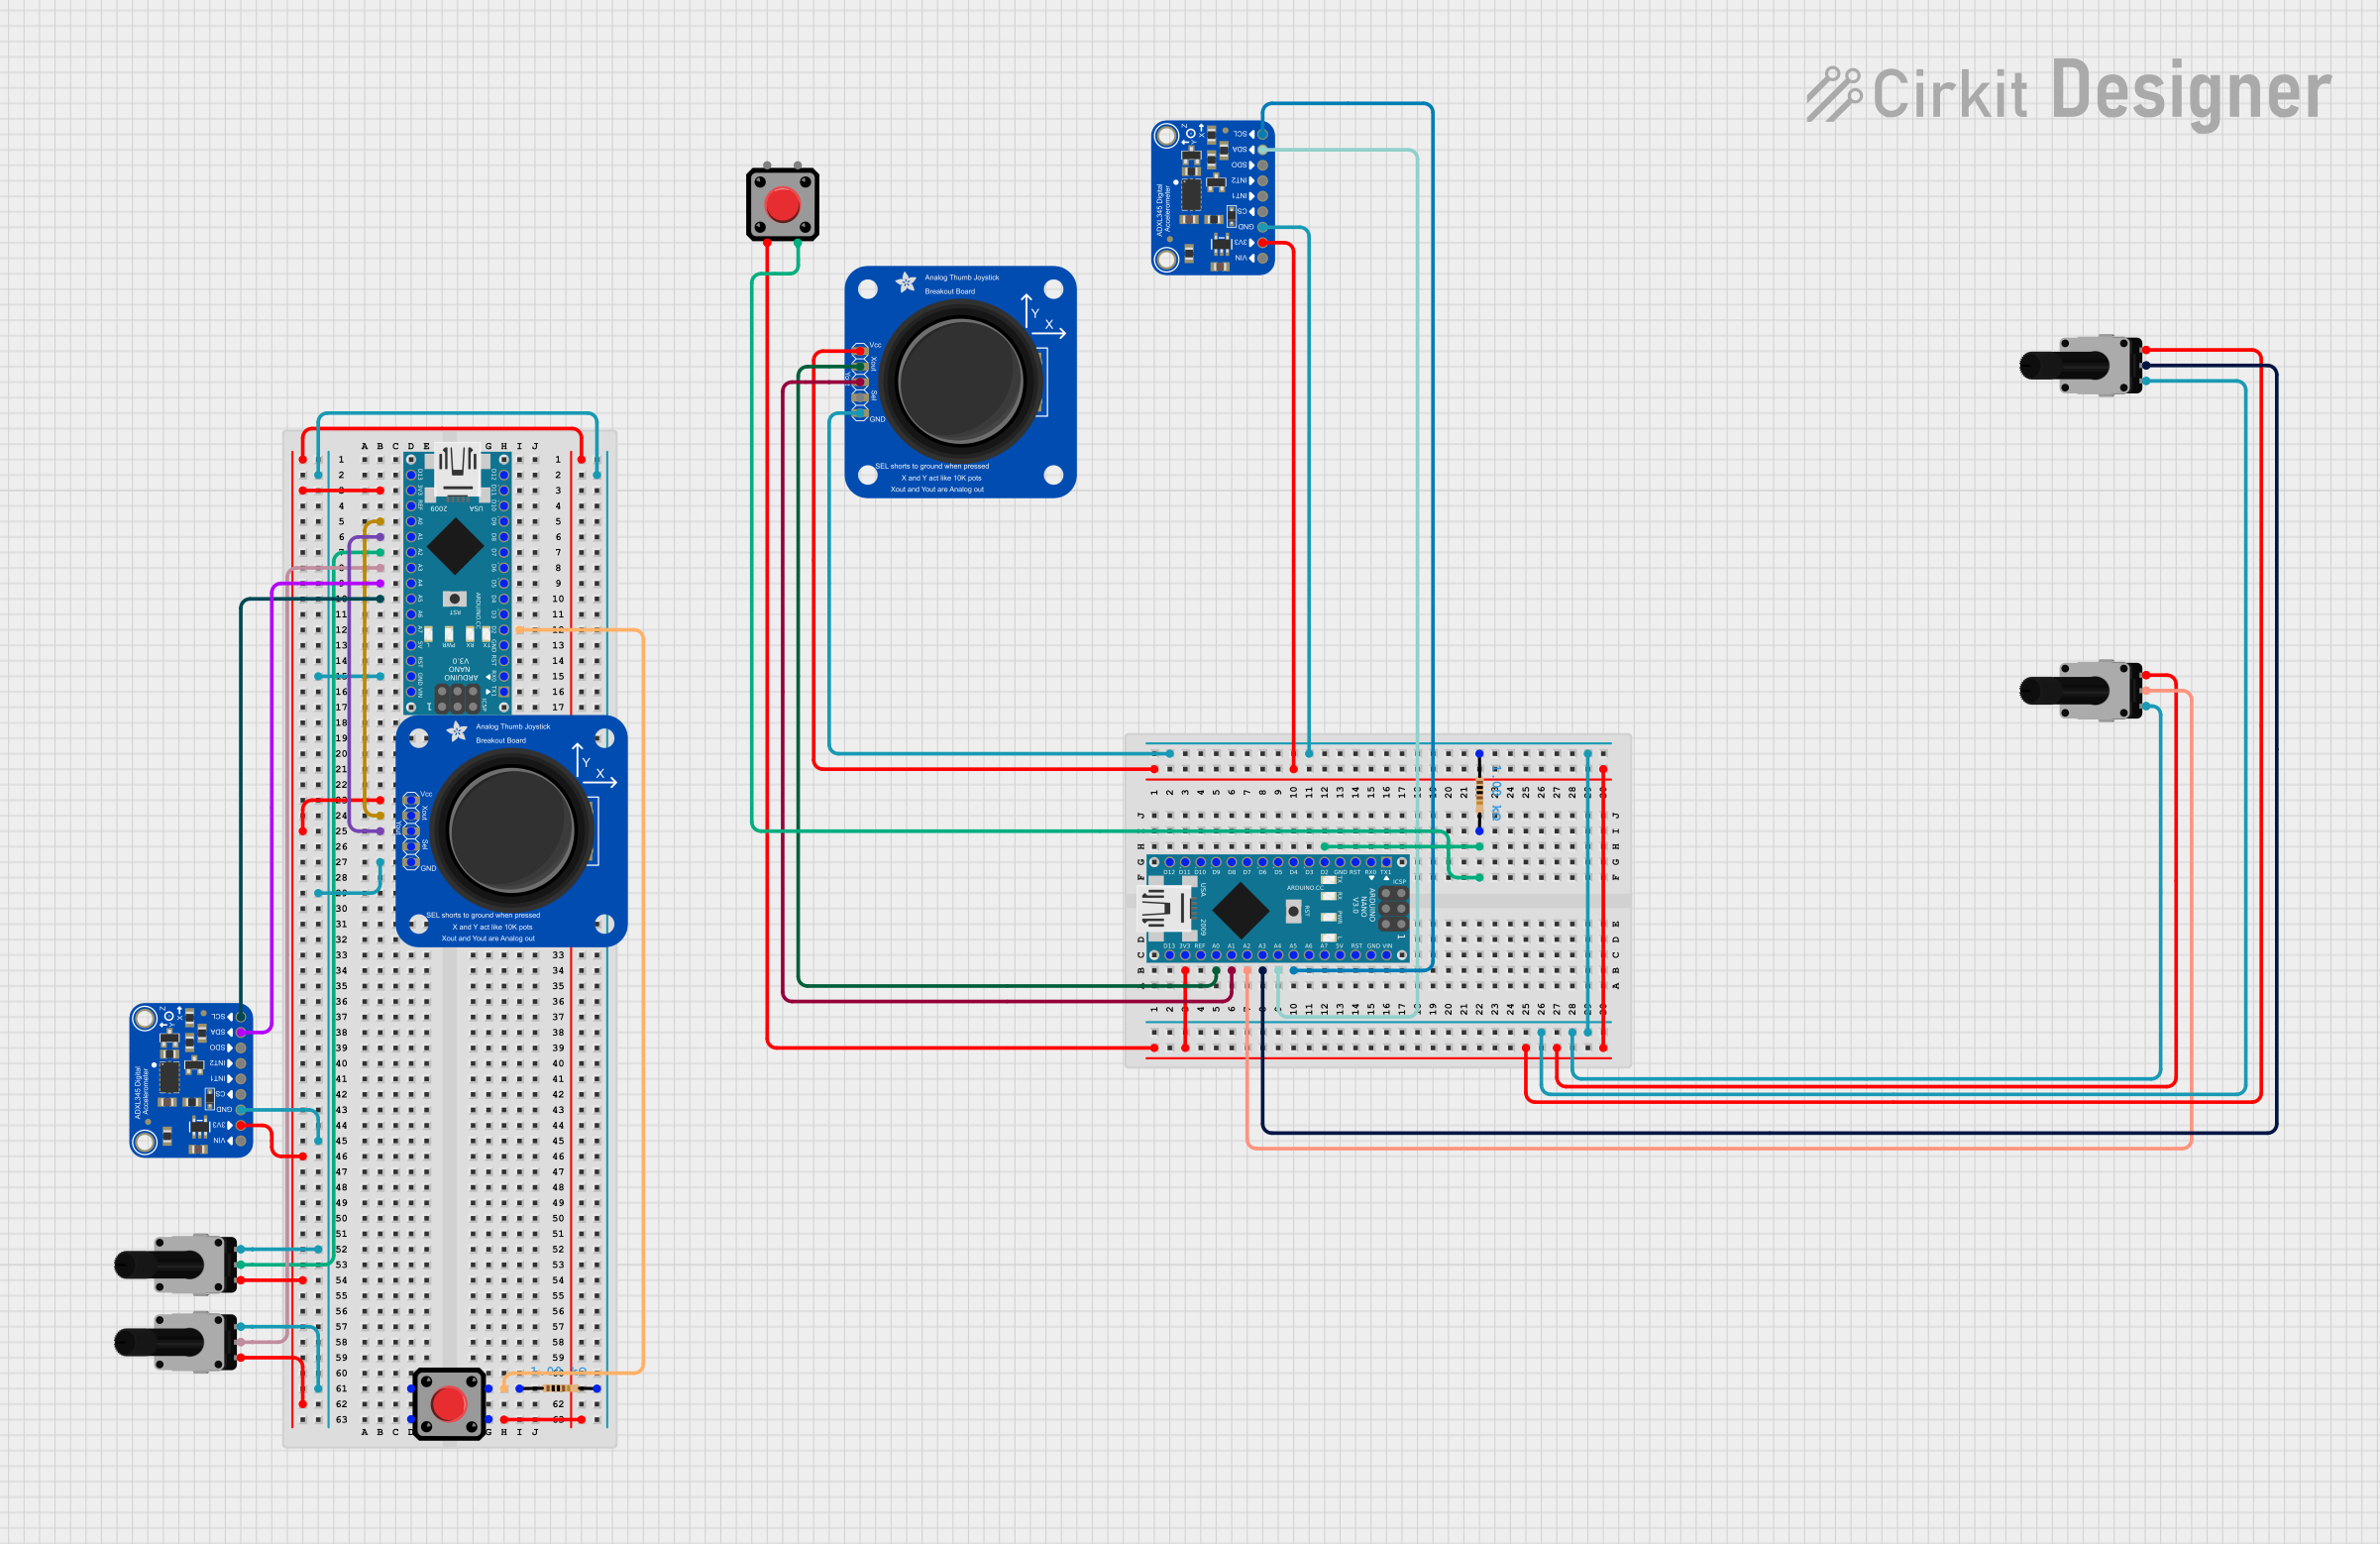
Circuit Documentation
Summary
This circuit involves two Arduino Nano microcontrollers, multiple sensors including joysticks and accelerometers, pushbuttons, resistors, and rotary potentiometers. The circuit is designed to read analog and digital inputs from these components and process them using the Arduino Nano microcontrollers.
Component List
Adafruit Analog 2-Axis Joystick
- Pins: VCC, XOUT, YOUT, SWITCH, GND
- Description: An analog joystick that provides X and Y axis readings.
- Purpose: Used to capture 2D directional input.
Pushbutton
- Pins: Pin 2, Pin 1, Pin 3, Pin 4
- Description: A simple pushbutton switch.
- Purpose: Used to provide digital input when pressed.
Resistor
- Pins: pin1, pin2
- Description: A resistor with a resistance of 1000 Ohms.
- Purpose: Used to limit current in the circuit.
Arduino Nano
- Pins: D1/TX, D0/RX, RESET, GND, D2, D3, D4, D5, D6, D7, D8, D9, D10, D11/MOSI, D12/MISO, VIN, 5V, A7, A6, A5, A4, A3, A2, A1, A0, AREF, 3V3, D13/SCK
- Description: A small, complete, and breadboard-friendly board based on the ATmega328.
- Purpose: Used to process inputs and control outputs.
Rotary Potentiometer
- Pins: leg1, wiper, leg2
- Description: A rotary potentiometer with a resistance of 10000 Ohms.
- Purpose: Used to provide variable resistance for analog input.
Adafruit ADXL345
- Pins: VIN, 3.3V, GND, CS, INT1, INT2, SDO/ADDR, SDA/SDIO, SCL
- Description: A 3-axis accelerometer.
- Purpose: Used to measure acceleration in three dimensions.
Wiring Details
Adafruit Analog 2-Axis Joystick
- VCC connected to 3V3 of Arduino Nano
- XOUT connected to A0 of Arduino Nano
- YOUT connected to A1 of Arduino Nano
- GND connected to GND of Arduino Nano
Pushbutton
- Pin 1 connected to D2 of Arduino Nano
- Pin 2 connected to 3V3 of Arduino Nano
- Pin 3 connected to pin2 of Resistor
- Pin 4 connected to 3V3 of Arduino Nano
Resistor
- pin1 connected to Pin 1 of Pushbutton
- pin2 connected to GND of Arduino Nano
Arduino Nano
- 3V3 connected to VCC of Adafruit Analog 2-Axis Joystick, 3.3V of Adafruit ADXL345, leg1 of Rotary Potentiometer, Pin 4 of Pushbutton
- A0 connected to XOUT of Adafruit Analog 2-Axis Joystick
- A1 connected to YOUT of Adafruit Analog 2-Axis Joystick
- A2 connected to wiper of Rotary Potentiometer
- A3 connected to wiper of Rotary Potentiometer
- A4 connected to SDA/SDIO of Adafruit ADXL345
- A5 connected to SCL of Adafruit ADXL345
- D2 connected to Pin 1 of Pushbutton, pin1 of Resistor
- GND connected to GND of Adafruit Analog 2-Axis Joystick, pin2 of Resistor, GND of Adafruit ADXL345, leg2 of Rotary Potentiometer
Rotary Potentiometer
- leg1 connected to 3V3 of Arduino Nano
- wiper connected to A2 of Arduino Nano
- leg2 connected to GND of Arduino Nano
Adafruit ADXL345
- 3.3V connected to 3V3 of Arduino Nano
- GND connected to GND of Arduino Nano
- SDA/SDIO connected to A4 of Arduino Nano
- SCL connected to A5 of Arduino Nano
Documented Code
Arduino Nano (Instance 1)
sketch.ino
void setup() {
  // put your setup code here, to run once:

}

void loop() {
  // put your main code here, to run repeatedly:

}
documentation.txt
No additional documentation provided.
Arduino Nano (Instance 2)
sketch.ino
void setup() {
  // put your setup code here, to run once:

}

void loop() {
  // put your main code here, to run repeatedly:

}
documentation.txt
No additional documentation provided.