Cirkit Designer
Your all-in-one circuit design IDE
Home /
Project Documentation
Arduino UNO Based Temperature Monitoring with Buzzer Alert
Circuit Documentation
Summary of the Circuit
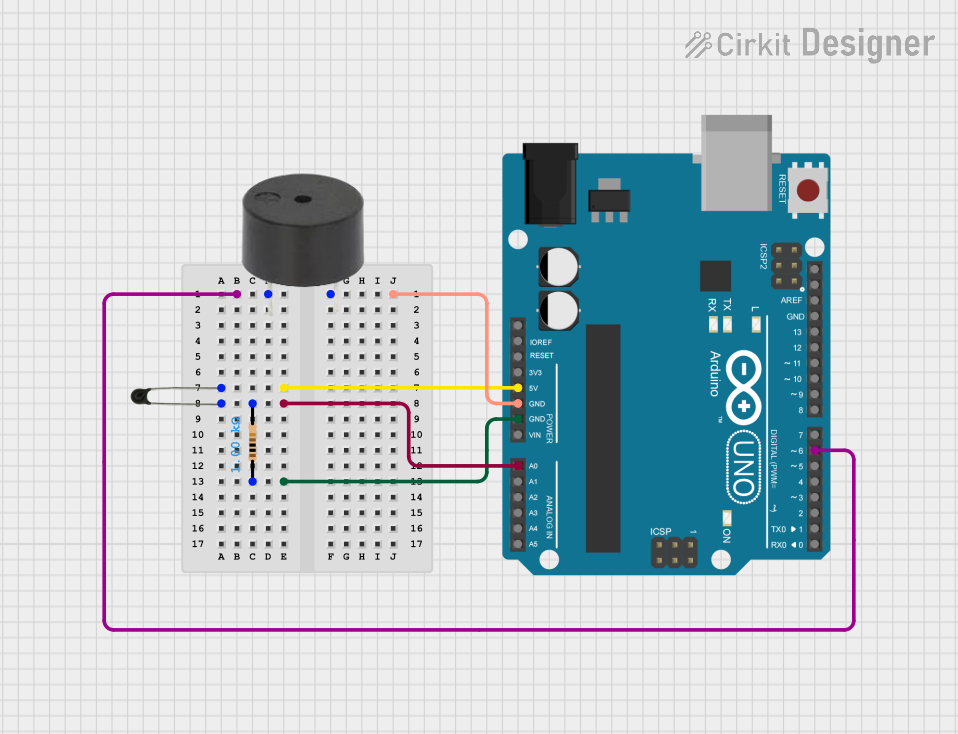
This circuit is designed around an Arduino UNO microcontroller and includes a temperature sensing NTC thermistor, a 1kΩ resistor, and a buzzer. The Arduino UNO is used as the central processing unit to read the temperature from the NTC thermistor and control the buzzer based on the temperature readings. The resistor is used to form a voltage divider with the NTC thermistor, allowing the Arduino to measure temperature-related changes in resistance.
Component List
Arduino UNO
- Description: A microcontroller board based on the ATmega328P.
- Purpose: Acts as the central processing unit for the circuit, reading sensor data and controlling the buzzer.
- Pins: UNUSED, IOREF, Reset, 3.3V, 5V, GND, Vin, A0-A5, SCL, SDA, AREF, D0-D13.
NTC Thermistor
- Description: A temperature-sensitive resistor whose resistance decreases as the temperature increases.
- Purpose: Senses the temperature for the circuit.
- Pins: A0, A1.
Resistor (1kΩ)
- Description: A passive two-terminal electrical component that implements electrical resistance as a circuit element.
- Purpose: Forms a voltage divider with the NTC thermistor for temperature measurement.
- Pins: pin1, pin2.
- Properties: Resistance: 1000 Ohms.
Buzzer
- Description: An audio signaling device.
- Purpose: Provides an audible alert based on temperature readings.
- Pins: PIN, GND.
Wiring Details
Arduino UNO
- D6 connected to Buzzer PIN.
- GND connected to Buzzer GND and Resistor pin1.
- 5V connected to NTC A1.
- A0 connected to NTC A0 and Resistor pin2.
NTC Thermistor
- A0 connected to Arduino A0 and Resistor pin2.
- A1 connected to Arduino 5V.
Resistor (1kΩ)
- pin1 connected to Arduino GND.
- pin2 connected to Arduino A0 and NTC A0.
Buzzer
- PIN connected to Arduino D6.
- GND connected to Arduino GND.
Documented Code
Arduino UNO Code (sketch.ino)
void setup() {
  // put your setup code here, to run once:

}

void loop() {
  // put your main code here, to run repeatedly:

}
Note: The provided code is a template and does not include specific functionality. It should be populated with the necessary setup and loop code to read the temperature from the NTC thermistor and control the buzzer accordingly.