
Circuit Documentation
Summary
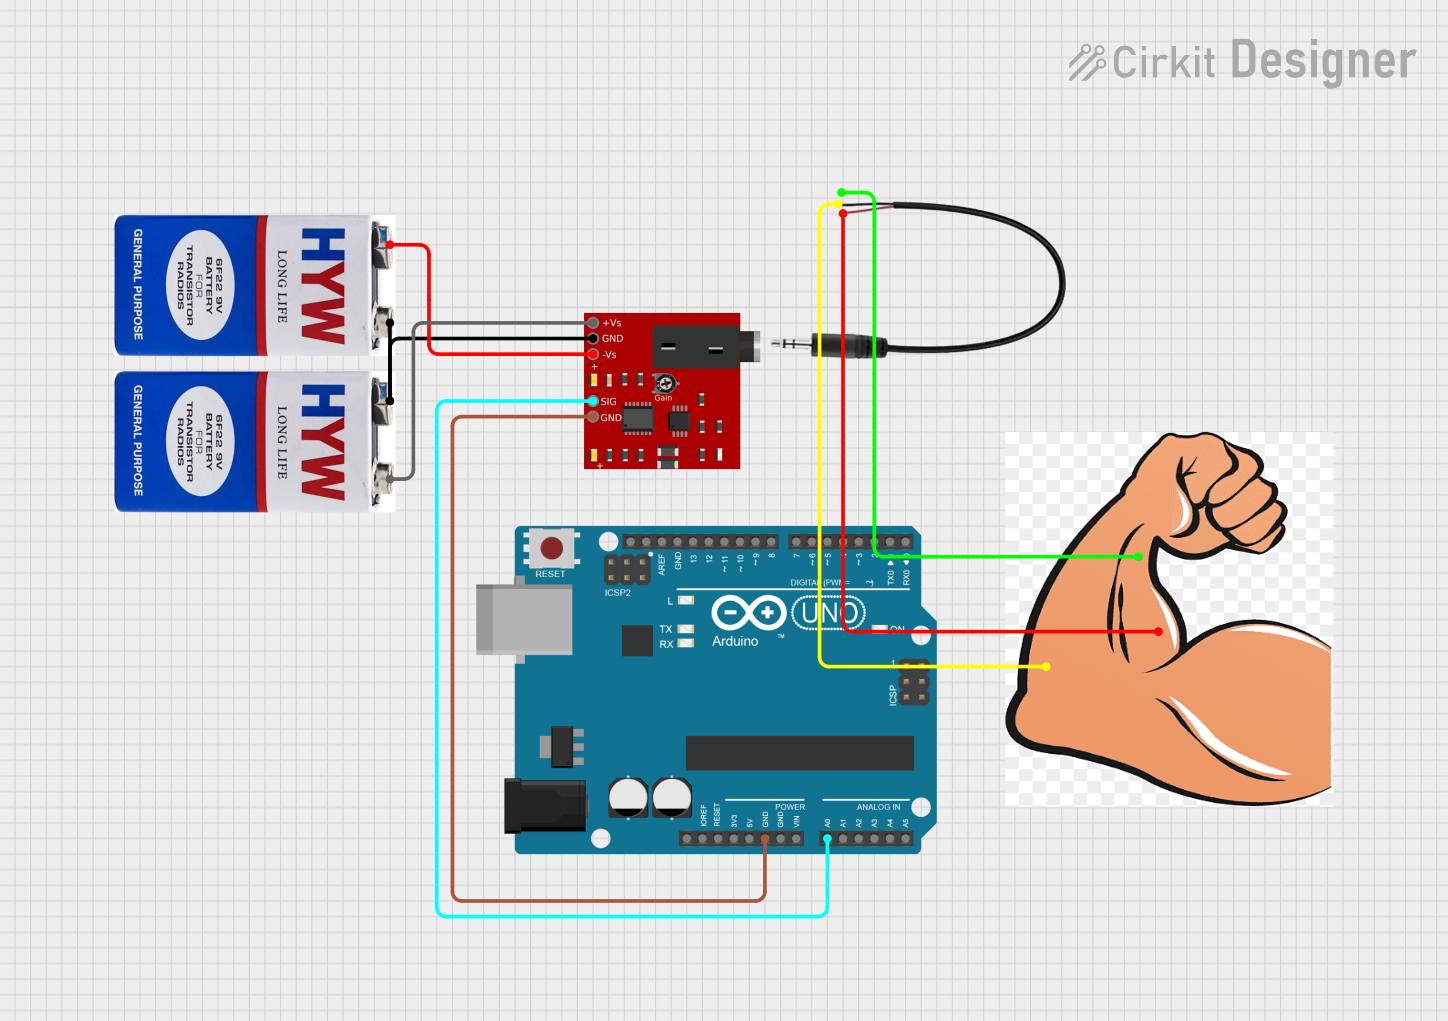
This document provides a detailed overview of a circuit that includes an Advancer Muscle Sensor V3, two 9V batteries, a hand component, a 3.5mm Audio Jack, and an Arduino UNO. The circuit is designed to interface the muscle sensor with the Arduino for signal processing and control.
Component List
Advancer Muscle Sensor V3
- Description: Muscle sensor for detecting muscle activity.
- Pins: +Vs, GND, -Vs, SIG
9V Battery
- Description: Power source for the circuit.
- Pins: +, -
Hand
- Description: Simulated hand component for testing.
- Pins: DNL, +IN, -IN
3.5mm Audio Jack 3 Pin
- Description: Audio jack for interfacing with external devices.
- Pins: L, R, GND
Arduino UNO
- Description: Microcontroller for processing and control.
- Pins: UNUSED, IOREF, Reset, 3.3V, 5V, GND, Vin, A0, A1, A2, A3, A4, A5, SCL, SDA, AREF, D13, D12, D11, D10, D9, D8, D7, D6, D5, D4, D3, D2, D1, D0
Wiring Details
Advancer Muscle Sensor V3
- GND connected to GND of Arduino UNO
- SIG connected to A0 of Arduino UNO
- +Vs connected to - of 9V battery
- GND connected to + of 9V battery
- -Vs connected to + of 9V battery
9V Battery
- - connected to +Vs of Advancer Muscle Sensor V3
- + connected to GND of Advancer Muscle Sensor V3
- - connected to + of 9V battery
Hand
- DNL connected to GND of 3.5mm Audio Jack
- +IN connected to L of 3.5mm Audio Jack
- -IN connected to R of 3.5mm Audio Jack
3.5mm Audio Jack 3 Pin
- GND connected to DNL of Hand
- L connected to +IN of Hand
- R connected to -IN of Hand
Arduino UNO
- GND connected to GND of Advancer Muscle Sensor V3
- A0 connected to SIG of Advancer Muscle Sensor V3
Documented Code
Arduino UNO Code (sketch.ino)
void setup() {
  // put your setup code here, to run once:

}

void loop() {
  // put your main code here, to run repeatedly:

}
Additional Documentation (documentation.txt)
This documentation provides a comprehensive overview of the circuit, including the components used, their connections, and the code for the Arduino UNO.