
Arduino UNO Controlled Relay System with Infrared Proximity Sensors
View and Edit Project In Cirkit Designer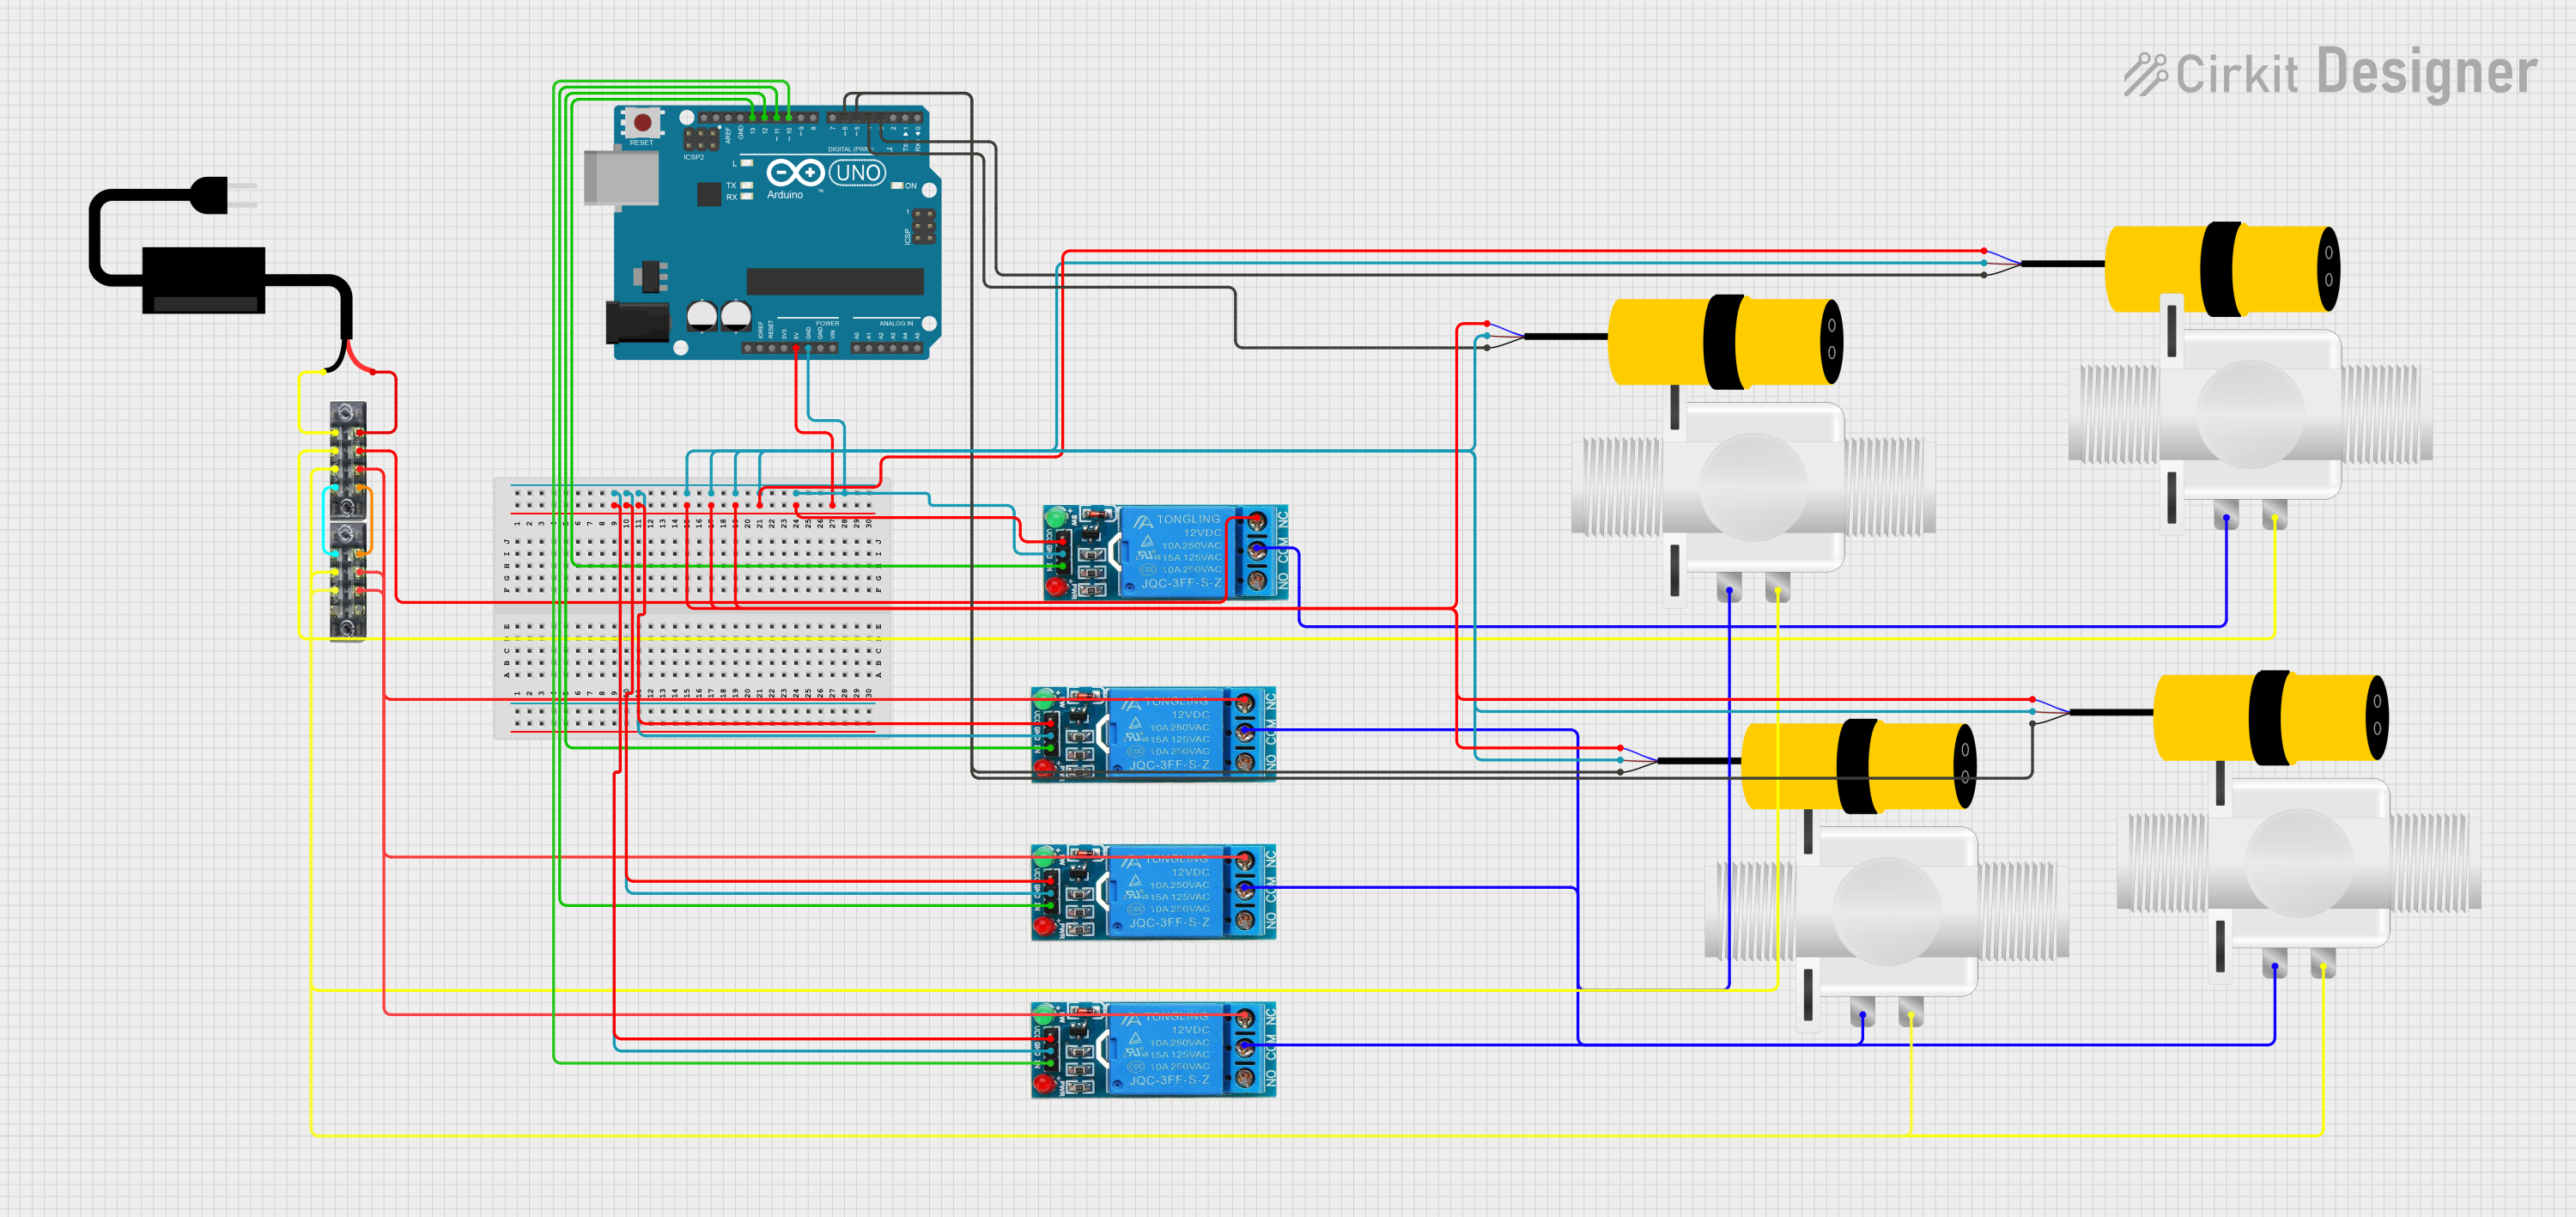
Circuit Documentation
Summary
This circuit is designed to control multiple 12V single-channel relays using an Arduino UNO microcontroller. The relays are used to switch various loads, potentially solenoid valves, as indicated by the presence of Plastic Solenoid Valves in the circuit. The circuit also includes E18-D80NK infrared proximity sensors that likely serve as inputs to the Arduino to control the state of the relays. A DC Source provides power to the system, and terminal blocks are used for organizing connections.
Component List
12V Single Channel Relay
- Pins: NC (Normally Closed), COM (Common), NO (Normally Open), IN (Input), GND (Ground), VCC (Voltage Supply)
- Description: A relay that switches a connected load on or off when a voltage is applied to its input pin.
Arduino UNO
- Pins: UNUSED, IOREF, Reset, 3.3V, 5V, GND, Vin, A0-A5, SCL, SDA, AREF, D0-D13
- Description: A microcontroller board based on the ATmega328P, with digital input/output pins, analog inputs, and various power options.
E18-D80NK Infrared Proximity Sensor
- Pins: pin1 (VCC), pin2 (GND), pin3 (Output)
- Description: An adjustable infrared sensor with an obstacle detection range.
DC Source
- Pins: + (Positive), - (Negative)
- Description: Provides the power supply for the circuit.
Terminal Block (04-01)
- Pins: 1-8
- Description: A connector that allows multiple wires to be connected together in a circuit.
Plastic Solenoid Valve
- Pins: pin1, pin2
- Description: An electrically-controlled valve used for controlling the flow of a fluid.
Wiring Details
12V Single Channel Relay
- VCC: Connected to the 5V output of the Arduino UNO and other VCC pins of relays and sensors.
- GND: Connected to the GND pin of the Arduino UNO and other GND pins of relays and sensors.
- IN: Controlled by digital pins D10-D13 of the Arduino UNO.
- NC: Connected to terminal block pins for interfacing with external components.
- COM: Connected to the Plastic Solenoid Valve pin1.
Arduino UNO
- 5V: Provides power to the VCC pins of the relays and sensors.
- GND: Common ground for the circuit.
- D3-D6: Connected to the output pins of the E18-D80NK sensors.
- D10-D13: Control the IN pins of the relays.
E18-D80NK Infrared Proximity Sensor
- pin1 (VCC): Connected to the 5V output of the Arduino UNO.
- pin2 (GND): Connected to the GND pin of the Arduino UNO.
- pin3 (Output): Connected to digital pins D3-D6 of the Arduino UNO.
DC Source
- + (Positive): Connected to the terminal block to distribute power.
- - (Negative): Connected to the terminal block to distribute ground.
Terminal Block (04-01)
- Pins 1-8: Used to organize connections between the DC Source, relays, and solenoid valves.
Plastic Solenoid Valve
- pin1: Connected to the COM pin of the corresponding relay.
- pin2: Connected to the terminal block to complete the circuit with the relay.
Documented Code
void setup()
{
  pinMode(13, OUTPUT);  // Set pin 13 as output
  pinMode(3, INPUT);    // Set pin 3 as input
  Serial.begin(9600);   // Start serial communication at 9600 bps
}

void loop()
{
  if (digitalRead(3) == LOW)  // Check if the input on pin 3 is LOW
  {
    digitalWrite(13, HIGH);   // Turn on the LED on pin 13
    delay(10);                // Wait for 10 milliseconds
  }
  else
  {
    digitalWrite(13, LOW);    // Turn off the LED
    delay(10);                // Wait for 10 milliseconds
  }
}
The code is written for the Arduino UNO and controls an LED connected to pin 13. It checks the state of pin 3, which is set as an input. If the input is LOW, the LED is turned on; otherwise, it is turned off. The code includes a 10-millisecond delay after each state change of the LED.