
Arduino Nano-Based IR Remote Controlled LED with Pushbutton Interaction
View and Edit Project In Cirkit Designer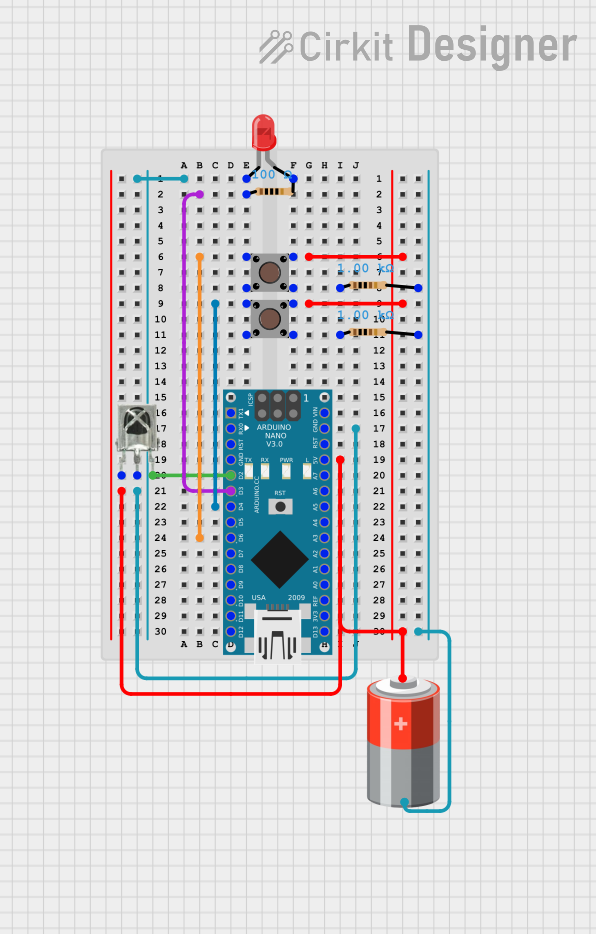
Circuit Documentation
Summary of the Circuit
This circuit is designed to interface an Arduino Nano with a VS1838B IR Receiver and a red LED. The circuit includes pushbuttons and resistors to facilitate user input and to ensure proper LED operation. A 5V battery provides power to the system. The Arduino Nano is programmed to interact with these components, although the specific functionality is not detailed in the provided code.
Component List
Arduino Nano
- Microcontroller board based on the ATmega328P
- It has a variety of digital and analog I/O pins.
VS1838B IR Receiver
- Infrared receiver module for remote control systems.
LED: Two Pin (red)
- A basic red LED for indication purposes.
Resistor (100 Ohms)
- A resistor with a resistance of 100 Ohms, likely used for current limiting for the LED.
Resistor (1000 Ohms)
- A resistor with a resistance of 1000 Ohms, possibly used for pull-up or pull-down resistors for the pushbuttons.
5V Battery
- Power source for the circuit, providing a stable 5V supply.
Pushbutton
- A standard pushbutton used for user input.
Wiring Details
Arduino Nano
- GND connected to the ground plane of the circuit.
- D3 connected to a 100 Ohm resistor.
- D6 connected to one of the pushbuttons.
- 5V connected to the other pushbutton and the 5V battery.
- D4 connected to the other pushbutton.
- D2 connected to the VCC of the VS1838B IR Receiver.
VS1838B IR Receiver
- OUT connected to the Arduino Nano.
- GND connected to the ground plane of the circuit.
- VCC connected to the Arduino Nano's D2 pin.
LED: Two Pin (red)
- Cathode connected to the ground plane of the circuit.
- Anode connected to a 100 Ohm resistor.
Resistor (100 Ohms)
- One side connected to the Arduino Nano's D3 pin.
- The other side connected to the anode of the red LED.
Resistor (1000 Ohms)
- One side connected to the pushbutton.
- The other side connected to the ground plane of the circuit.
5V Battery
- + connected to the 5V rail of the circuit.
- - connected to the ground plane of the circuit.
Pushbutton
- One side connected to the Arduino Nano's D6 and D4 pins.
- The other side connected to the 5V rail and through a 1000 Ohm resistor to the ground plane.
Documented Code
void setup() {
  // put your setup code here, to run once:

}

void loop() {
  // put your main code here, to run repeatedly:

}
The provided code is a template with empty setup() and loop() functions, which are the entry points for Arduino code. The setup() function is called once when the program starts and is used to initialize settings, while the loop() function is called repeatedly and contains the main logic of the program. The actual functionality needs to be implemented within these functions based on the desired behavior of the circuit.