Cirkit Designer
Your all-in-one circuit design IDE
Home /
Project Documentation
Arduino-Based Doppler Radar with RF Transmission and LCD Display
Circuit Documentation
Summary of the Circuit
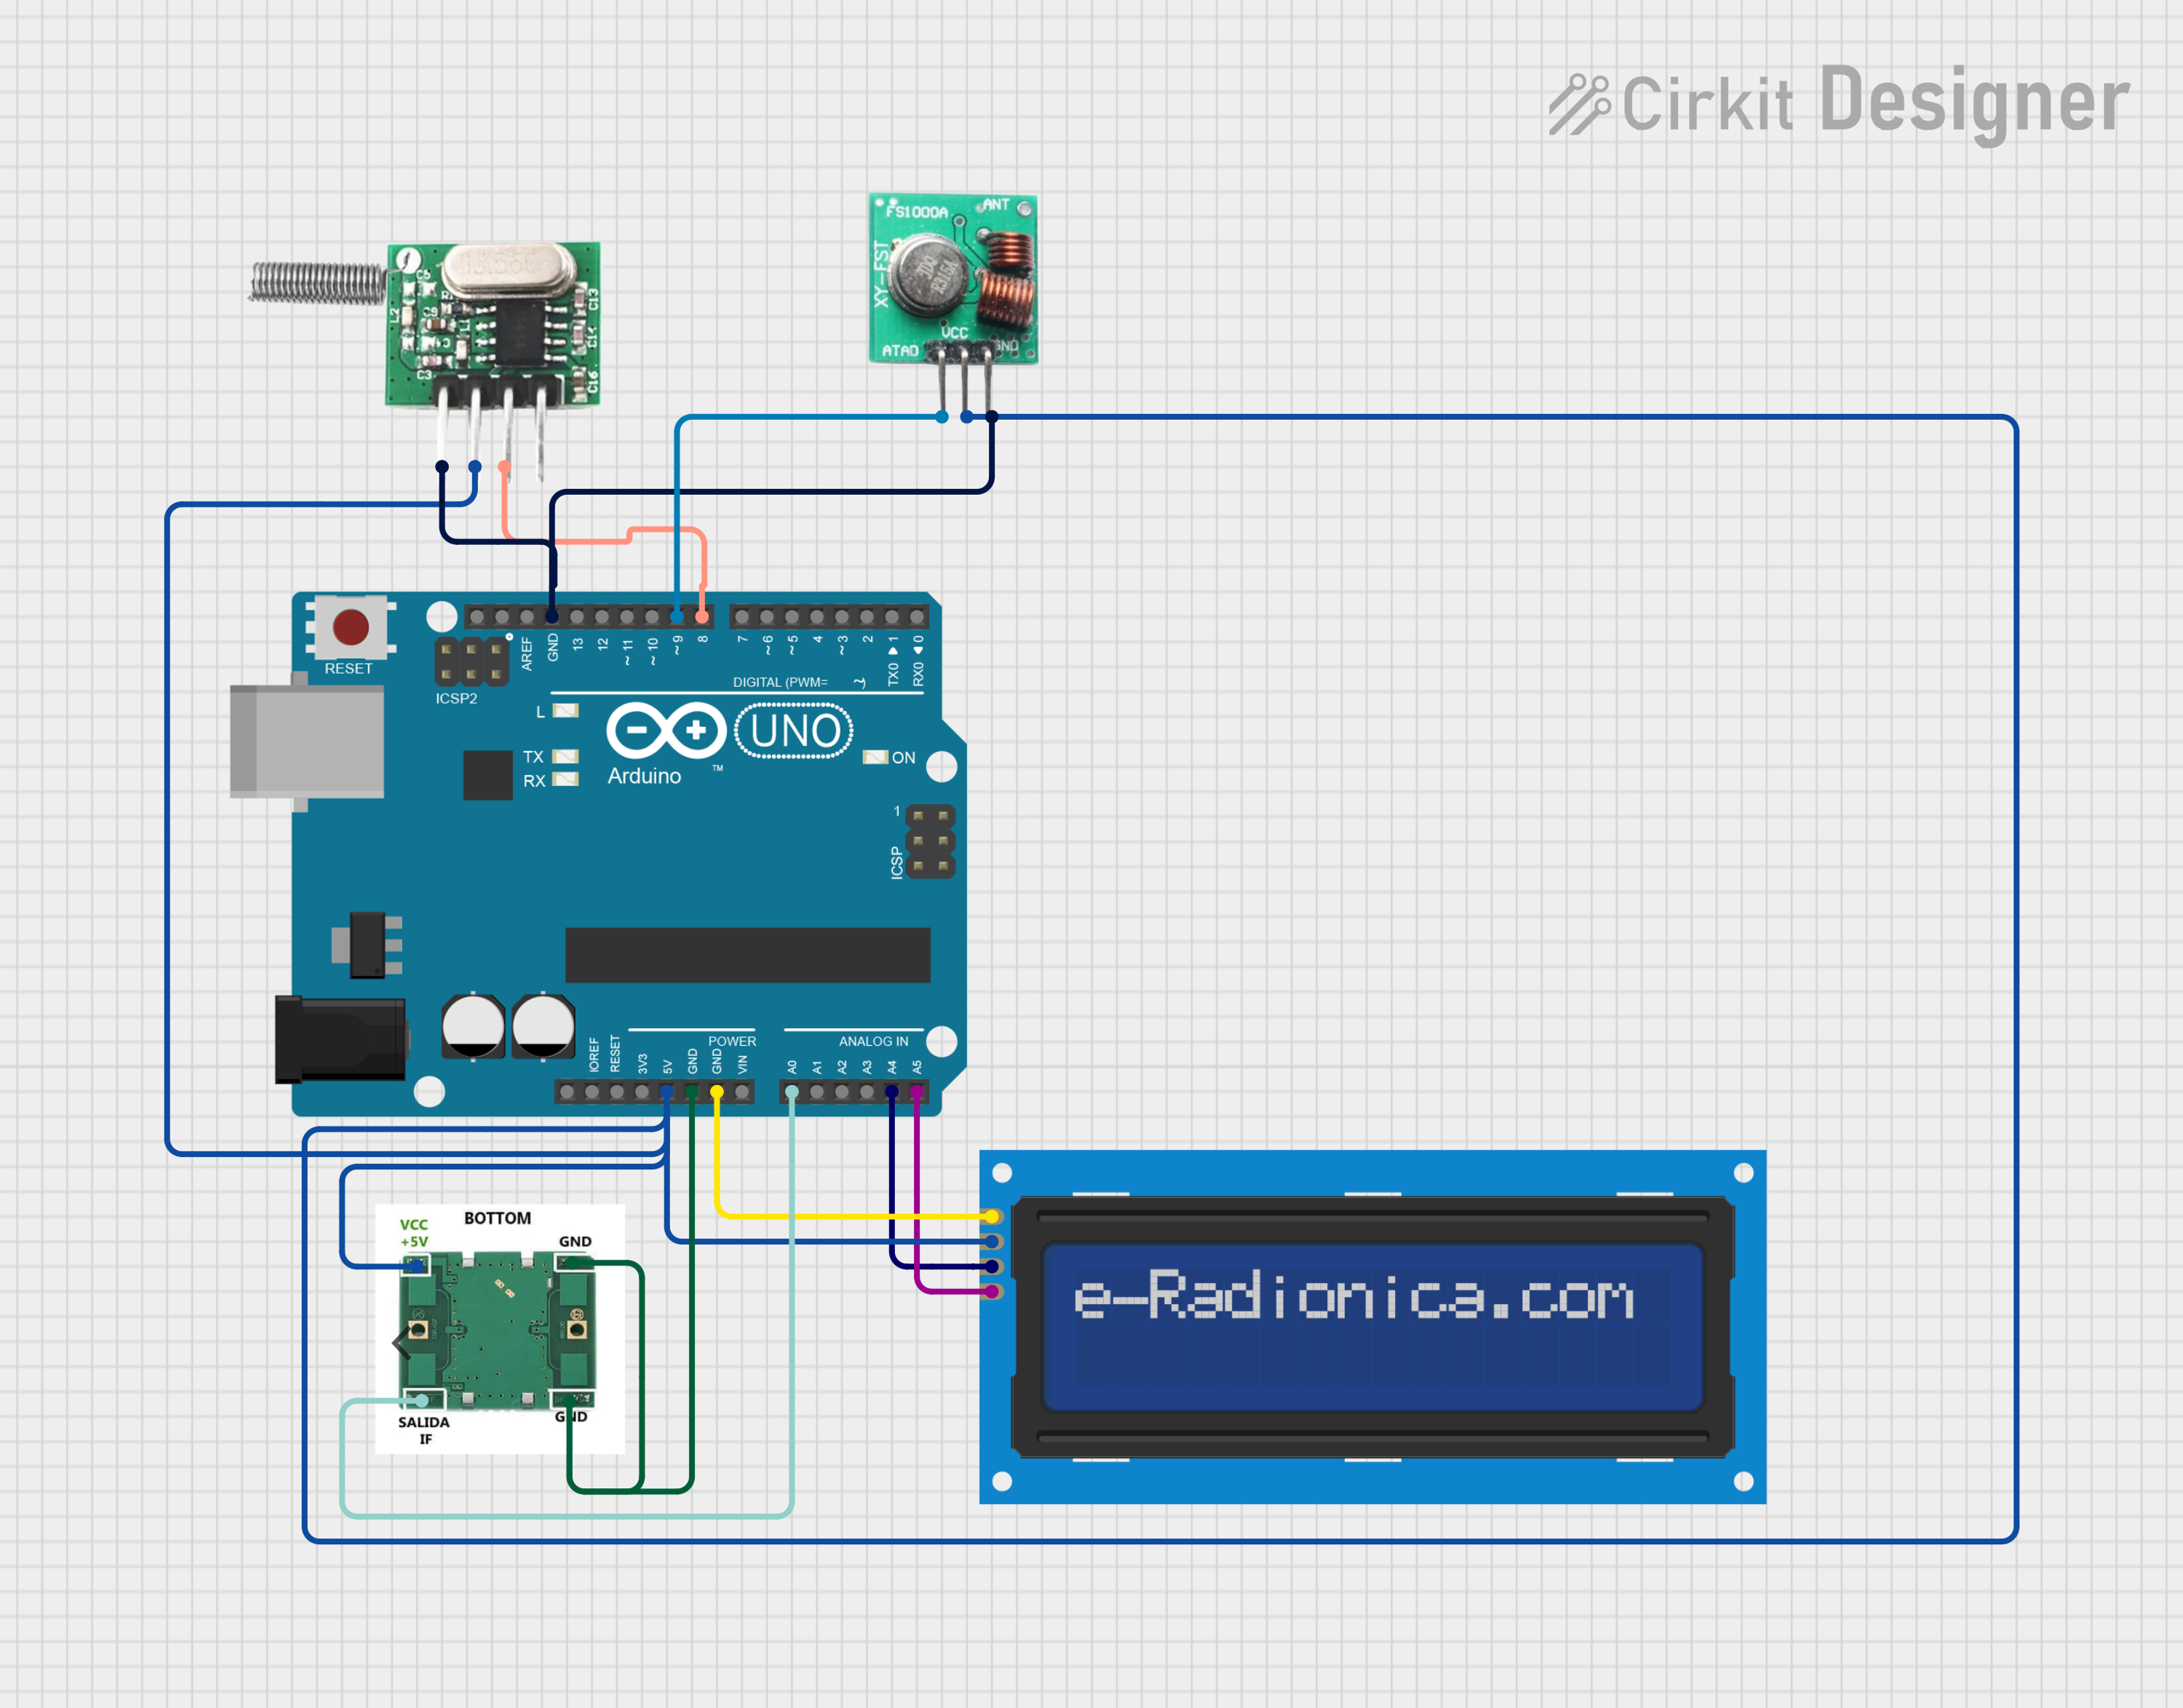
This circuit is designed to interface an RF 433 MHz Transmitter with an Arduino UNO microcontroller, along with a Transmitter RF Module, an LCD screen (16x2 with I2C interface), and a doppler radar sensor. The Arduino UNO serves as the central processing unit, controlling the RF transmitter and the doppler radar sensor, as well as displaying information on the LCD screen. The RF modules are used to transmit data wirelessly, and the doppler radar is used to detect motion or speed of objects. The LCD screen displays relevant information or readings from the radar sensor.
Component List
RF 433 MHz Transmitter
- Pins: -ve, Data, +ve
- Description: A wireless transmitter module operating at 433 MHz frequency.
Arduino UNO
- Pins: UNUSED, IOREF, Reset, 3.3V, 5V, GND, Vin, A0-A5, SCL, SDA, AREF, D0-D13
- Description: A microcontroller board based on the ATmega328P, with digital and analog I/O pins.
LCD screen 16x2 I2C
- Pins: SCL, SDA, VCC, GND
- Description: An alphanumeric liquid crystal display with an I2C interface for displaying text.
Doppler Radar
- Pins: +5V, GND, IF
- Description: A sensor module that detects motion based on the Doppler effect.
Transmitter RF Module
- Pins: DATA, VCC, GND
- Description: An RF module used for wireless data transmission.
Wiring Details
RF 433 MHz Transmitter
- -ve: Connected to GND
- Data: Connected to Arduino UNO pin D8
- +ve: Connected to 5V
Arduino UNO
- GND: Common ground for RF 433 MHz Transmitter, Transmitter RF Module, LCD screen, and Doppler Radar
- 5V: Power supply for RF 433 MHz Transmitter, Transmitter RF Module, LCD screen, and Doppler Radar
- D8: Data input for RF 433 MHz Transmitter
- D9: Data input for Transmitter RF Module
- A0: Analog input connected to IF pin of Doppler Radar
- A4 (SDA): I2C data line for LCD screen
- A5 (SCL): I2C clock line for LCD screen
LCD screen 16x2 I2C
- SCL: Connected to Arduino UNO pin A5
- SDA: Connected to Arduino UNO pin A4
- VCC: Connected to 5V
- GND: Connected to GND
Doppler Radar
- +5V: Connected to 5V
- GND: Connected to GND
- IF: Connected to Arduino UNO pin A0
Transmitter RF Module
- DATA: Connected to Arduino UNO pin D9
- VCC: Connected to 5V
- GND: Connected to GND
Documented Code
Arduino UNO Code (sketch.ino)
void setup() {
  // put your setup code here, to run once:

}

void loop() {
  // put your main code here, to run repeatedly:

}
Additional Notes
- The provided code is a template and does not contain any functional implementation. It needs to be populated with the logic for interfacing with the RF modules, reading data from the doppler radar, and displaying information on the LCD screen.
- The
setup()function is intended for initialization routines, while theloop()function will contain the main program logic that repeats indefinitely. - The code for the Arduino UNO is stored in a file named
sketch.ino. Additional documentation or comments can be added within the code to describe the functionality in detail.