Cirkit Designer
Your all-in-one circuit design IDE
Home /
Project Documentation
Arduino UNO Traffic Light Controller
Circuit Documentation
Summary
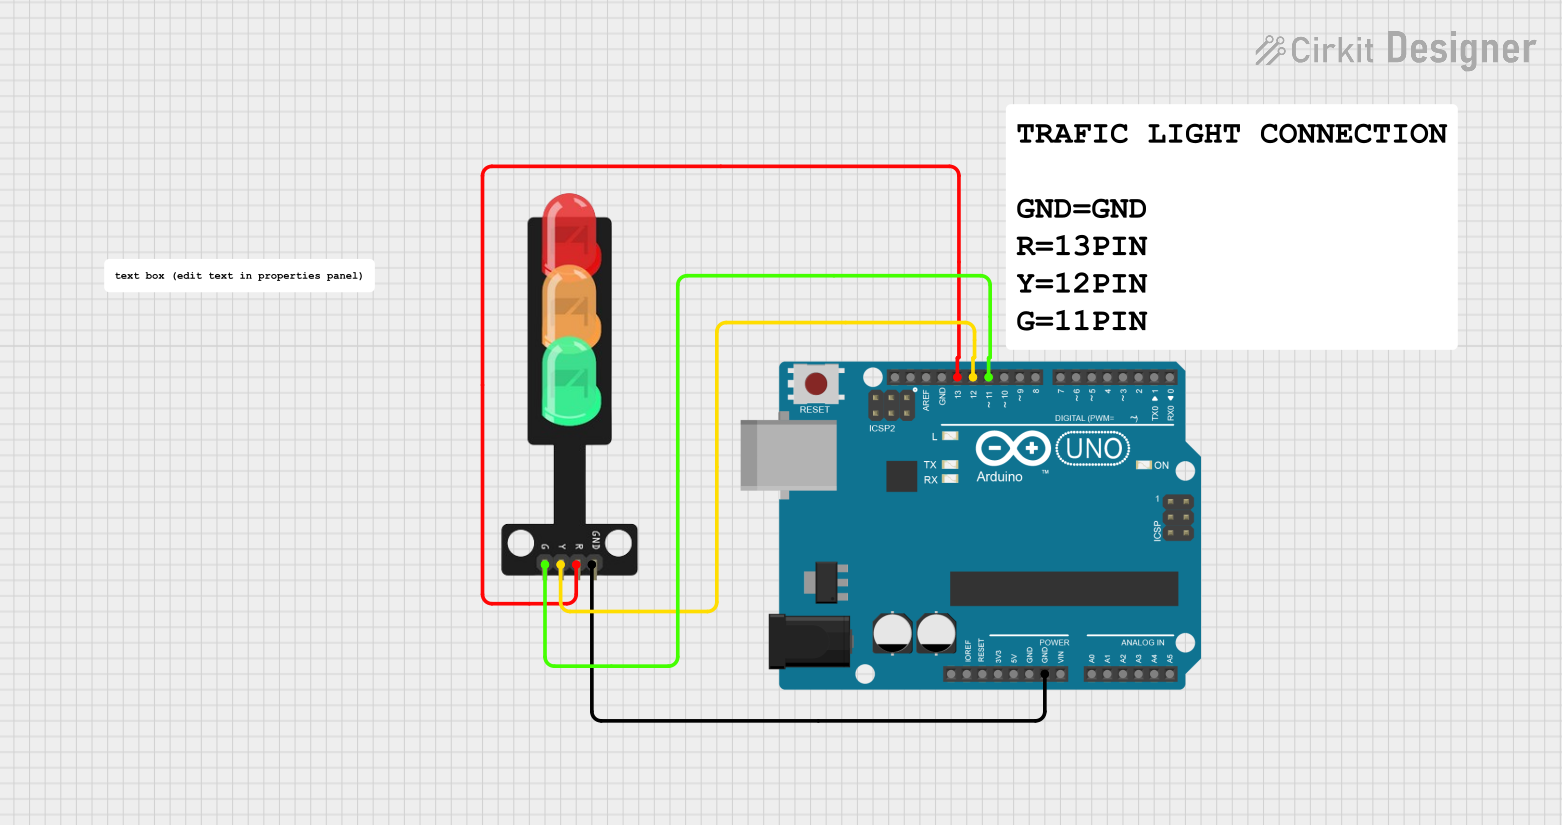
This document provides a detailed overview of a simple traffic light control circuit using an Arduino UNO microcontroller. The circuit includes an Arduino UNO and a Traffic Light module with three LEDs (Red, Yellow, Green). The Arduino UNO controls the LEDs based on the provided code.
Component List
Arduino UNO
- Description: A microcontroller board based on the ATmega328P.
- Pins: UNUSED, IOREF, Reset, 3.3V, 5V, GND, Vin, A0, A1, A2, A3, A4, A5, SCL, SDA, AREF, D13, D12, D11, D10, D9, D8, D7, D6, D5, D4, D3, D2, D1, D0
Traffic Light
- Description: A module with three LEDs (Red, Yellow, Green) and a ground pin.
- Pins: Green, Yellow, Red, GND
Comment
- Description: Placeholder for comments in the circuit.
- Pins: None
Wiring Details
Arduino UNO
- GND: Connected to Traffic Light GND
- D13: Connected to Traffic Light Red
- D12: Connected to Traffic Light Yellow
- D11: Connected to Traffic Light Green
Traffic Light
- GND: Connected to Arduino UNO GND
- Red: Connected to Arduino UNO D13
- Yellow: Connected to Arduino UNO D12
- Green: Connected to Arduino UNO D11
Code Documentation
Arduino UNO Code
void setup() {
  // put your setup code here, to run once:

}

void loop() {
  // put your main code here, to run repeatedly:

}
This code is a basic template for the Arduino UNO. The setup() function is used to initialize any settings, and the loop() function contains the main code that runs repeatedly. In this template, no specific functionality is implemented yet.