
Arduino UNO Controlled LED with Potentiometer Brightness Adjustment
View and Edit Project In Cirkit Designer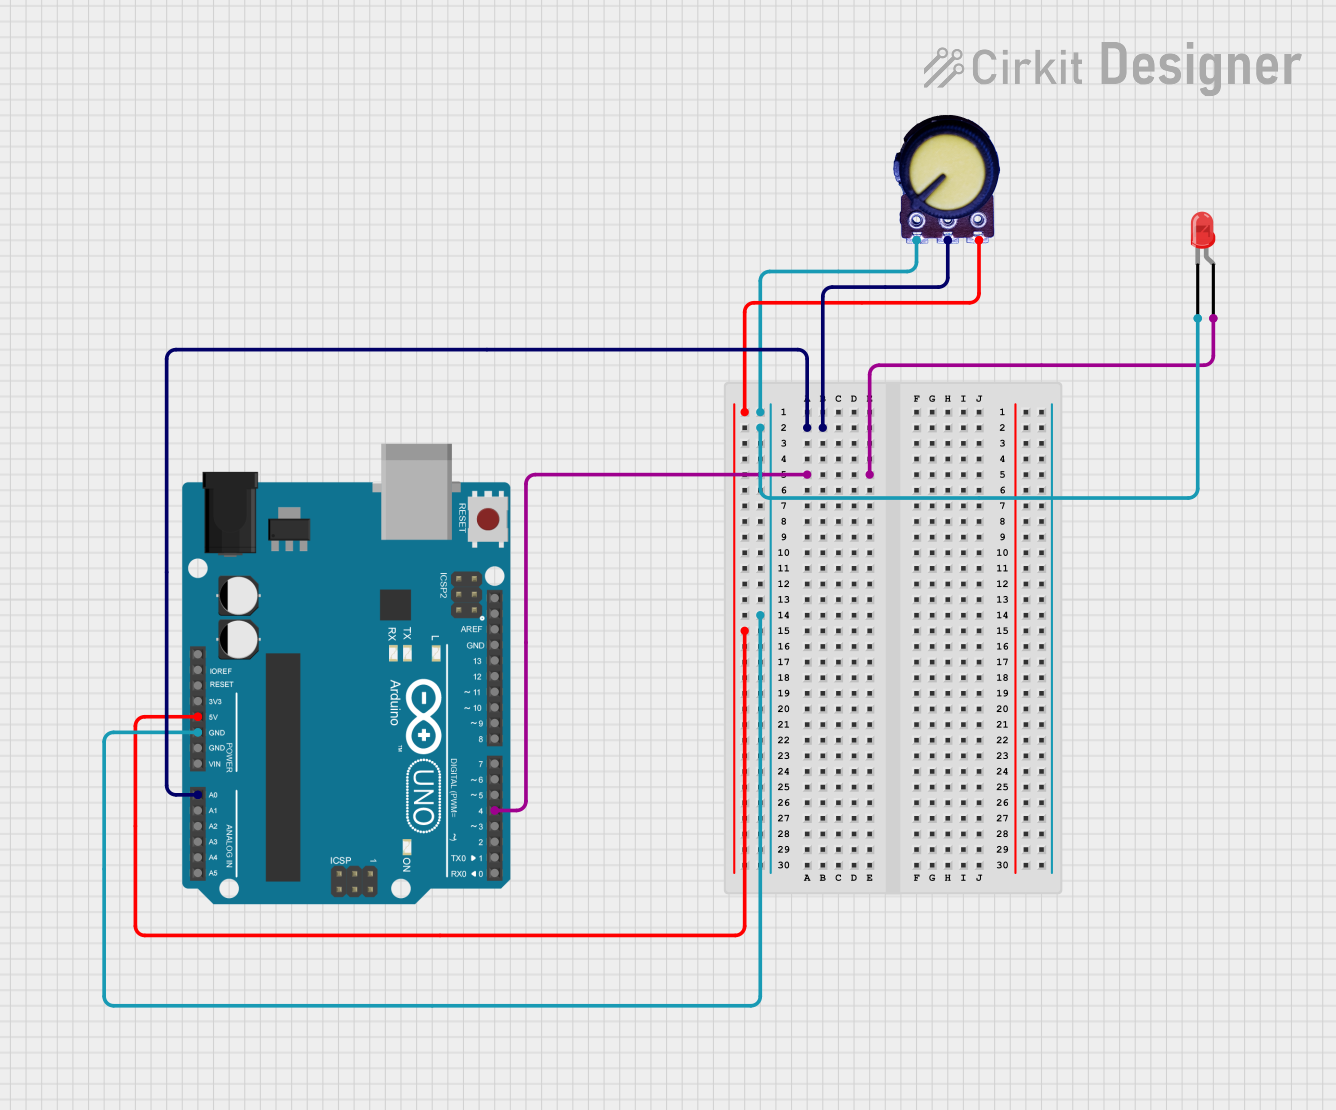
Circuit Documentation
Summary
This circuit consists of an Arduino UNO microcontroller, a red LED, and a potentiometer. The Arduino UNO controls the LED and reads the potentiometer's output. The LED is connected to a digital pin on the Arduino, and the potentiometer is connected to an analog input pin.
Component List
LED: Two Pin (red)
- Description: A red LED with two pins: cathode and anode.
- Pins: cathode, anode
Arduino UNO
- Description: A microcontroller board based on the ATmega328P.
- Pins: UNUSED, IOREF, Reset, 3.3V, 5V, GND, Vin, A0, A1, A2, A3, A4, A5, SCL, SDA, AREF, D13, D12, D11, D10, D9, D8, D7, D6, D5, D4, D3, D2, D1, D0
Potentiometer
- Description: A three-terminal resistor with a sliding or rotating contact that forms an adjustable voltage divider.
- Pins: GND, Output, VCC
Wiring Details
LED: Two Pin (red)
cathode is connected to:
- Arduino UNO: GND
- Potentiometer: GND
anode is connected to:
- Arduino UNO: D4
Arduino UNO
GND is connected to:
- LED: Two Pin (red): cathode
- Potentiometer: GND
D4 is connected to:
- LED: Two Pin (red): anode
5V is connected to:
- Potentiometer: VCC
A0 is connected to:
- Potentiometer: Output
Potentiometer
GND is connected to:
- Arduino UNO: GND
- LED: Two Pin (red): cathode
VCC is connected to:
- Arduino UNO: 5V
Output is connected to:
- Arduino UNO: A0
Code Documentation
Arduino UNO Code
sketch.ino
void setup() {
  // put your setup code here, to run once:

}

void loop() {
  // put your main code here, to run repeatedly:

}
documentation.txt