
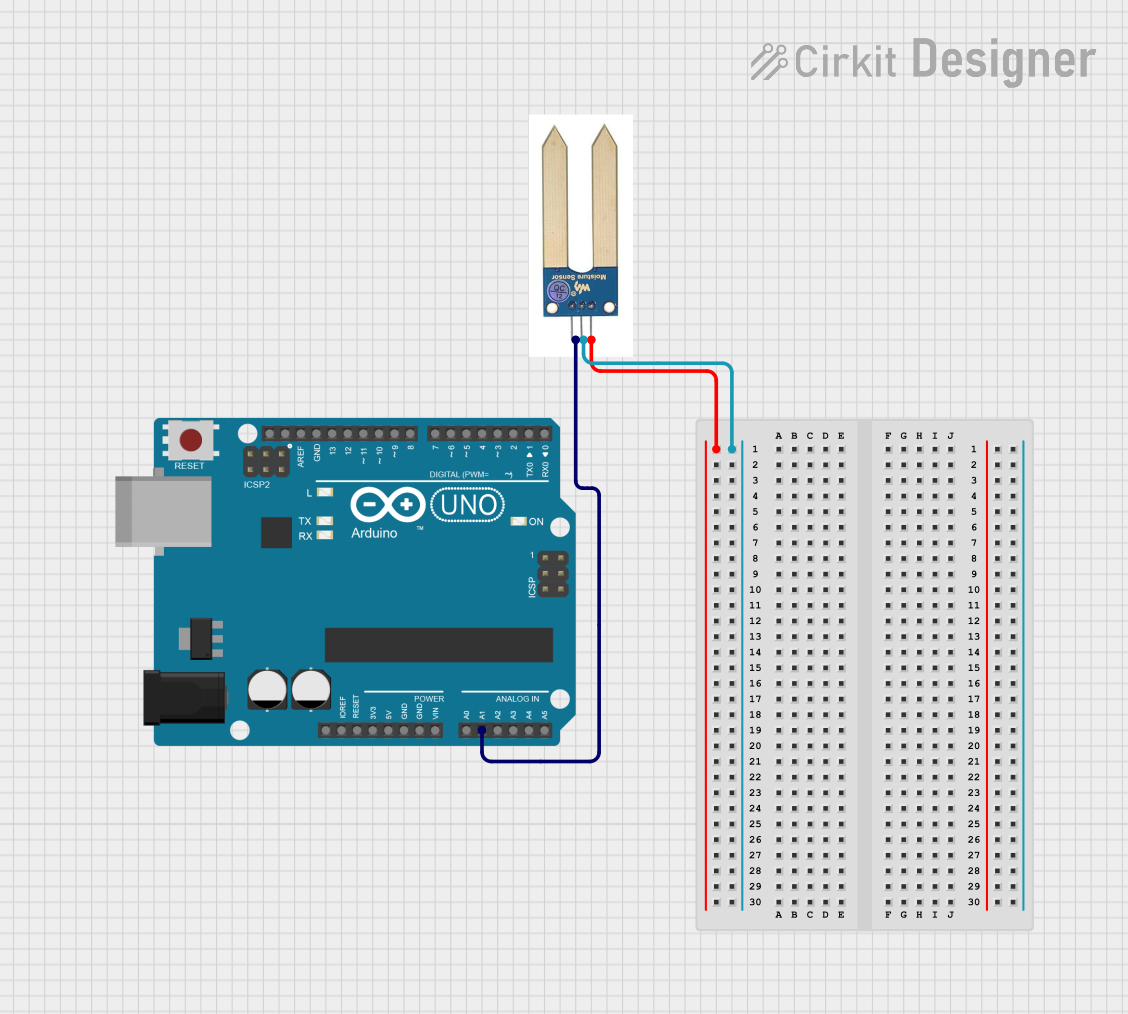
Circuit Documentation
Summary
This circuit consists of an Arduino UNO microcontroller and a YL-69 soil moisture sensor. The YL-69 sensor's analog output is connected to one of the analog input pins on the Arduino UNO. The Arduino UNO reads the sensor data and can be programmed to perform various actions based on the moisture level detected by the YL-69 sensor.
Component List
Arduino UNO
- Description: A microcontroller board based on the ATmega328P.
- Pins: UNUSED, IOREF, Reset, 3.3V, 5V, GND, Vin, A0, A1, A2, A3, A4, A5, SCL, SDA, AREF, D13, D12, D11, D10, D9, D8, D7, D6, D5, D4, D3, D2, D1, D0
- Purpose in Circuit: Acts as the main controller, reading data from the YL-69 sensor and executing programmed actions.
YL-69
- Description: A soil moisture sensor used to measure the moisture level in the soil.
- Pins: vcc, gnd, AOUT
- Purpose in Circuit: Provides analog output corresponding to the moisture level in the soil.
Wiring Details
Arduino UNO
- A1: Connected to AOUT of YL-69
YL-69
- vcc: Not connected
- gnd: Not connected
- AOUT: Connected to A1 of Arduino UNO
Code Documentation
Arduino UNO Code
sketch.ino
void setup() {
  // put your setup code here, to run once:

}

void loop() {
  // put your main code here, to run repeatedly:

}
documentation.txt
This code initializes the Arduino UNO and sets up the main loop where the primary logic of the program will be executed. Currently, the setup and loop functions are empty and can be filled with the desired logic to read from the YL-69 sensor and perform actions based on the moisture level.