
Arduino UNO Based Automated Solar-Powered Irrigation System with Soil Moisture Sensing
View and Edit Project In Cirkit Designer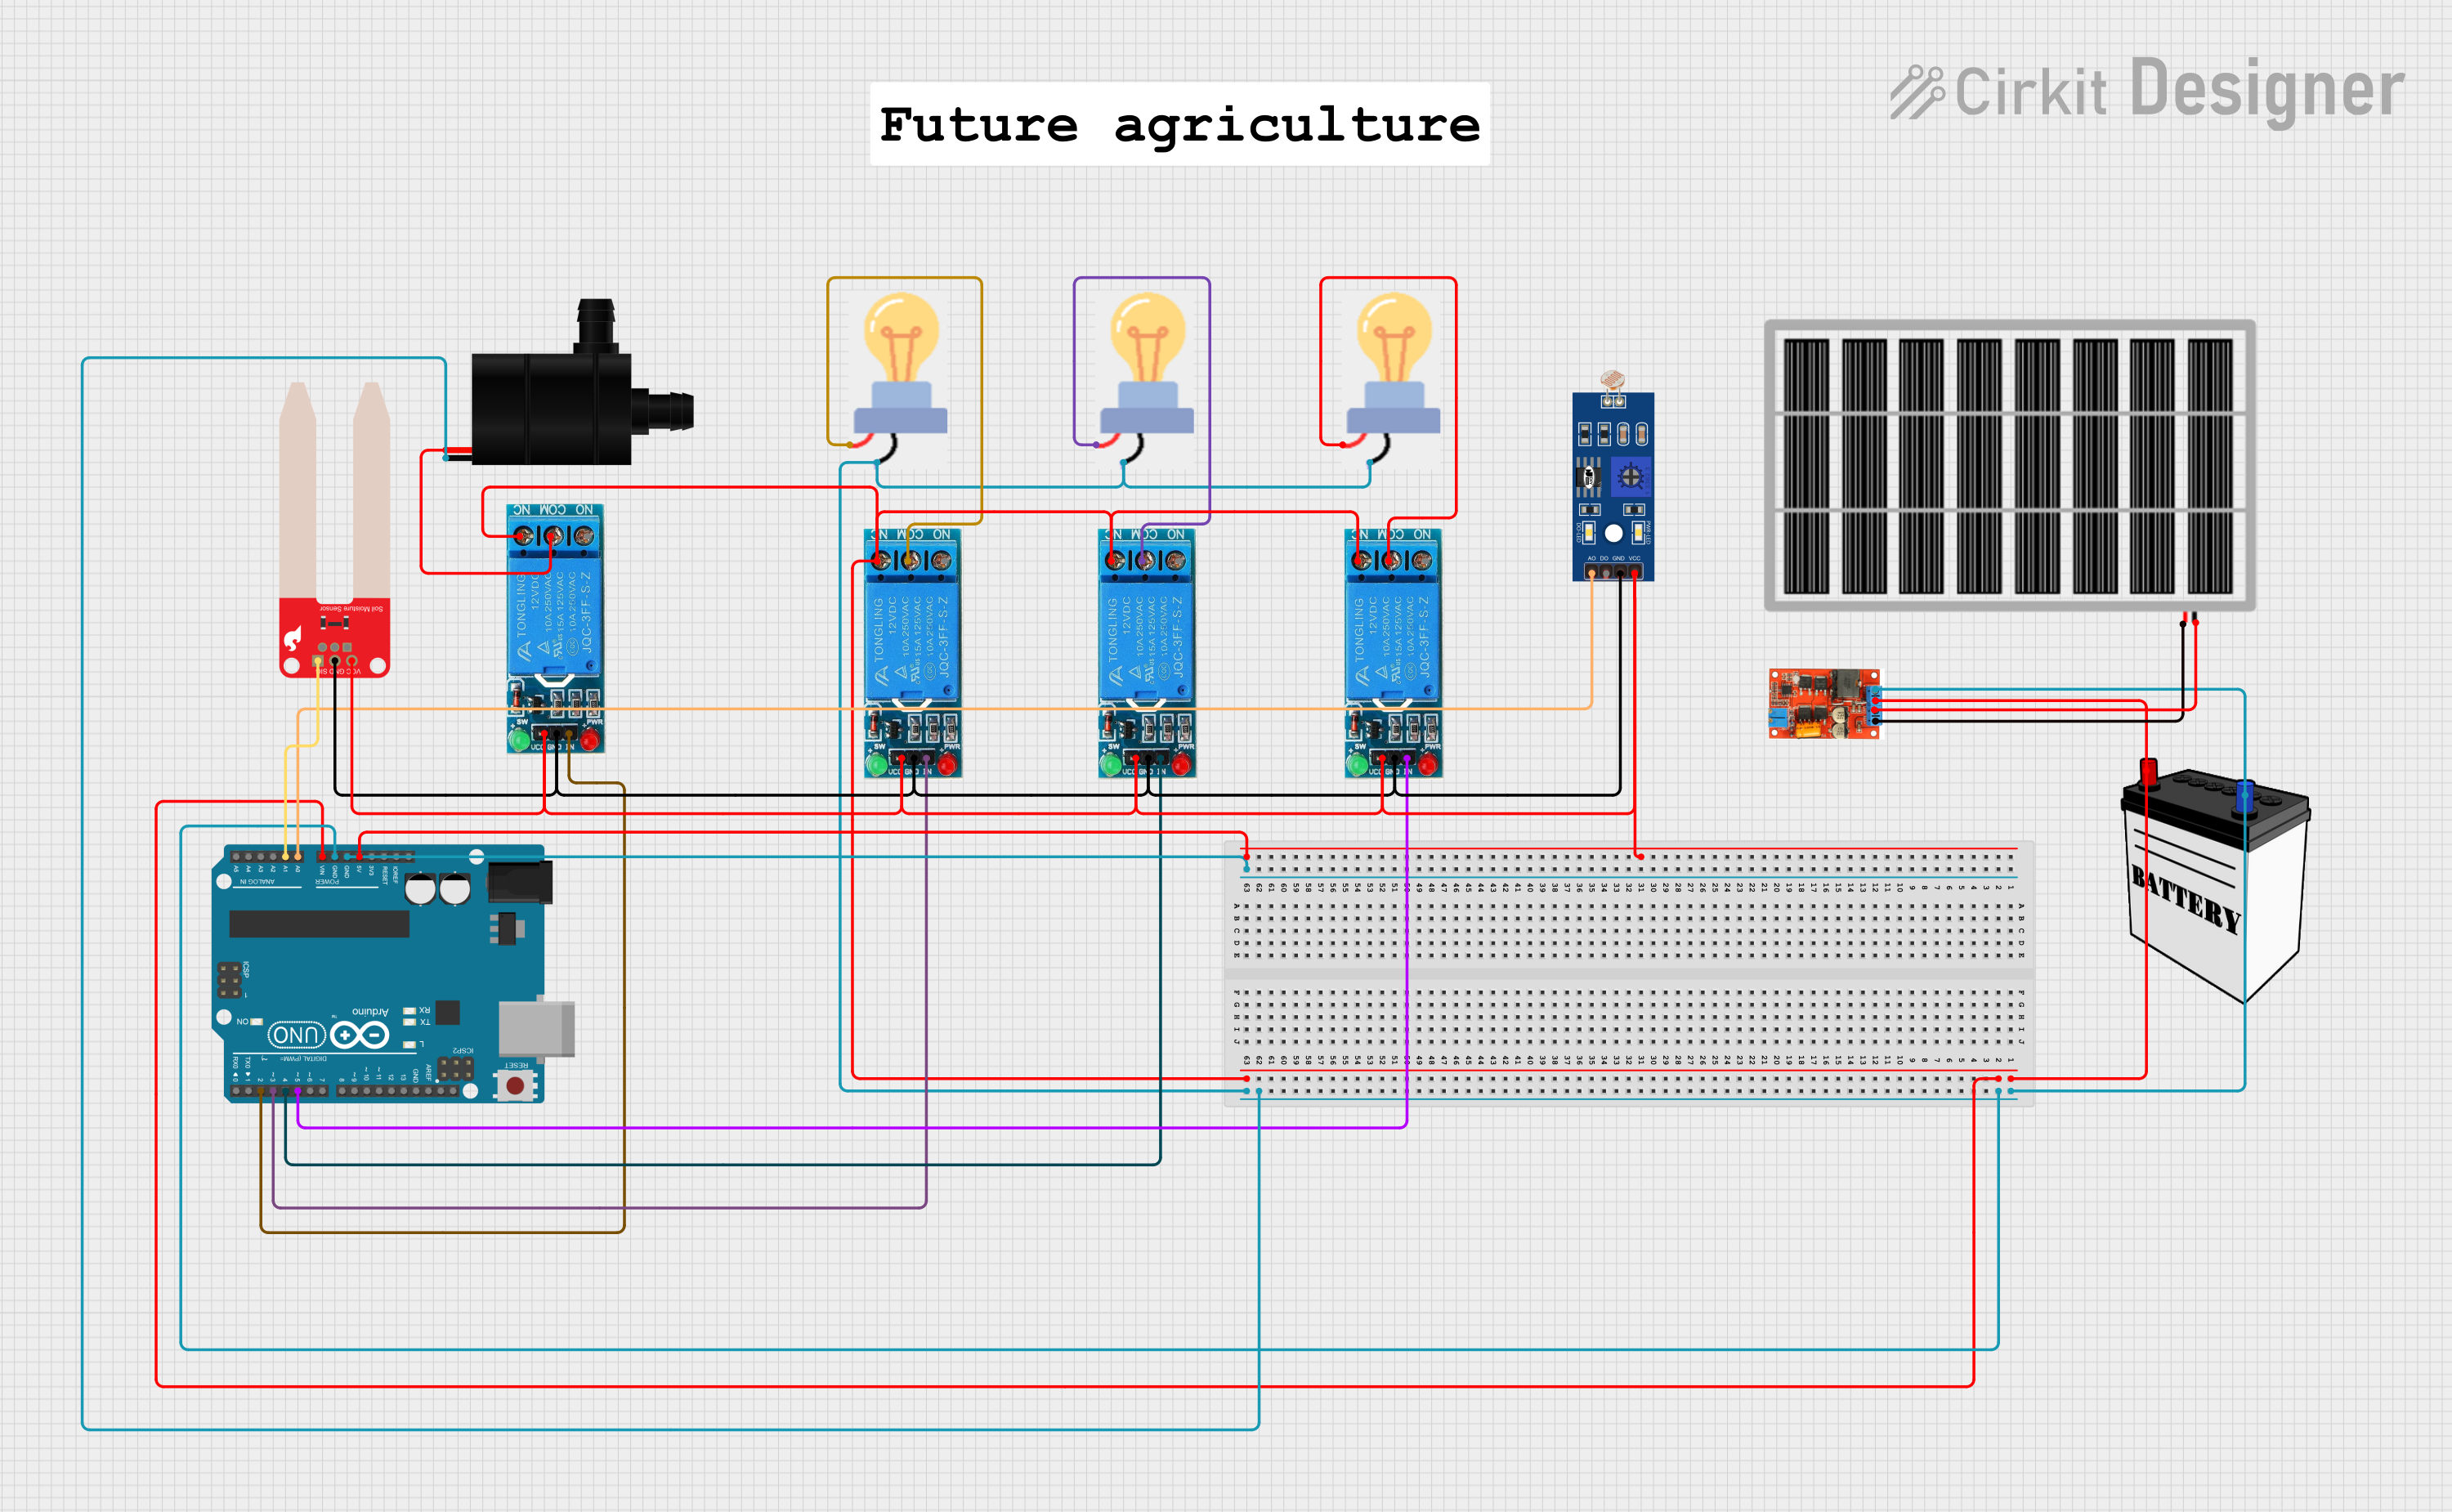
Circuit Documentation
Summary
This circuit is designed to interface various components with an Arduino UNO microcontroller. It includes a solar panel with a regulator for power management, an LDR (Light Dependent Resistor) for light sensing, a SparkFun Soil Moisture Sensor for detecting soil moisture levels, multiple 12V single-channel relays for controlling power to bulbs and a water pump, and a 12V battery as a power source. The circuit appears to be intended for an automated system that could be used for applications such as a smart garden where lighting and watering are controlled based on environmental conditions.
Component List
Arduino UNO
- Microcontroller board based on the ATmega328P
- It has 14 digital input/output pins, 6 analog inputs, a 16 MHz quartz crystal, a USB connection, a power jack, an ICSP header, and a reset button.
Solar Panel
- A photovoltaic panel designed to convert sunlight into electrical power.
LDR (Light Dependent Resistor)
- A sensor that changes its resistance based on the light intensity.
Bulb
- An electric light source.
Water Pump
- A device used to move water through a system.
SparkFun Soil Moisture Sensor
- A sensor used to measure the volumetric content of water in the soil.
12V Battery
- A power source that provides a nominal voltage of 12 volts.
Solar Panel Regulator 5A MPPT Controller Battery Charging 9V/12V/24V/Auto Switch
- A charge controller that optimizes the power output from a solar panel to charge a battery.
12V SINGLE CHANNEL RELAY
- An electrically operated switch that allows you to control a high power circuit with a low power signal.
Wiring Details
Arduino UNO
5Vconnected to LDR VCC, Soil Moisture Sensor VCC, and all 12V Single Channel Relay VCC pins.GNDconnected to the common ground net.Vinconnected to the 12V Battery VCC through the Solar Panel Regulator.A0connected to LDR A0.A1connected to Soil Moisture Sensor SIG.D2toD5connected to the IN pins of the 12V Single Channel Relays.
Solar Panel
gndconnected to Solar Panel Regulator Ground.vccconnected to Solar Panel Regulator +Vin.
LDR
VCCconnected to Arduino UNO 5V.A0connected to Arduino UNO A0.GNDconnected to the common ground net.
Bulb
GNDconnected to the common ground net.powerconnected to the COM pin of the corresponding 12V Single Channel Relay.
Water Pump
VCCconnected to the COM pin of the corresponding 12V Single Channel Relay.GNDconnected to the common ground net.
SparkFun Soil Moisture Sensor
VCCconnected to Arduino UNO 5V.SIGconnected to Arduino UNO A1.GNDconnected to the common ground net.
12V Battery
VCCconnected to Arduino UNO Vin and Solar Panel Regulator battery(+).GNDconnected to the common ground net.
Solar Panel Regulator 5A MPPT Controller Battery Charging 9V/12V/24V/Auto Switch
+Vinconnected to Solar Panel vcc.Groundconnected to Solar Panel gnd.battery (-)connected to the common ground net.battery(+)connected to 12V Battery VCC.
12V SINGLE CHANNEL RELAY
VCCconnected to Arduino UNO 5V.GNDconnected to the common ground net.INconnected to the corresponding Arduino UNO digital pins (D2 to D5).COMconnected to the power input of the corresponding device (bulb or water pump).NCconnected to the 12V Battery VCC.
Documented Code
void setup() {
  // put your setup code here, to run once:

}

void loop() {
  // put your main code here, to run repeatedly:

}
The provided code is a template with empty setup() and loop() functions, which are the entry points for Arduino sketches. The setup() function is called once when the sketch starts and is used for initializing settings, while the loop() function runs repeatedly, allowing the microcontroller to perform operations based on the logic defined within it. Since the actual logic is not provided, it is assumed that the user will populate these functions with code to control the relays based on sensor inputs from the LDR and the Soil Moisture Sensor.