Arduino UNO-Based Interactive Touch and Distance Sensing System with LED Indicators and Servo Control
Circuit Documentation
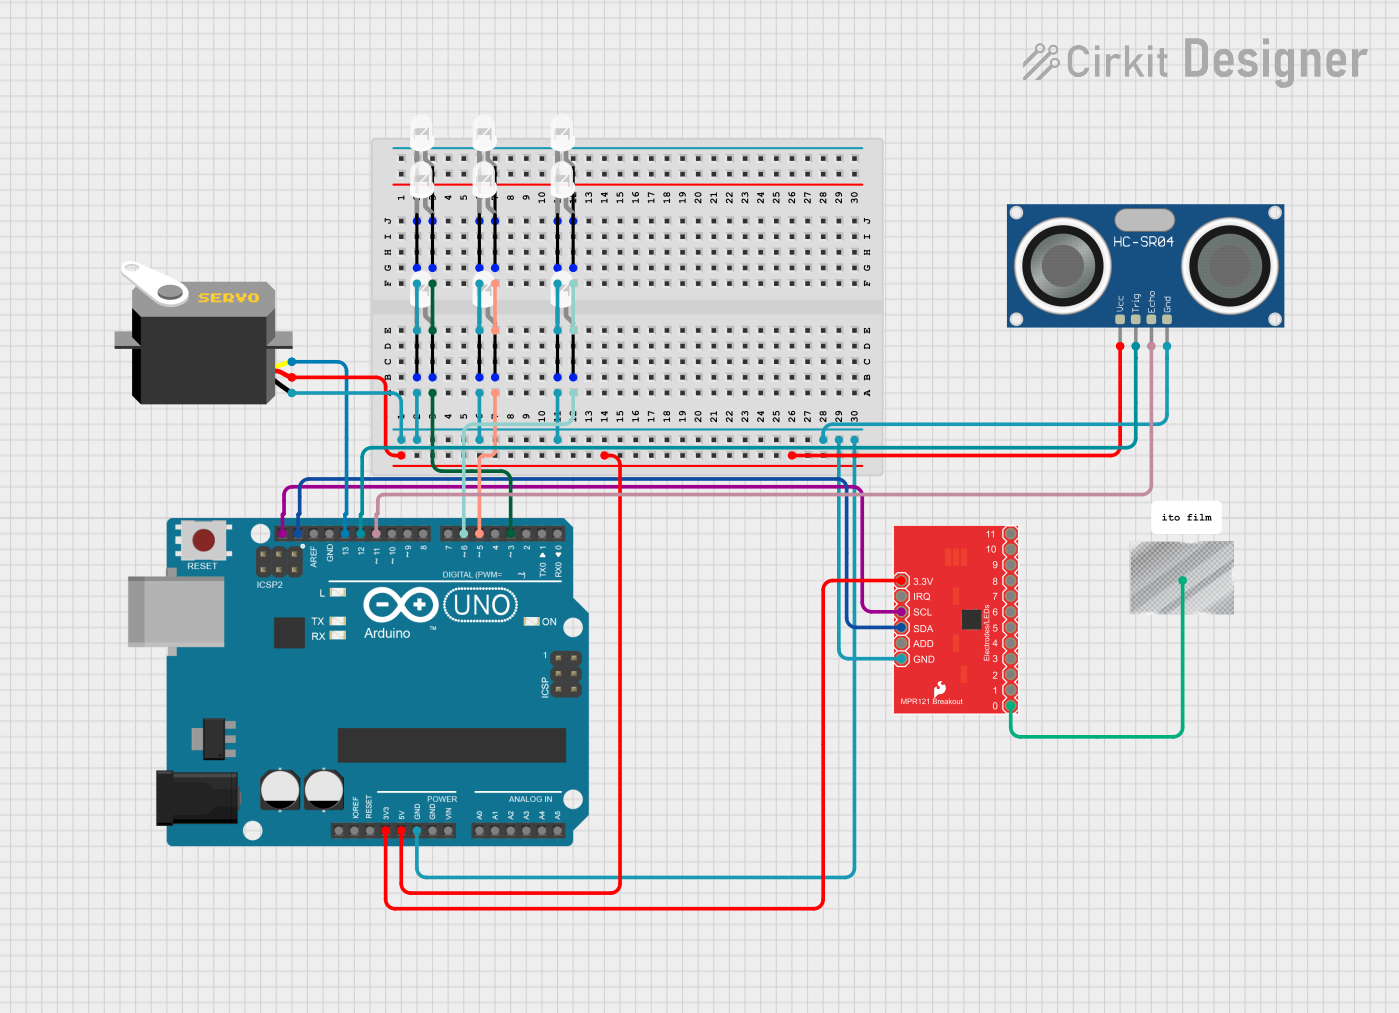
Summary
This circuit involves an Arduino UNO microcontroller interfacing with several components including a Servo motor, an HC-SR04 Ultrasonic Sensor, an MPR121 Capacitive Touch Sensor Breakout Board, and multiple white LEDs. The circuit is designed to control the Servo motor, read distance measurements from the Ultrasonic Sensor, detect touch inputs from the Capacitive Touch Sensor, and control the LEDs.
Component List
Arduino UNO
- Description: A microcontroller board based on the ATmega328P.
- Pins: UNUSED, IOREF, Reset, 3.3V, 5V, GND, Vin, A0, A1, A2, A3, A4, A5, SCL, SDA, AREF, D13, D12, D11, D10, D9, D8, D7, D6, D5, D4, D3, D2, D1, D0
Servo
- Description: A standard servo motor.
- Pins: gnd, vcc, pulse
MPR121 Capacitive Touch Sensor Breakout Board
- Description: A capacitive touch sensor breakout board.
- Pins: ADD, IRQ, 6, GND, 10, 2, SDA, 8, 4, 0, SCL, 11, 9, 7, 5, 3, 1, 3.3V
LED: Two Pin (white)
- Description: A white LED with two pins.
- Pins: cathode, anode
HC-SR04 Ultrasonic Sensor
- Description: An ultrasonic distance sensor.
- Pins: VCC, TRIG, ECHO, GND
Ito flim
- Description: Conductive film used for touch sensing.
- Pins: None
Comment
- Description: Placeholder for comments.
- Pins: None
Wiring Details
Arduino UNO
5V connected to:
- Servo (vcc)
- HC-SR04 Ultrasonic Sensor (VCC)
GND connected to:
- Servo (gnd)
- HC-SR04 Ultrasonic Sensor (GND)
- MPR121 Capacitive Touch Sensor Breakout Board (GND)
- LED: Two Pin (white) (cathode) [multiple instances]
D3 connected to:
- LED: Two Pin (white) (anode) [multiple instances]
D5 connected to:
- LED: Two Pin (white) (anode) [multiple instances]
D6 connected to:
- LED: Two Pin (white) (anode) [multiple instances]
3.3V connected to:
- MPR121 Capacitive Touch Sensor Breakout Board (3.3V)
SCL connected to:
- MPR121 Capacitive Touch Sensor Breakout Board (SCL)
SDA connected to:
- MPR121 Capacitive Touch Sensor Breakout Board (SDA)
D13 connected to:
- Servo (pulse)
D12 connected to:
- HC-SR04 Ultrasonic Sensor (TRIG)
D11 connected to:
- HC-SR04 Ultrasonic Sensor (ECHO)
Servo
vcc connected to:
- Arduino UNO (5V)
gnd connected to:
- Arduino UNO (GND)
pulse connected to:
- Arduino UNO (D13)
MPR121 Capacitive Touch Sensor Breakout Board
3.3V connected to:
- Arduino UNO (3.3V)
GND connected to:
- Arduino UNO (GND)
SCL connected to:
- Arduino UNO (SCL)
SDA connected to:
- Arduino UNO (SDA)
0 connected to:
- Ito flim
LED: Two Pin (white)
cathode connected to:
- Arduino UNO (GND) [multiple instances]
anode connected to:
- Arduino UNO (D3) [multiple instances]
- Arduino UNO (D5) [multiple instances]
- Arduino UNO (D6) [multiple instances]
HC-SR04 Ultrasonic Sensor
VCC connected to:
- Arduino UNO (5V)
GND connected to:
- Arduino UNO (GND)
TRIG connected to:
- Arduino UNO (D12)
ECHO connected to:
- Arduino UNO (D11)
Ito flim
- Connected to:
- MPR121 Capacitive Touch Sensor Breakout Board (0)
Documented Code
Arduino UNO Code (sketch.ino)
void setup() {
  // put your setup code here, to run once:

}

void loop() {
  // put your main code here, to run repeatedly:

}
Documentation (documentation.txt)
This documentation provides a comprehensive overview of the circuit, including a summary, detailed component list, wiring details, and the code used in the Arduino UNO microcontroller.