
Circuit Documentation
Summary
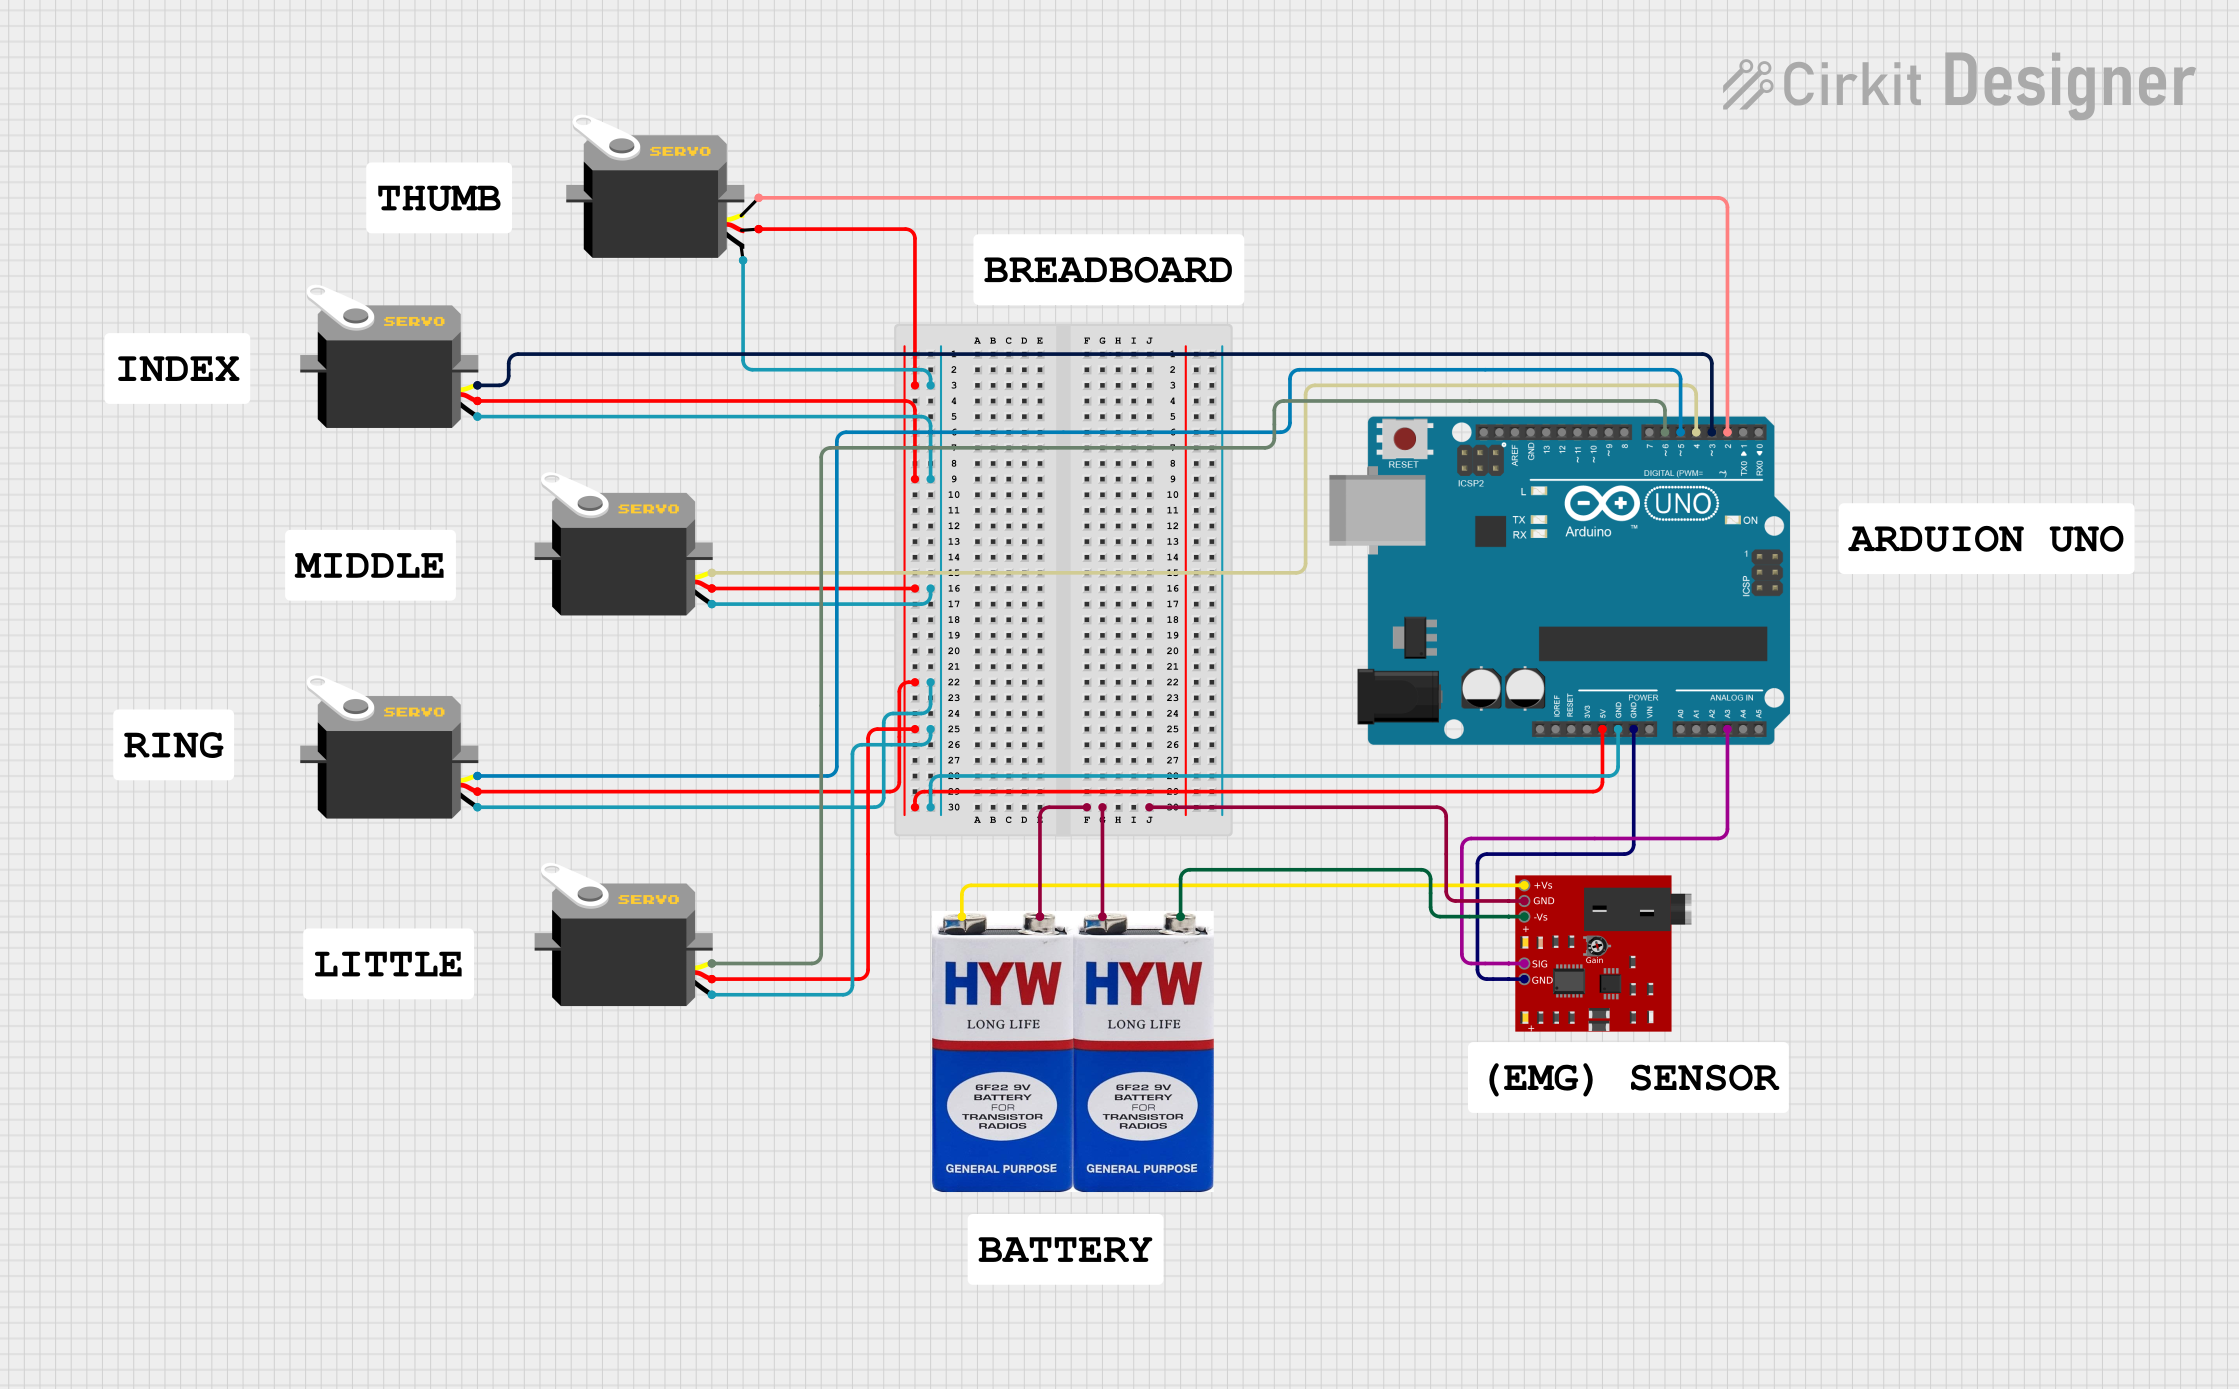
This circuit is designed to interface an Arduino UNO with multiple servo motors and an Advancer Muscle Sensor V3. The Arduino UNO acts as the central controller, providing power and control signals to the servo motors, and reading the muscle sensor's output. The servos are powered by the Arduino's 5V output, and their control pulses are generated by the Arduino's digital pins. The muscle sensor is powered by a separate 9V battery and its signal is read by one of the Arduino's analog pins.
Component List
Arduino UNO
- Microcontroller board based on the ATmega328P
- Provides I/O pins for interfacing with various components
- Can be powered via USB or external power sources
Servo Motors (x5)
- Actuators that can be precisely controlled in terms of angle, velocity, and acceleration
- Each servo has three connections: ground (gnd), power (vcc), and control signal (pulse)
Advancer Muscle Sensor V3
- A sensor that measures muscle activity
- Outputs an analog signal corresponding to the muscle's electrical potential
- Requires a power supply and has a ground and signal output
9V Batteries (x2)
- Provide power to the circuit
- Each battery has a positive (+) and negative (-) terminal
Wiring Details
Arduino UNO
- 5V pin provides power to all servo motors' vcc pins
- GND pin is connected to all servo motors' gnd pins and the muscle sensor's GND pin
- A3 pin is connected to the muscle sensor's SIG pin to read the sensor's output
- D2 - D6 pins are connected to the pulse pins of the servo motors for control signals
Servo Motors
- vcc pins connected to Arduino UNO's 5V pin
- gnd pins connected to Arduino UNO's GND pin
- pulse pins connected to Arduino UNO's digital pins D2 - D6 for control
Advancer Muscle Sensor V3
- +Vs pin connected to the positive terminal of one 9V battery
- -Vs pin connected to the negative terminal of the other 9V battery
- GND pin connected to Arduino UNO's GND pin
- SIG pin connected to Arduino UNO's A3 pin
9V Batteries
- One battery's positive terminal connected to the muscle sensor's +Vs pin
- The other battery's negative terminal connected to the muscle sensor's -Vs pin
Documented Code
Arduino UNO - sketch.ino
void setup() {
  // put your setup code here, to run once:

}

void loop() {
  // put your main code here, to run repeatedly:

}
Arduino UNO - documentation.txt
(No additional documentation provided)
This document provides an overview of the circuit's components, their wiring, and the initial code structure for the Arduino UNO. Further development of the code is required to control the servo motors and read the muscle sensor's output.