
Arduino UNO-Based Smart IR Sensor System with LCD Display and Battery Power
View and Edit Project In Cirkit Designer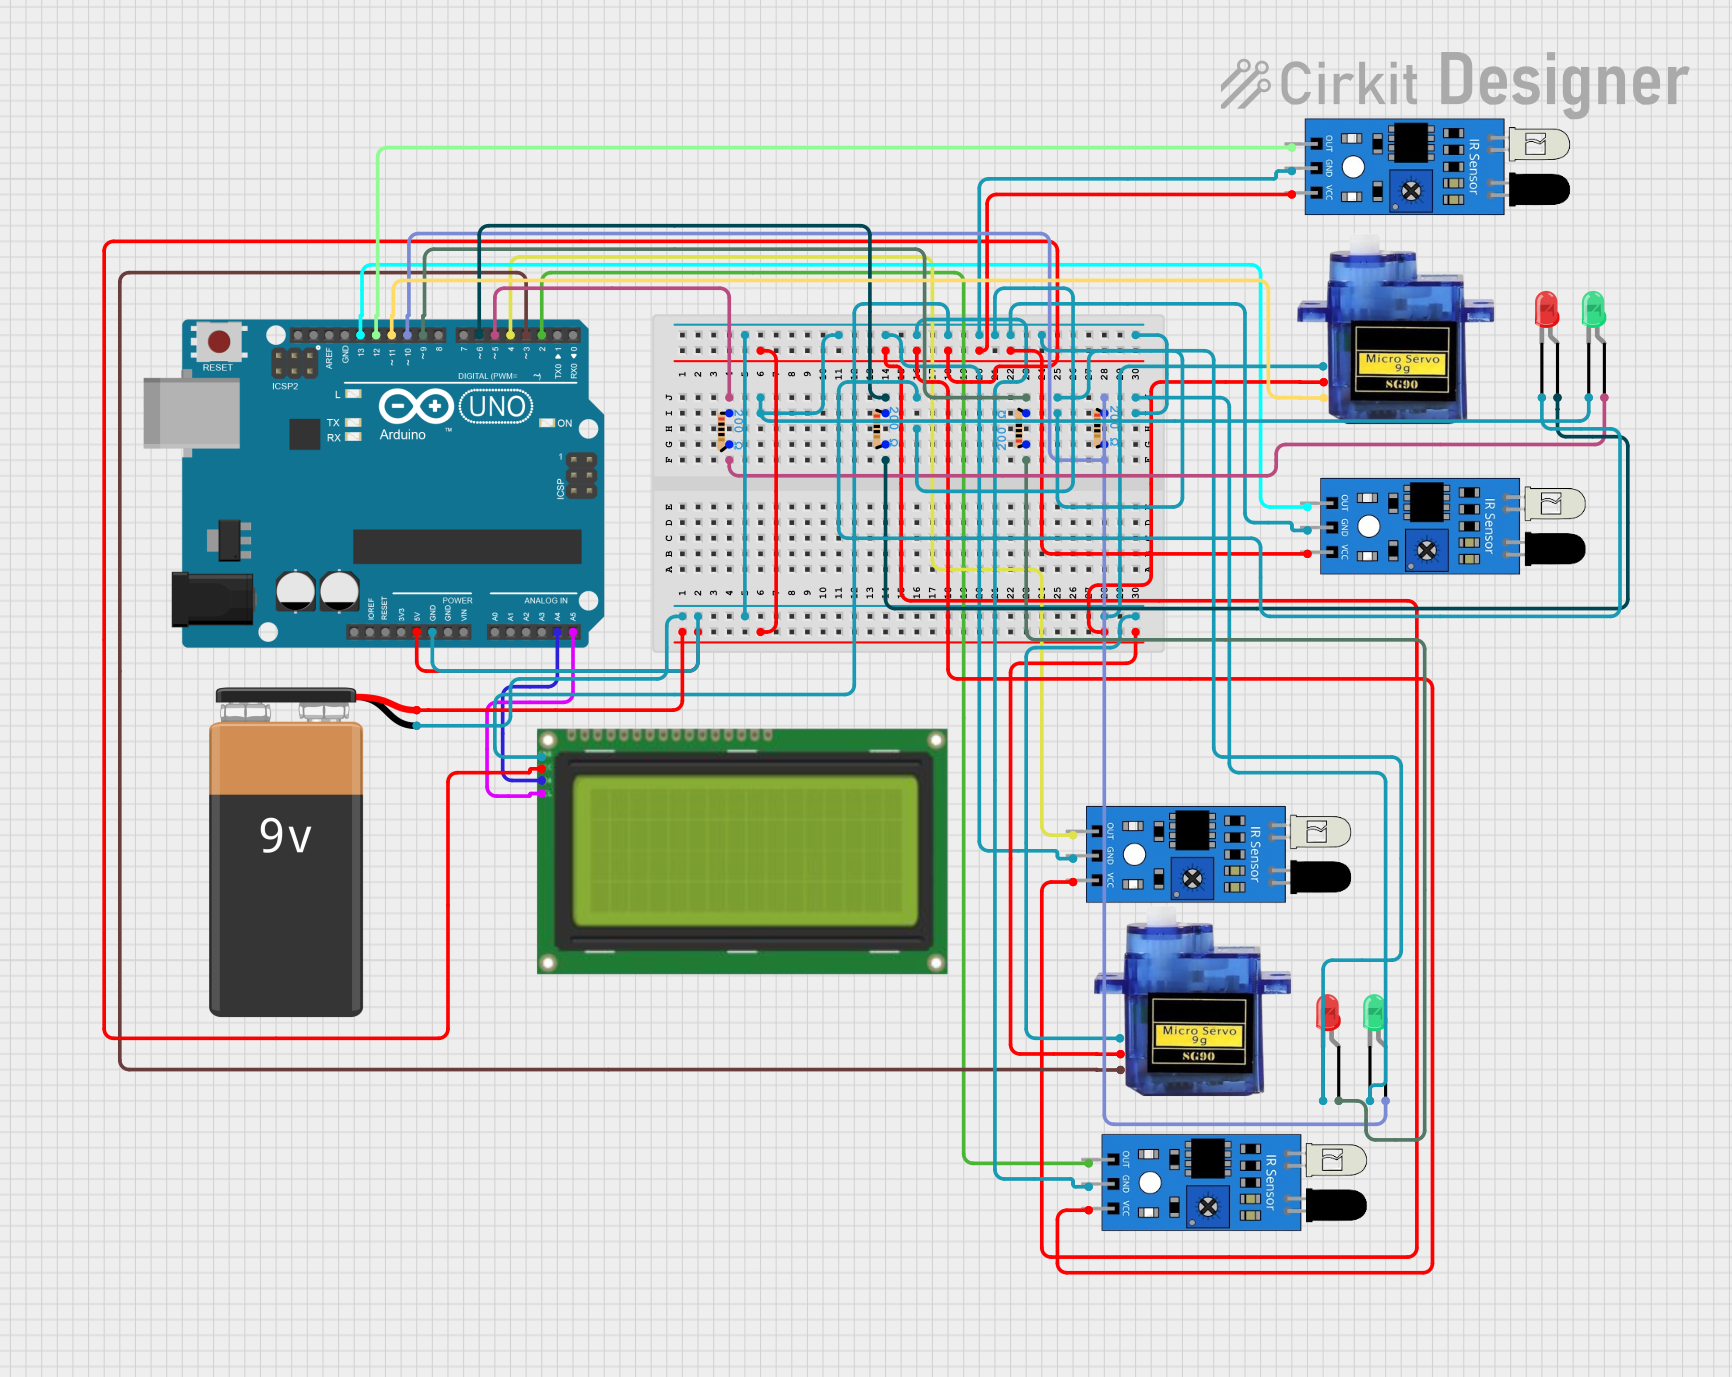
Circuit Documentation
Summary
This circuit involves an Arduino UNO microcontroller interfacing with various components including LEDs, resistors, IR sensors, a 20x4 LCD display, micro servos, and a 9V battery. The circuit is designed to demonstrate basic input/output operations, sensor interfacing, and display control.
Component List
LED: Two Pin (red)
- Pins: cathode, anode
- Description: Red LED for visual indication.
LED: Two Pin (green)
- Pins: cathode, anode
- Description: Green LED for visual indication.
Resistor
- Pins: pin1, pin2
- Description: 200 Ohms resistor for current limiting.
Lcd 20x4 i2c
- Pins: GND, 5v, SCA, SCL
- Description: 20x4 character LCD display with I2C interface.
Arduino UNO
- Pins: UNUSED, IOREF, Reset, 3.3V, 5V, GND, Vin, A0, A1, A2, A3, A4, A5, SCL, SDA, AREF, D13, D12, D11, D10, D9, D8, D7, D6, D5, D4, D3, D2, D1, D0
- Description: Microcontroller board based on the ATmega328P.
IR Sensor
- Pins: out, gnd, vcc
- Description: Infrared sensor for object detection.
Micro servo 9G
- Pins: GND, +5V, PWM
- Description: Small servo motor for precise control.
9V Battery
- Pins: -, +
- Description: Power source for the circuit.
Wiring Details
LED: Two Pin (red)
- Anode connected to:
- Resistor pin1 (200 Ohms)
- Arduino UNO D6
- Cathode connected to:
- Common ground with other components
LED: Two Pin (green)
- Anode connected to:
- Resistor pin1 (200 Ohms)
- Arduino UNO D5
- Cathode connected to:
- Common ground with other components
Resistor
- Pin1 connected to:
- LED anode
- Pin2 connected to:
- LED anode
Lcd 20x4 i2c
- GND connected to:
- Common ground with other components
- 5v connected to:
- 9V Battery +
- Arduino UNO 5V
- SCA connected to:
- Arduino UNO A4
- SCL connected to:
- Arduino UNO A5
Arduino UNO
- D5 connected to:
- Resistor pin1 (200 Ohms)
- LED (green) anode
- D6 connected to:
- Resistor pin1 (200 Ohms)
- LED (red) anode
- D9 connected to:
- Resistor pin1 (200 Ohms)
- LED (red) anode
- D10 connected to:
- Resistor pin1 (200 Ohms)
- LED (green) anode
- D11 connected to:
- Micro servo 9G PWM
- D12 connected to:
- IR sensor out
- D13 connected to:
- IR sensor out
- A4 connected to:
- Lcd 20x4 i2c SCA
- A5 connected to:
- Lcd 20x4 i2c SCL
- GND connected to:
- Common ground with other components
- 5V connected to:
- 9V Battery +
- Lcd 20x4 i2c 5v
IR Sensor
- Out connected to:
- Arduino UNO D2, D4, D12, D13
- GND connected to:
- Common ground with other components
- Vcc connected to:
- 9V Battery +
- Arduino UNO 5V
Micro servo 9G
- GND connected to:
- Common ground with other components
- +5V connected to:
- 9V Battery +
- Arduino UNO 5V
- PWM connected to:
- Arduino UNO D3, D11
9V Battery
- + connected to:
- Arduino UNO 5V
- Lcd 20x4 i2c 5v
- Micro servo 9G +5V
- IR sensor vcc
- - connected to:
- Common ground with other components
Code Documentation
Arduino UNO Code
#include <107-Arduino-24LCxx.hpp>
#include <107-Arduino-24LCxx.hpp>
#include <107-Arduino-24LCxx.hpp>
#include <107-Arduino-24LCxx.hpp>
#include <107-Arduino-24LCxx.hpp>
#include <107-Arduino-24LCxx.hpp>
#include <107-Arduino-24LCxx.hpp>
#include <107-Arduino-24LCxx.hpp>
#include <107-Arduino-24LCxx.hpp>
#include <107-Arduino-24LCxx.hpp>
#include <107-Arduino-24LCxx.hpp>
#include <107-Arduino-24LCxx.hpp>

void setup() {
  // put your setup code here, to run once:

}

void loop() {
  // put your main code here, to run repeatedly:

}
This code includes multiple instances of the 107-Arduino-24LCxx library and contains empty setup and loop functions. The setup function is intended for initialization code that runs once, and the loop function is for the main code that runs repeatedly.