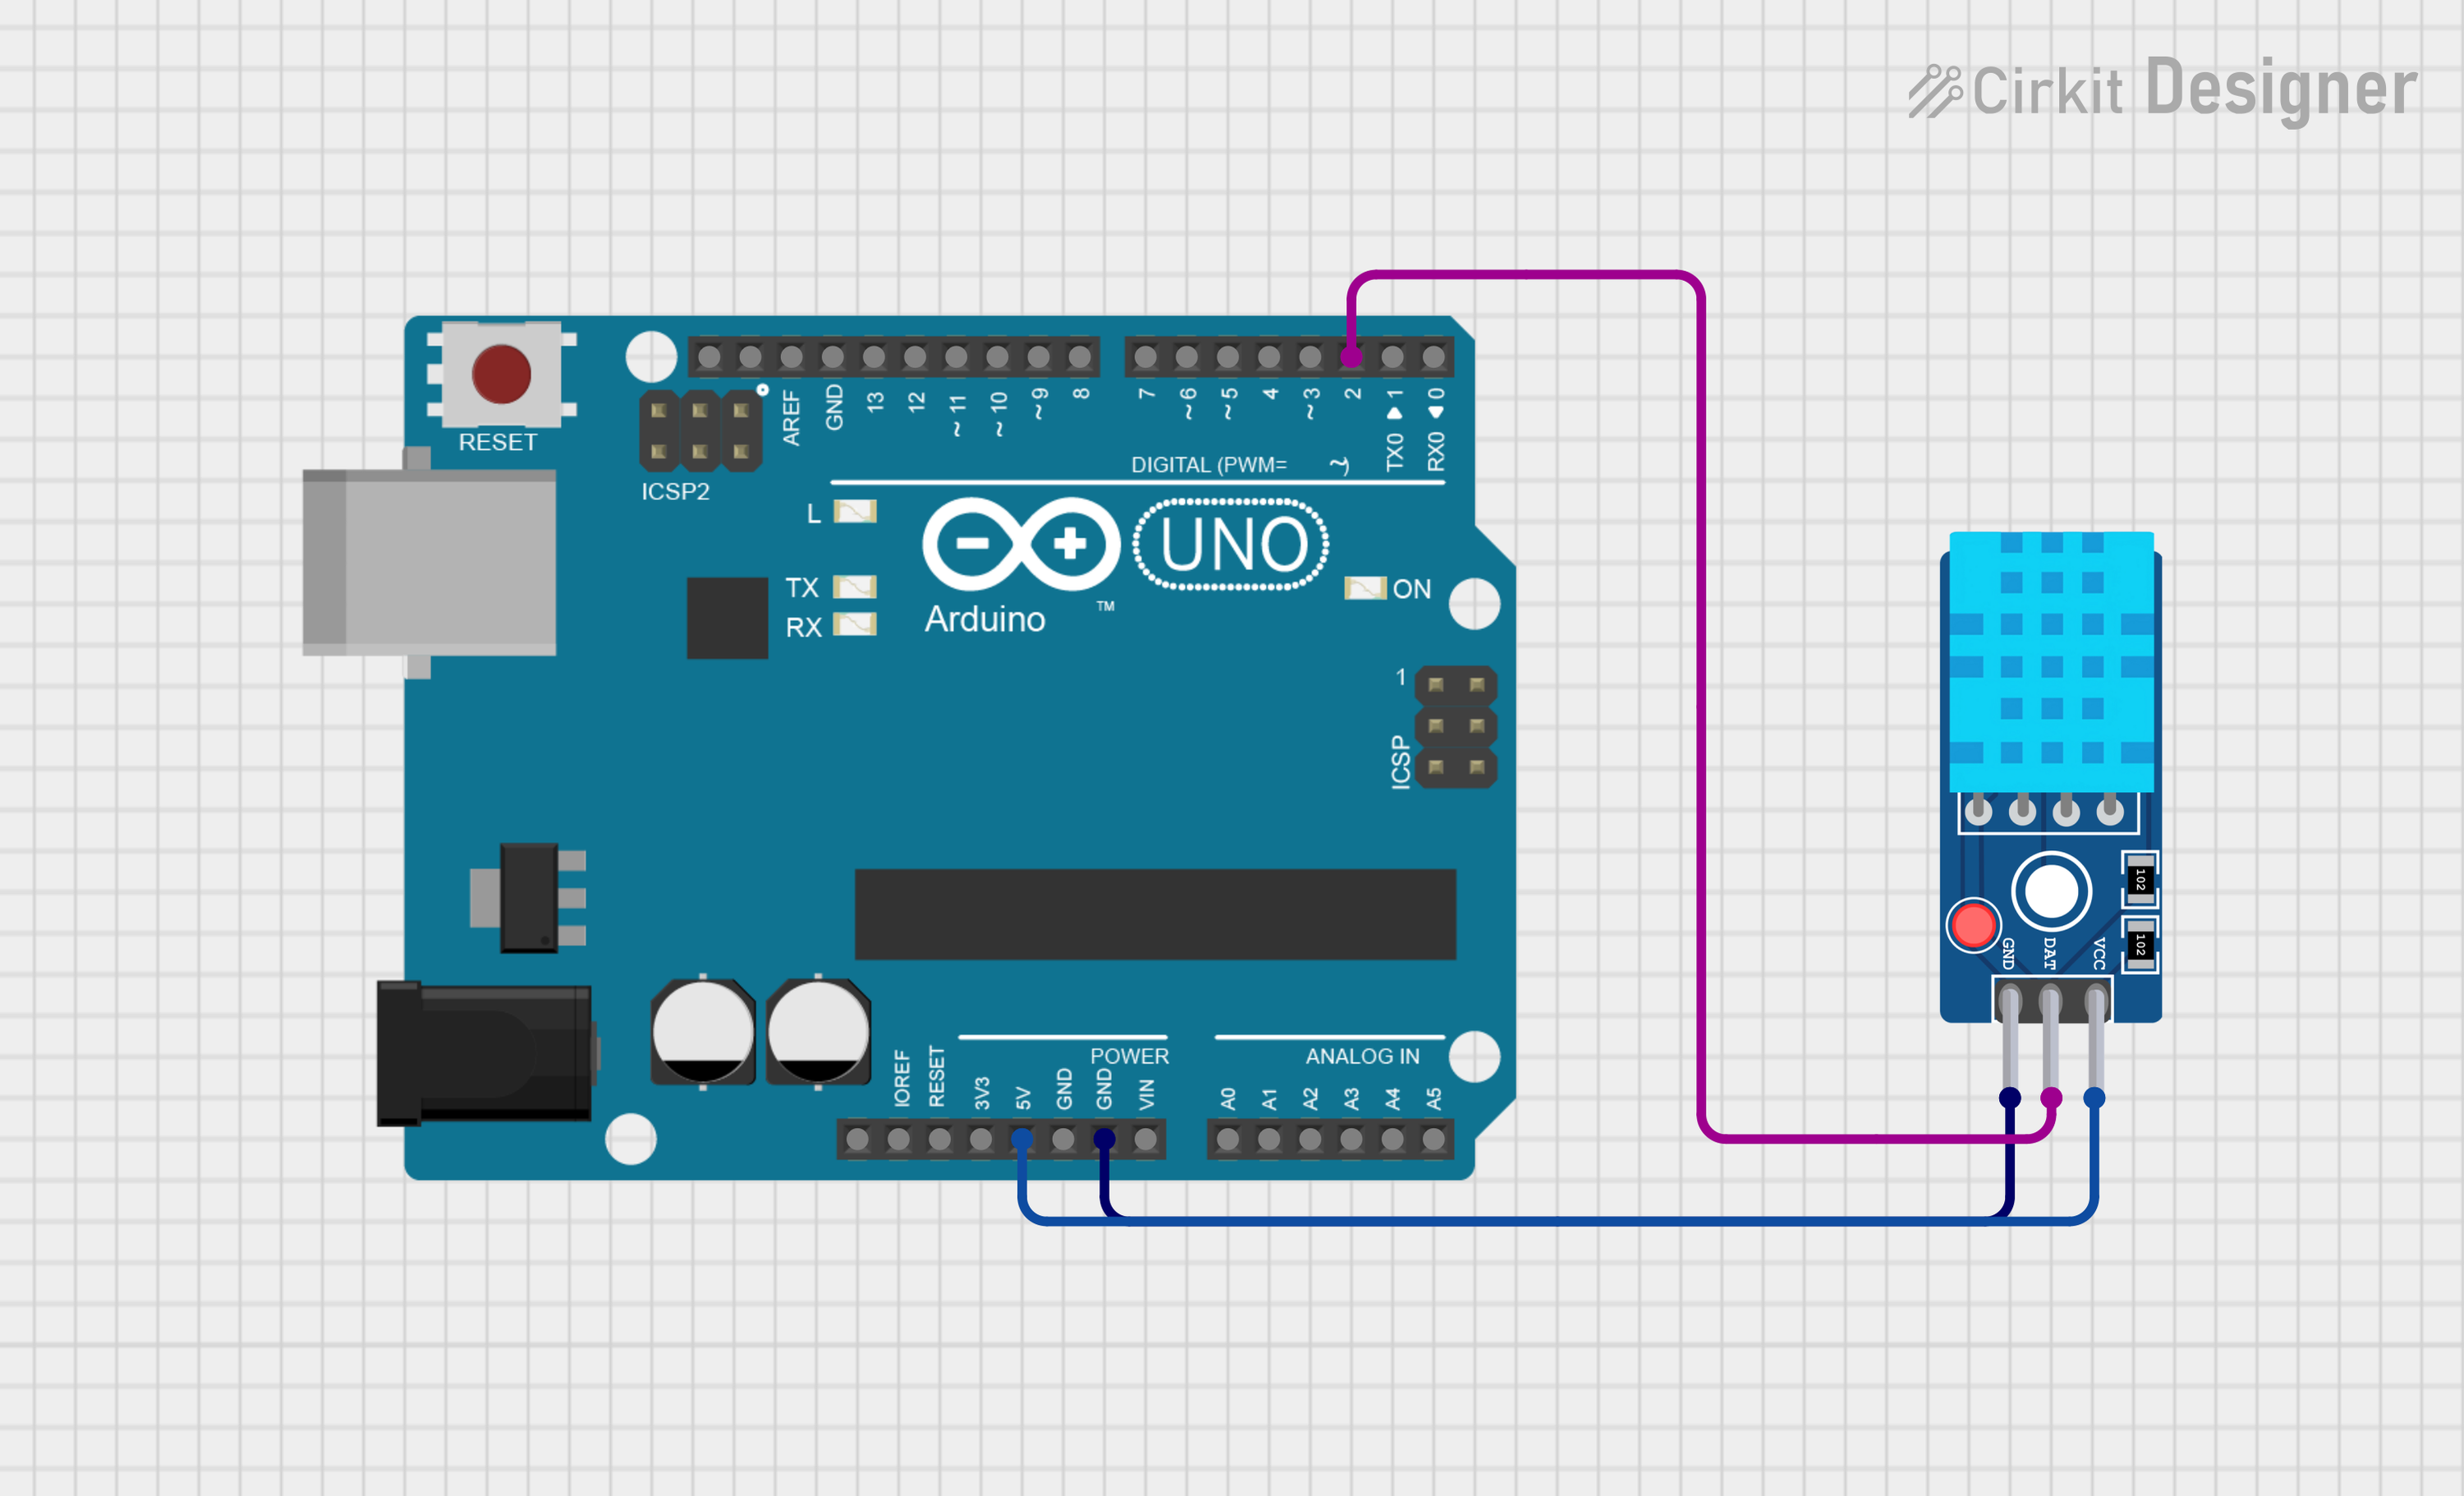
Arduino UNO with DHT11 Temperature and Humidity Sensor

Circuit Documentation
Summary of the Circuit
This circuit consists of an Arduino UNO microcontroller board interfaced with a DHT11 Sensor V2. The Arduino UNO is responsible for controlling the operation of the circuit and processing the data from the DHT11 sensor, which is a digital temperature and humidity sensor. The sensor's data pin is connected to a digital input on the Arduino to read the environmental data. The Arduino is programmed to read the temperature and humidity values from the DHT11 sensor and output the results to the serial monitor.
Component List
Arduino UNO
- Description: A microcontroller board based on the ATmega328P.
- Pins: UNUSED, IOREF, Reset, 3.3V, 5V, GND, Vin, A0-A5, SCL, SDA, AREF, D0-D13.
- Purpose: Acts as the central processing unit of the circuit, reading sensor data and executing embedded code.
DHT11 Sensor V2
- Description: A basic, ultra low-cost digital temperature and humidity sensor.
- Pins: GND, DAT, VCC.
- Purpose: Measures the ambient temperature and humidity and provides the data to the Arduino UNO.
Wiring Details
Arduino UNO
- 5V: Provides power to the DHT11 Sensor V2.
- GND: Connected to the ground pin of the DHT11 Sensor V2 to complete the power circuit.
- D2: Acts as the data input pin connected to the DAT pin of the DHT11 Sensor V2.
DHT11 Sensor V2
- VCC: Connected to the 5V output from the Arduino UNO to power the sensor.
- GND: Connected to the ground (GND) on the Arduino UNO to complete the power circuit.
- DAT: Sends the temperature and humidity data to the Arduino UNO via pin D2.
Documented Code
#include "DHT.h"

#define DHTPIN 2     // Digital pin connected to the DHT sensor

#define DHTTYPE DHT11   // DHT 11

DHT dht(DHTPIN, DHTTYPE);

void setup() {
  Serial.begin(9600);
  Serial.println(F("DHTxx test!"));

  dht.begin();
}

void loop() {
  // Wait a few seconds between measurements.
  delay(2000);

  // Reading temperature or humidity takes about 250 milliseconds!
  float h = dht.readHumidity();
  // Read temperature as Celsius (the default)
  float t = dht.readTemperature();
  // Read temperature as Fahrenheit (isFahrenheit = true)
  float f = dht.readTemperature(true);

  // Check if any reads failed and exit early (to try again).
  if (isnan(h) || isnan(t) || isnan(f)) {
    Serial.println(F("Failed to read from DHT sensor!"));
    return;
  }

  // Compute heat index in Fahrenheit (the default)
  float hif = dht.computeHeatIndex(f, h);
  // Compute heat index in Celsius (isFahreheit = false)
  float hic = dht.computeHeatIndex(t, h, false);

  Serial.print(F("Humidity: "));
  Serial.print(h);
  Serial.print(F("%  Temperature: "));
  Serial.print(t);
  Serial.print(F("°C "));
  Serial.print(f);
  Serial.print(F("°F  Heat index: "));
  Serial.print(hic);
  Serial.print(F("°C "));
  Serial.print(hif);
  Serial.println(F("°F"));
}
This code is written for the Arduino UNO and is used to interface with the DHT11 Sensor V2. It initializes the sensor and reads the humidity and temperature values at regular intervals. The readings are then printed to the serial monitor along with the computed heat index in both Celsius and Fahrenheit. If the sensor fails to provide a reading, an error message is printed to the serial monitor.