
Arduino UNO Controlled LCD Interface with DC Motor and Buzzer Feedback
View and Edit Project In Cirkit Designer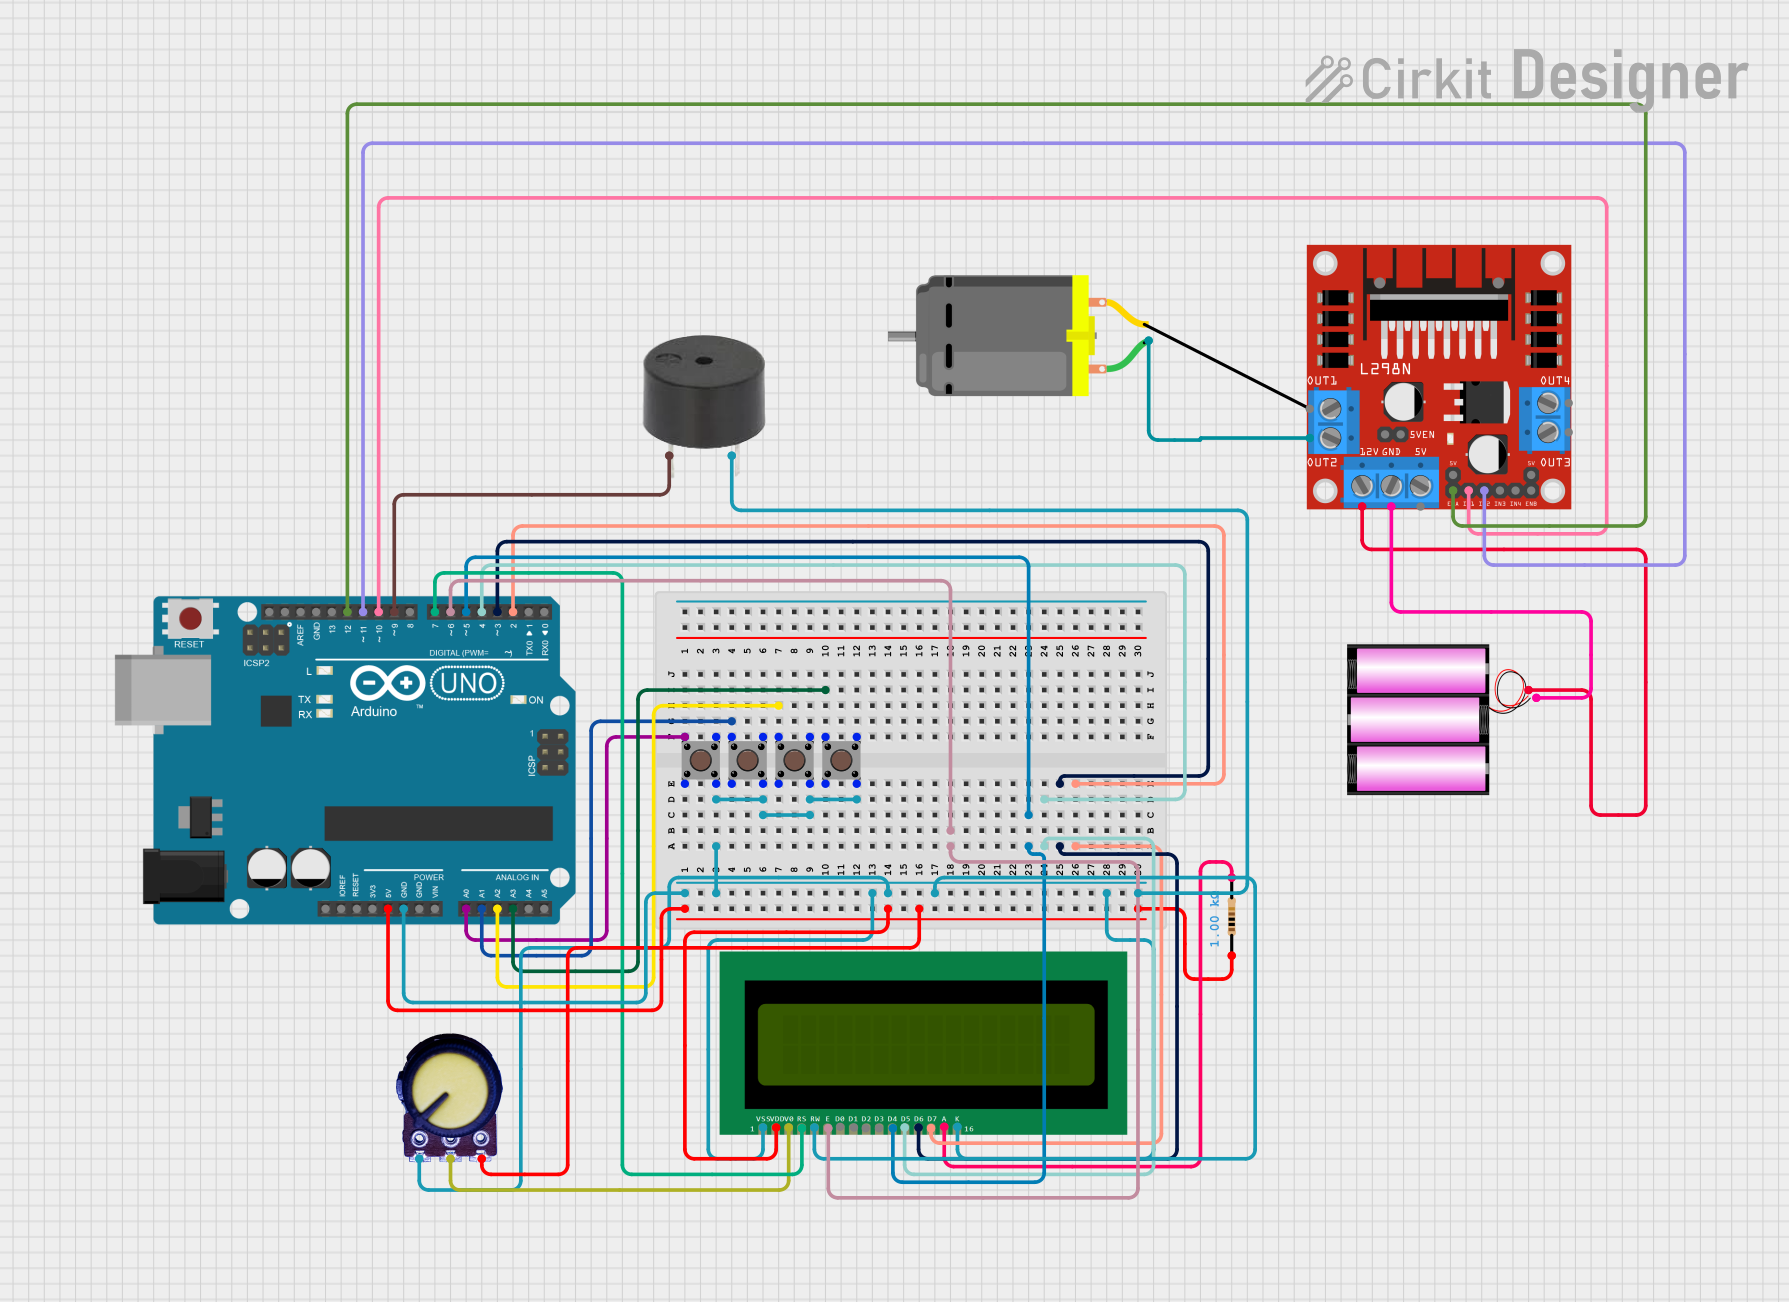
Circuit Documentation
Summary
This document provides a detailed overview of a circuit that includes an Arduino UNO microcontroller, a DC motor, a 16X2 LCD display, a buzzer, multiple pushbuttons, a potentiometer, a resistor, an L298N DC motor driver, and a 12V battery. The circuit is designed to interface with various input devices and control a DC motor while providing feedback through an LCD display and a buzzer.
Component List
Arduino UNO
- Microcontroller board based on the ATmega328P
- Provides digital and analog I/O pins for interfacing with other components
DC Motor
- Converts electrical energy into mechanical motion
16X2 LCD
- Alphanumeric liquid crystal display with 2 rows of 16 characters
- Used for displaying information to the user
Buzzer
- An electromechanical component that produces sound
- Used for audible feedback or alerts
Pushbuttons (4x)
- Simple switch mechanism for controlling a circuit
- Used to provide user input to the microcontroller
Potentiometer
- Three-terminal resistor with an adjustable voltage divider
- Used for adjusting LCD contrast or as an analog input
Resistor
- Electrical component that implements electrical resistance
- Used for current limiting or voltage division
L298N DC Motor Driver
- Dual H-bridge motor driver
- Used for controlling the direction and speed of DC motors
Battery 12V
- Provides power to the circuit
Wiring Details
Arduino UNO
5Vconnected to 16X2 LCDVDD, PotentiometerVCC, and Resistorpin1GNDconnected to all PushbuttonsPin 4 (out), 16X2 LCDVSS,RW,K, PotentiometerGND, and BuzzerGNDA0toA3connected to PushbuttonsPin 1 (in)D2toD7connected to 16X2 LCDD7,D6,D5,D4,E,RSD9connected to BuzzerPIND10andD11connected to L298N DC motor driverIN1andIN2D12connected to L298N DC motor driverENA
DC Motor
pin 1connected to L298N DC motor driverOUT2
16X2 LCD
V0connected to PotentiometerOutputAconnected to Resistorpin2
L298N DC Motor Driver
12VandGNDconnected to Battery 12V+and-
Documented Code
Arduino UNO Code (sketch.ino)
void setup() {
  // put your setup code here, to run once:

}

void loop() {
  // put your main code here, to run repeatedly:

}
Additional Notes (documentation.txt)
No additional code documentation provided.