
Arduino UNO-Based Line Following Robot with L298N Motor Driver and IR Sensors
View and Edit Project In Cirkit Designer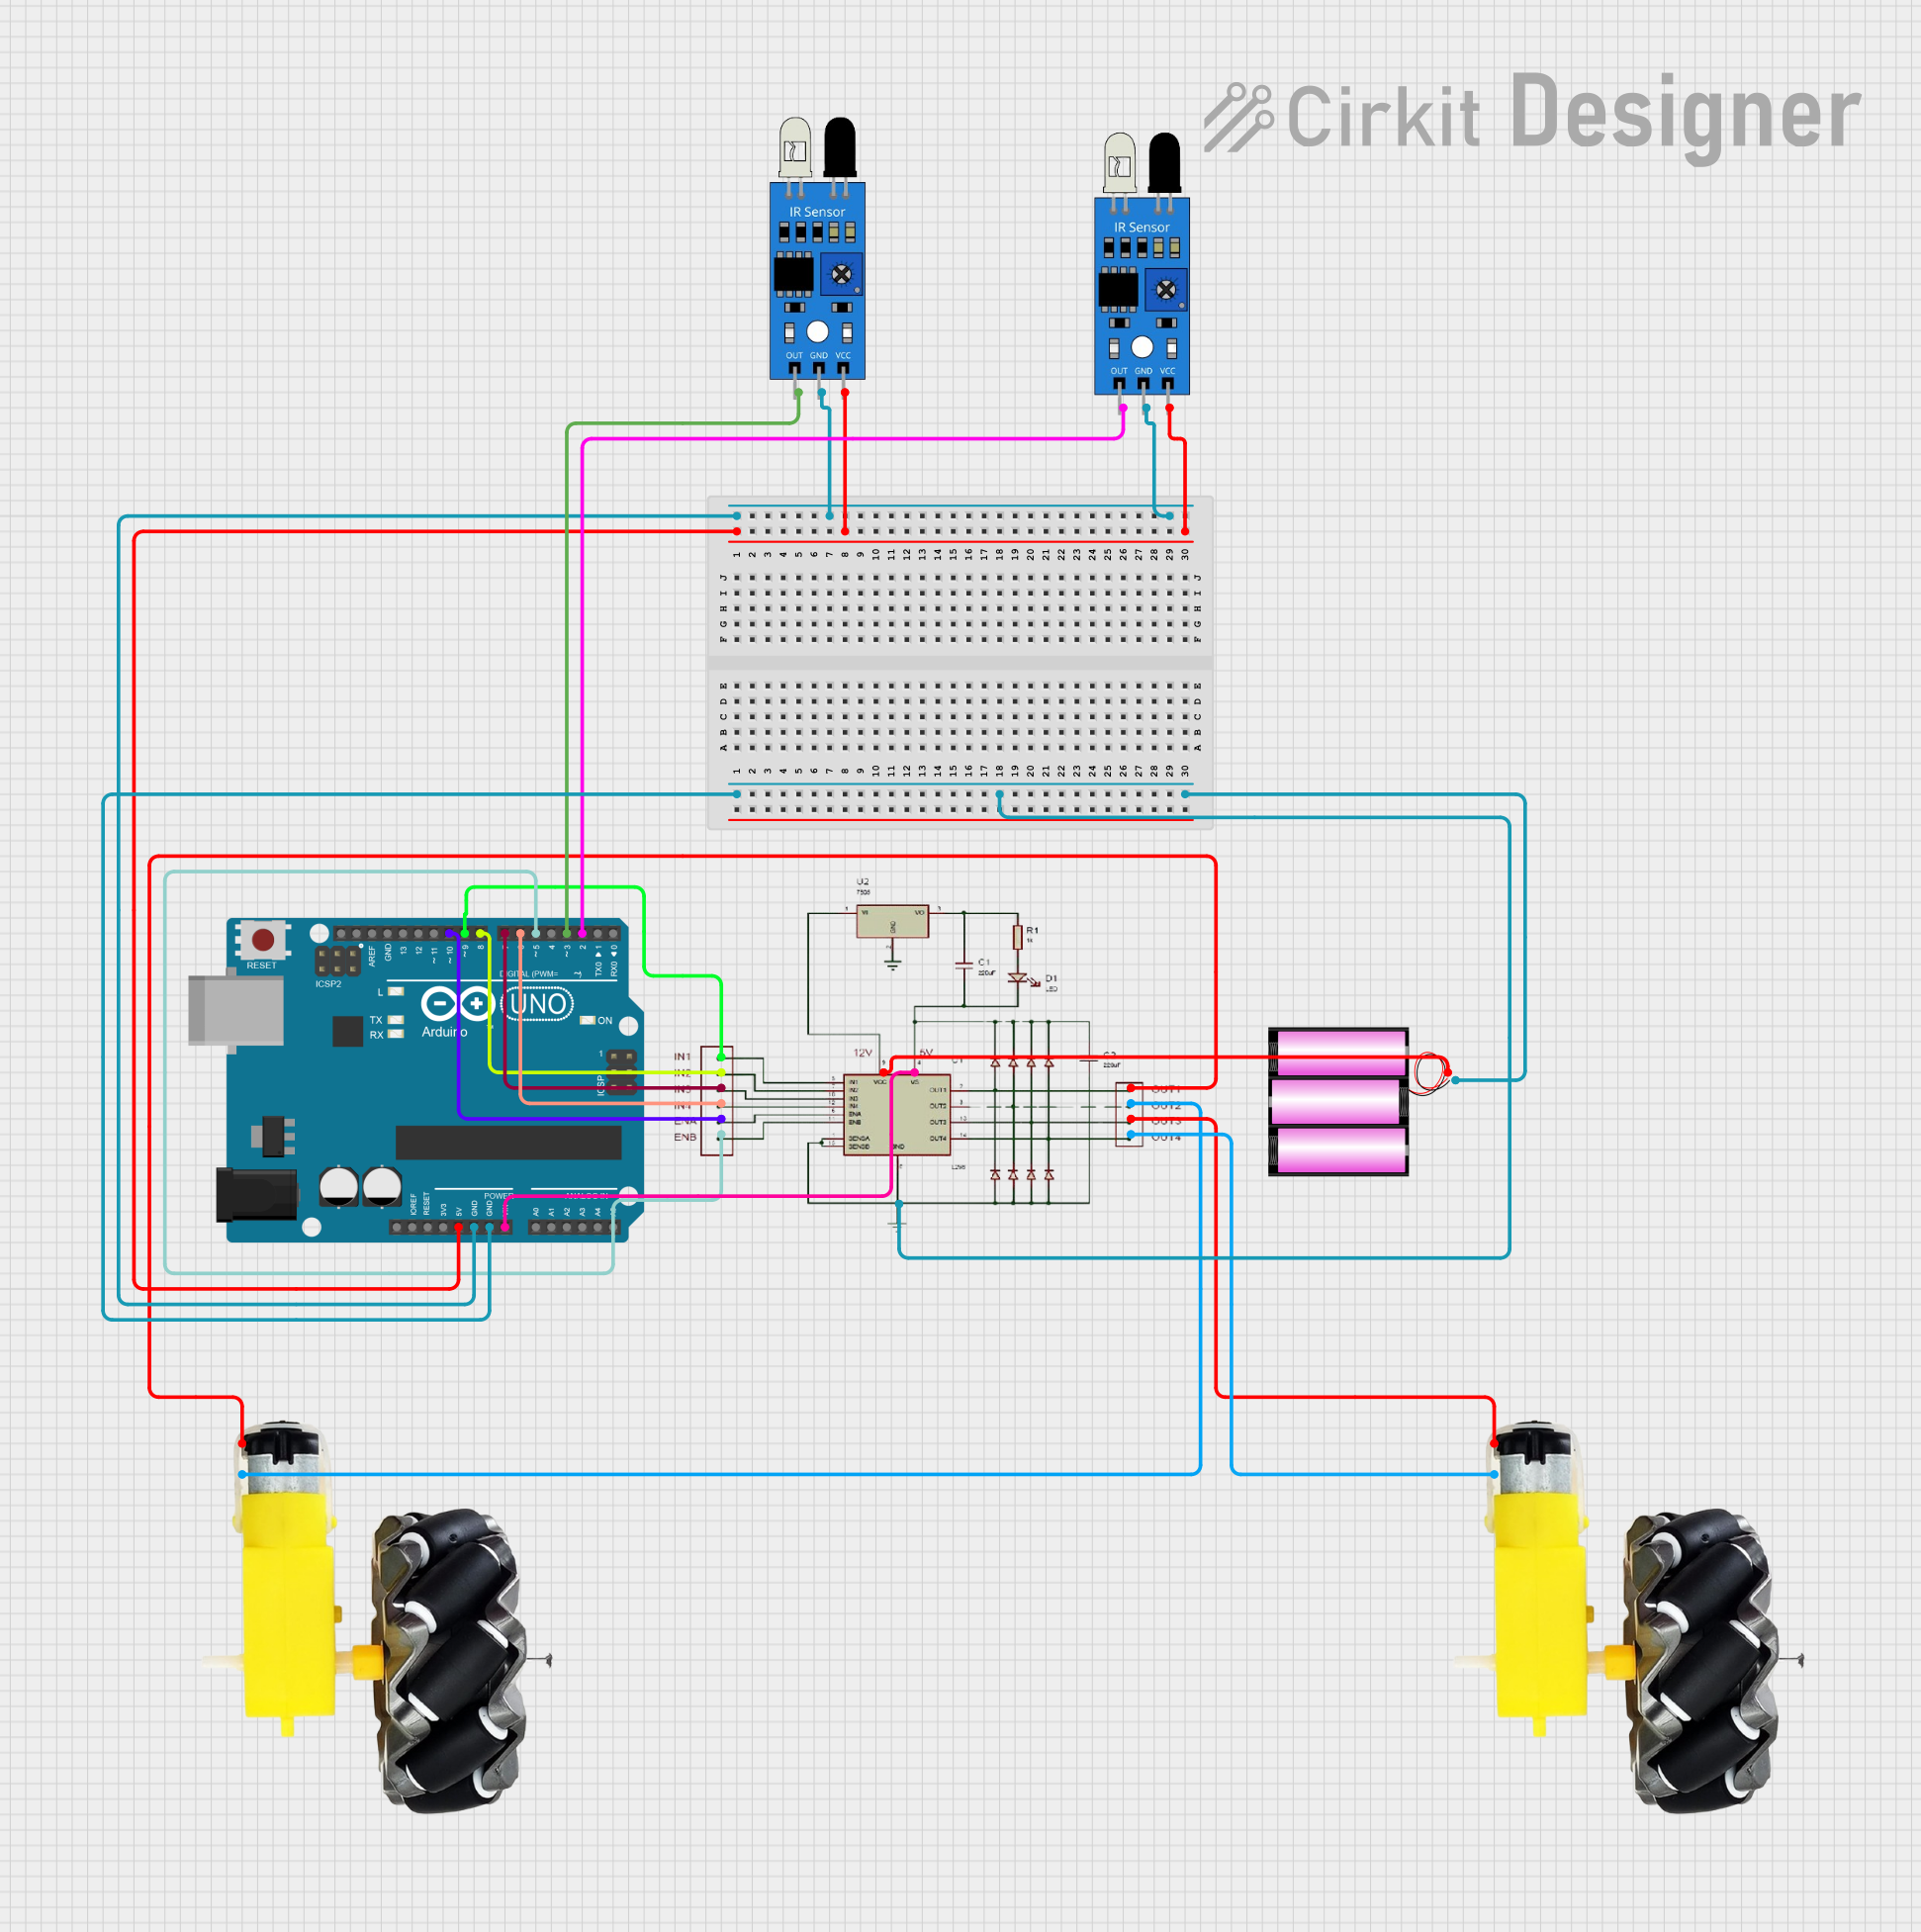
Circuit Documentation
Summary
This document provides a detailed overview of a circuit designed using an Arduino UNO, an L298N Motor Driver, two motors with wheels, two IR sensors, and a 12V battery. The circuit is intended to control the motors based on the input from the IR sensors, with the Arduino UNO serving as the central microcontroller.
Component List
Arduino UNO
- Description: A microcontroller board based on the ATmega328P.
- Pins: UNUSED, IOREF, Reset, 3.3V, 5V, GND, Vin, A0, A1, A2, A3, A4, A5, SCL, SDA, AREF, D13, D12, D11, D10, D9, D8, D7, D6, D5, D4, D3, D2, D1, D0
L298N Motor Driver
- Description: A dual H-Bridge motor driver that allows control of two DC motors.
- Pins: IN1, IN2, IN3, IN4, ENA, ENB, OUT1, OUT2, OUT3, OUT4, GND, 5V, 12V
Motor and Wheels
- Description: A DC motor with attached wheels.
- Pins: vcc, GND
IR Sensor
- Description: An infrared sensor used for obstacle detection.
- Pins: out, gnd, vcc
Battery 12V
- Description: A 12V battery used to power the circuit.
- Pins: +, -
Wiring Details
Arduino UNO
- GND: Connected to GND of L298N Motor Driver and - of 12V battery.
- 5V: Connected to vcc of both IR sensors.
- Vin: Connected to 5V of L298N Motor Driver.
- D10: Connected to ENA of L298N Motor Driver.
- D9: Connected to IN1 of L298N Motor Driver.
- D8: Connected to IN2 of L298N Motor Driver.
- D7: Connected to IN3 of L298N Motor Driver.
- D6: Connected to IN4 of L298N Motor Driver.
- D5: Connected to ENB of L298N Motor Driver.
- D3: Connected to out of one IR sensor.
- D2: Connected to out of the other IR sensor.
L298N Motor Driver
- GND: Connected to GND of Arduino UNO and - of 12V battery.
- 5V: Connected to Vin of Arduino UNO.
- ENA: Connected to D10 of Arduino UNO.
- IN1: Connected to D9 of Arduino UNO.
- IN2: Connected to D8 of Arduino UNO.
- IN3: Connected to D7 of Arduino UNO.
- IN4: Connected to D6 of Arduino UNO.
- ENB: Connected to D5 of Arduino UNO.
- OUT1: Connected to vcc of one motor.
- OUT2: Connected to GND of the same motor.
- OUT3: Connected to vcc of the other motor.
- OUT4: Connected to GND of the other motor.
- 12V: Connected to + of 12V battery.
Motor and Wheels
- Motor 1:
- vcc: Connected to OUT1 of L298N Motor Driver.
- GND: Connected to OUT2 of L298N Motor Driver.
- Motor 2:
- vcc: Connected to OUT3 of L298N Motor Driver.
- GND: Connected to OUT4 of L298N Motor Driver.
IR Sensor
- Sensor 1:
- out: Connected to D3 of Arduino UNO.
- gnd: Connected to GND of Arduino UNO.
- vcc: Connected to 5V of Arduino UNO.
- Sensor 2:
- out: Connected to D2 of Arduino UNO.
- gnd: Connected to GND of Arduino UNO.
- vcc: Connected to 5V of Arduino UNO.
Battery 12V
- +: Connected to 12V of L298N Motor Driver.
- -: Connected to GND of Arduino UNO and GND of L298N Motor Driver.
Code Documentation
Arduino UNO Code
void setup() {
  // put your setup code here, to run once:

}

void loop() {
  // put your main code here, to run repeatedly:

}
This code is a basic template for the Arduino UNO. The setup() function is where you initialize your settings, and the loop() function is where the main code runs repeatedly. You can add your motor control and sensor reading logic in these functions to achieve the desired behavior of your circuit.