
Arduino UNO Controlled Multi-Servo Robotic Arm with Joystick Interface
View and Edit Project In Cirkit Designer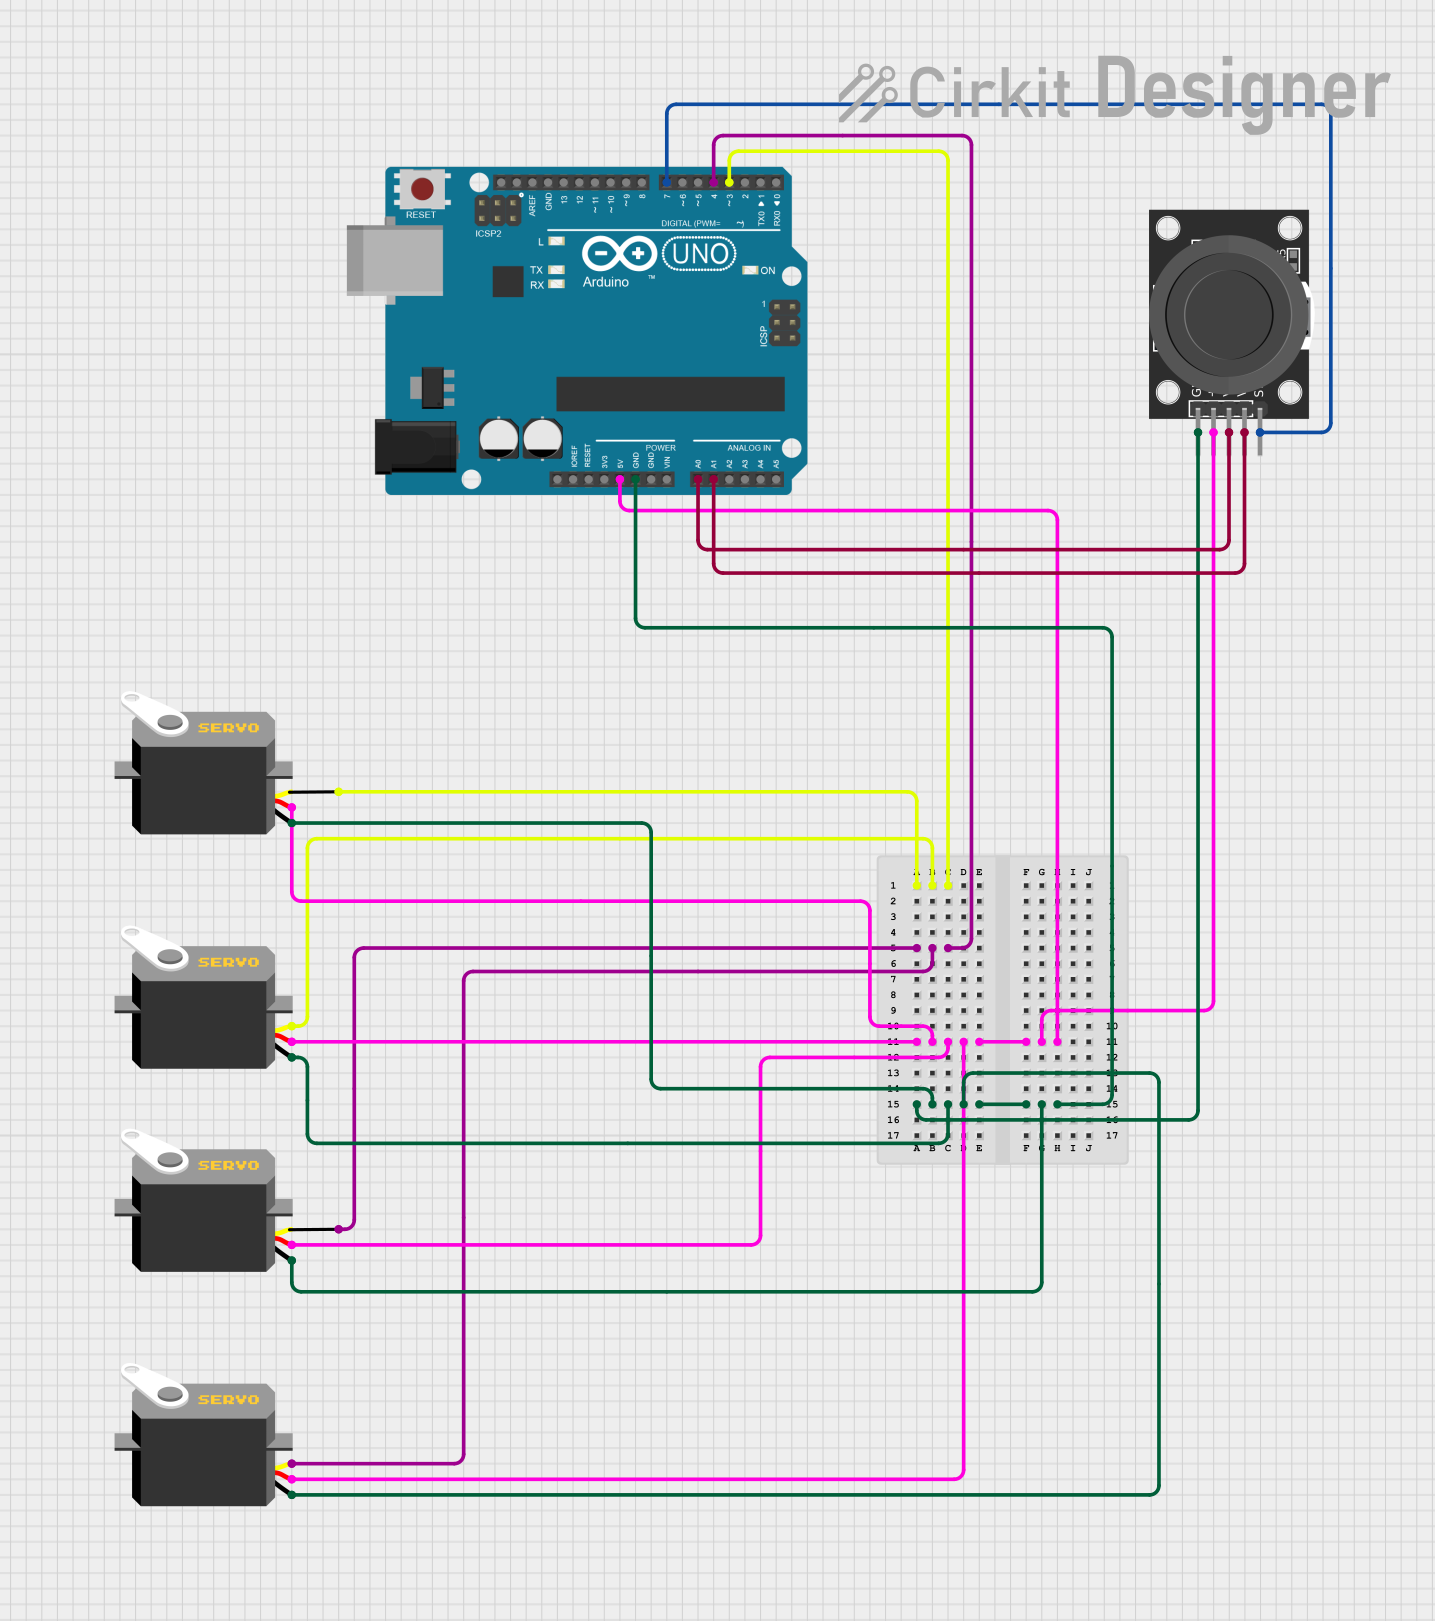
Circuit Documentation
Summary
This circuit consists of an Arduino UNO microcontroller, a KY-023 Dual Axis Joystick Module, and four Servo motors. The Arduino UNO serves as the central controller, interfacing with the joystick module to read user input and controlling the servos based on this input.
Component List
Arduino UNO
- Description: A microcontroller board based on the ATmega328P.
- Pins: UNUSED, IOREF, Reset, 3.3V, 5V, GND, Vin, A0, A1, A2, A3, A4, A5, SCL, SDA, AREF, D13, D12, D11, D10, D9, D8, D7, D6, D5, D4, D3, D2, D1, D0
Servo (x4)
- Description: A small device that has an output shaft. This shaft can be positioned to specific angular positions by sending the servo a coded signal.
- Pins: gnd, vcc, pulse
KY-023 Dual Axis Joystick Module
- Description: A joystick module that provides two axes of analog input and a digital switch.
- Pins: GND, +5V, VRx, VRy, SW
Wiring Details
Arduino UNO
- 5V: Connected to vcc of all Servos and +5V of the KY-023 Dual Axis Joystick Module.
- GND: Connected to gnd of all Servos and GND of the KY-023 Dual Axis Joystick Module.
- D3: Connected to pulse of two Servos.
- D4: Connected to pulse of the other two Servos.
- A0: Connected to VRx of the KY-023 Dual Axis Joystick Module.
- A1: Connected to VRy of the KY-023 Dual Axis Joystick Module.
- D7: Connected to SW of the KY-023 Dual Axis Joystick Module.
Servo (1)
- gnd: Connected to GND.
- vcc: Connected to 5V.
- pulse: Connected to D3.
Servo (2)
- gnd: Connected to GND.
- vcc: Connected to 5V.
- pulse: Connected to D3.
Servo (3)
- gnd: Connected to GND.
- vcc: Connected to 5V.
- pulse: Connected to D4.
Servo (4)
- gnd: Connected to GND.
- vcc: Connected to 5V.
- pulse: Connected to D4.
KY-023 Dual Axis Joystick Module
- GND: Connected to GND.
- +5V: Connected to 5V.
- VRx: Connected to A0.
- VRy: Connected to A1.
- SW: Connected to D7.
Code Documentation
Arduino UNO Code
sketch.ino
void setup() {
  // put your setup code here, to run once:

}

void loop() {
  // put your main code here, to run repeatedly:

}
documentation.txt