
Arduino-Controlled Robotic Vehicle with Ultrasonic Sensing and Servo Actuation
View and Edit Project In Cirkit Designer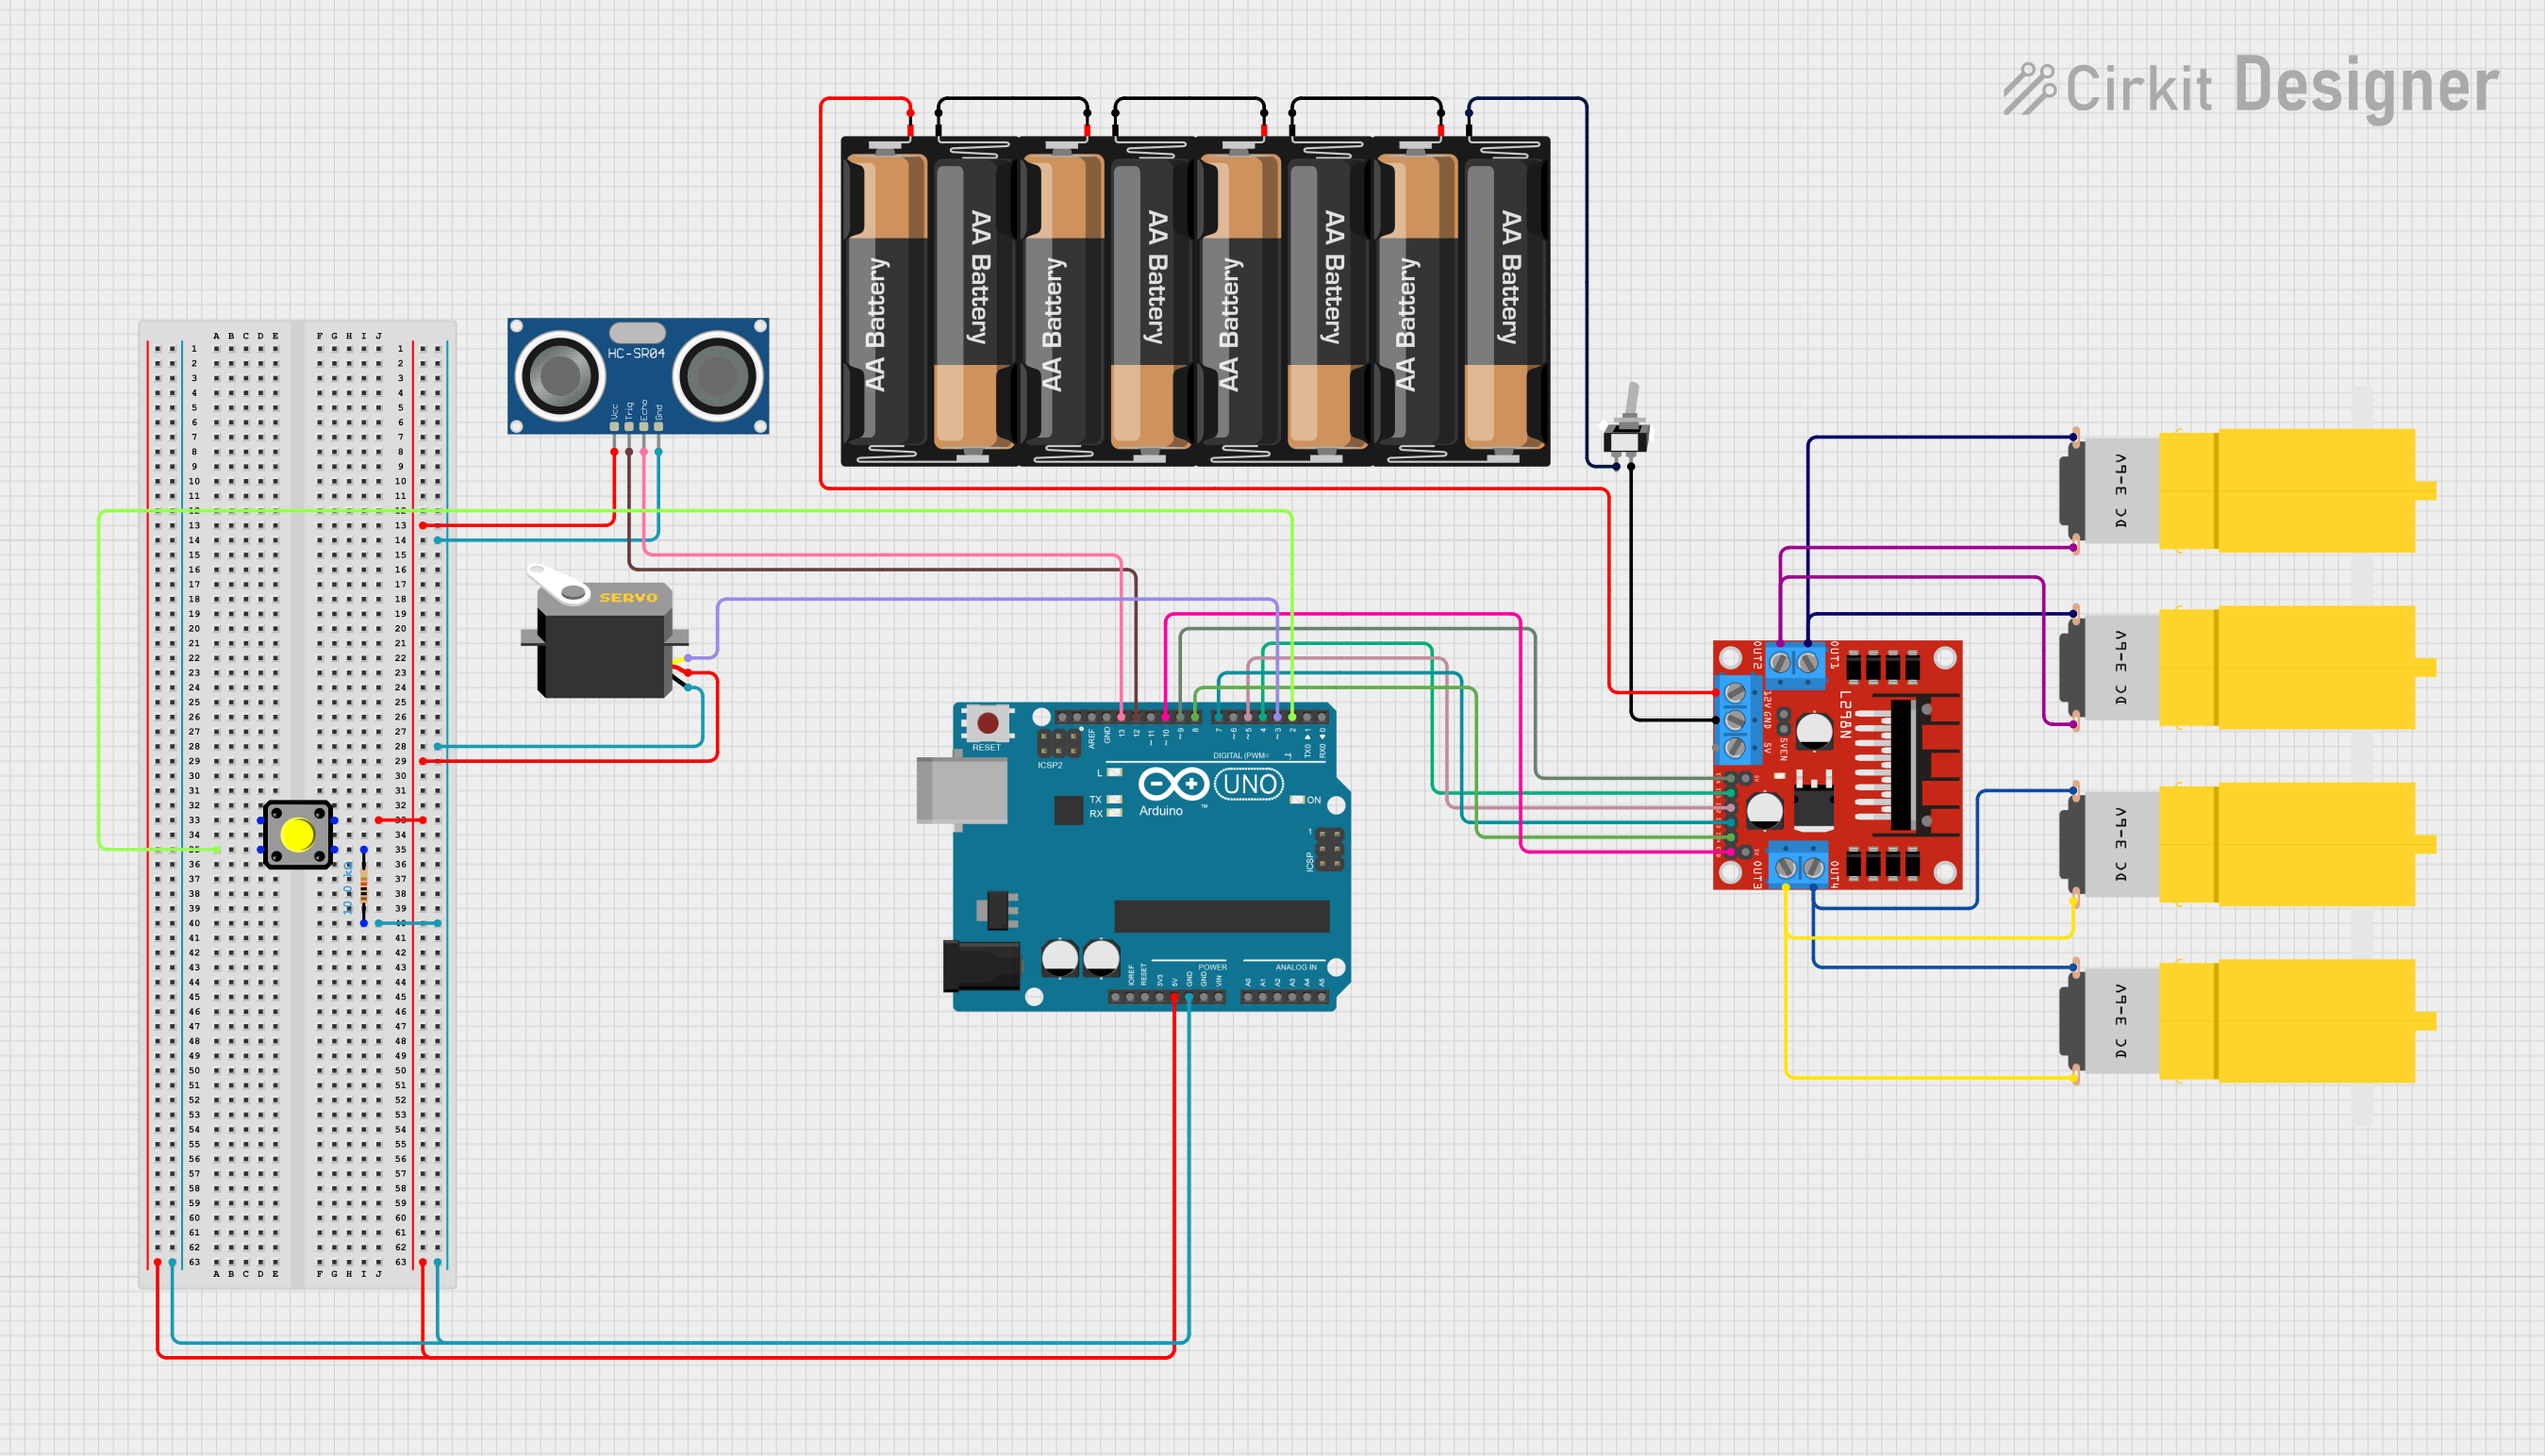
Circuit Documentation
Summary
This circuit is designed to interface an Arduino UNO with various components including an HC-SR04 Ultrasonic Sensor, an L298N DC motor driver, hobby motors, a servo motor, a toggle switch, battery mounts, a pushbutton, and a resistor. The Arduino UNO acts as the central controller, managing sensor inputs, driving motors, and controlling a servo based on programmed logic. The circuit is powered by multiple AA battery mounts, and the toggle switch is used to control the power flow to the motor driver.
Component List
Arduino UNO
- Microcontroller board based on the ATmega328P
- It has 14 digital input/output pins, 6 analog inputs, a 16 MHz quartz crystal, a USB connection, a power jack, an ICSP header, and a reset button.
HC-SR04 Ultrasonic Sensor
- An ultrasonic distance sensor that provides 2cm to 400cm non-contact measurement functionality with a ranging accuracy that can reach up to 3mm.
L298N DC Motor Driver
- A high-power motor driver capable of driving up to 2 DC motors.
- It has 4 input terminals for controlling the direction and speed of the motors and 4 output terminals to connect the motors.
Motor Amarillo Motorreductor Hobby (4x)
- A yellow hobby gear motor used for simple robotics and mechanical projects.
Toggle Switch SPST
- A single-pole single-throw (SPST) toggle switch used to control the power supply to the circuit.
2 x AA Battery Mount (4x)
- A battery mount designed to hold 2 AA batteries, used to provide power to the circuit.
Servo
- A small device that has an output shaft. This shaft can be positioned to specific angular positions by sending the servo a coded signal.
Pushbutton
- A simple switch mechanism for controlling some aspect of a machine or a process.
Resistor
- An electrical component that limits or regulates the flow of electrical current in an electronic circuit.
Wiring Details
Arduino UNO
5Vconnected to HC-SR04 VCC, Servo VCC, and Pushbutton Pin 3GNDconnected to HC-SR04 GND, Servo GND, and one leg of the ResistorD13connected to HC-SR04 ECHOD12connected to HC-SR04 TRIGD10connected to L298N ENBD9connected to L298N ENAD8connected to L298N IN4D7connected to L298N IN3D5connected to L298N IN2D4connected to L298N IN1D3connected to Servo pulseD2connected to Pushbutton Pin 1
HC-SR04 Ultrasonic Sensor
VCCconnected to Arduino UNO 5VGNDconnected to Arduino UNO GNDECHOconnected to Arduino UNO D13TRIGconnected to Arduino UNO D12
L298N DC Motor Driver
OUT1andOUT2connected to one pair of Motor Amarillo motorreductor hobby terminalsOUT3andOUT4connected to another pair of Motor Amarillo motorreductor hobby terminals12Vconnected to 2 x AA Battery Mount +GNDconnected to Toggle Switch COMENAandENBconnected to Arduino UNO D9 and D10 respectivelyIN1,IN2,IN3, andIN4connected to Arduino UNO D4, D5, D7, and D8 respectively
Motor Amarillo Motorreductor Hobby
- Four motors with
vccandGNDterminals connected to L298N DC motor driver outputs.
Toggle Switch SPST
COMconnected to L298N GNDL1connected to 2 x AA Battery Mount -
2 x AA Battery Mount
- Four mounts with
+and-terminals. The+terminals are interconnected and connected to L298N 12V. The-terminals are interconnected and connected to Toggle Switch L1.
Servo
gndconnected to Arduino UNO GNDvccconnected to Arduino UNO 5Vpulseconnected to Arduino UNO D3
Pushbutton
Pin 1connected to Arduino UNO D2Pin 2connected to one leg of the ResistorPin 3connected to Arduino UNO 5V
Resistor
- One leg connected to Pushbutton Pin 2
- The other leg connected to Arduino UNO GND
Documented Code
Arduino UNO Code (sketch.ino)
void setup() {
  // put your setup code here, to run once:

}

void loop() {
  // put your main code here, to run repeatedly:

}
Note: The provided code is a template and does not contain any functional code. It needs to be populated with the logic to control the components as per the requirements of the circuit's application.