Cirkit Designer
Your all-in-one circuit design IDE
Home /
Project Documentation
Arduino UNO with DHT22 Temperature and Humidity Sensor
Circuit Documentation
Summary
This document provides a detailed overview of a simple circuit that interfaces an Arduino UNO with a DHT22 temperature and humidity sensor. The Arduino UNO serves as the microcontroller platform for reading data from the DHT22 sensor and potentially processing or transmitting the data for further use.
Component List
Arduino UNO
- Description: A microcontroller board based on the ATmega328P.
- Pins: UNUSED, IOREF, Reset, 3.3V, 5V, GND, Vin, A0-A5, SCL, SDA, AREF, D0-D13.
- Purpose: Acts as the central processing unit of the circuit, controlling the DHT22 sensor and handling data communication.
DHT22
- Description: A digital temperature and humidity sensor.
- Pins: + (Power), Out (Signal), - (Ground).
- Purpose: Measures the ambient temperature and humidity and provides the data to the Arduino UNO.
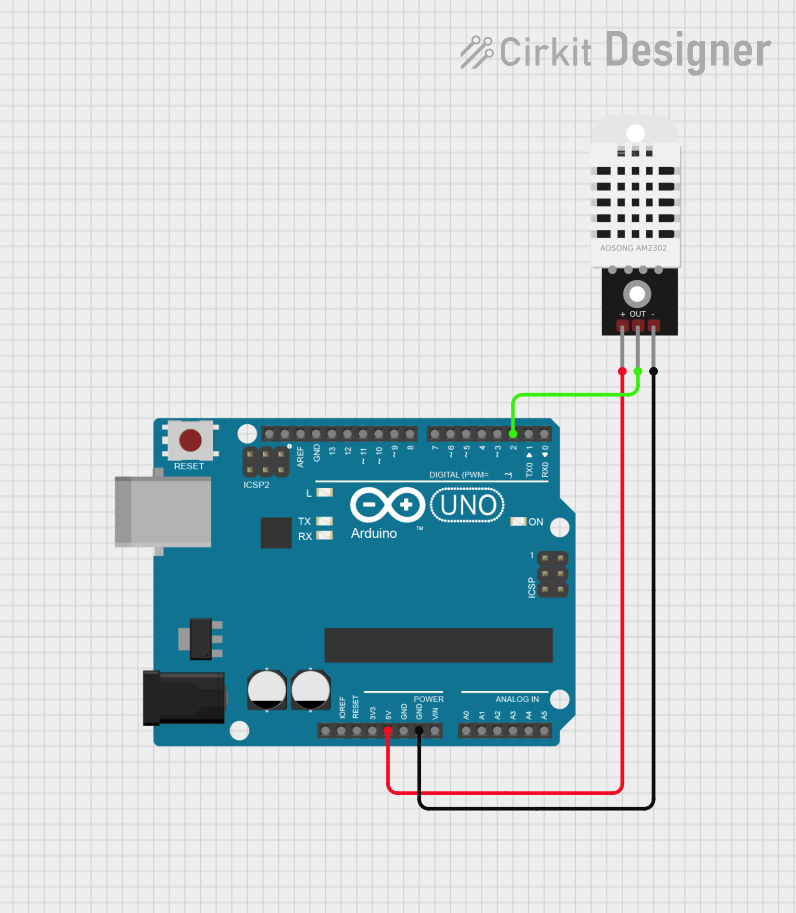
Wiring Details
Arduino UNO
- 5V: Provides power to the DHT22 sensor.
- D2: Receives the data signal from the DHT22 sensor's output pin.
- GND: Connected to the ground pin of the DHT22 to complete the power circuit.
DHT22
- + (Power): Connected to the 5V output from the Arduino UNO to power the sensor.
- Out (Signal): Sends the temperature and humidity data to the Arduino UNO's digital pin D2.
- - (Ground): Connected to the ground (GND) on the Arduino UNO.
Documented Code
Arduino UNO Code (sketch.ino)
void setup() {
  // put your setup code here, to run once:

}

void loop() {
  // put your main code here, to run repeatedly:

}
This code template provides the basic structure for an Arduino sketch with empty setup() and loop() functions. The setup() function is intended for initialization code that runs once when the device is powered on or reset. The loop() function contains code that runs continuously, allowing the Arduino to read data from the DHT22 sensor and perform actions based on that data.
Additional Notes
- The provided code is a template and does not include specific instructions for interacting with the DHT22 sensor. To complete the circuit's functionality, code for initializing the sensor and reading data from it should be added to the
setup()andloop()functions, respectively. - The DHT22 requires a library for interfacing with the Arduino, which should be included at the beginning of the sketch.
- Proper error handling and data validation should be implemented to ensure reliable operation of the circuit.