
Circuit Documentation
Summary
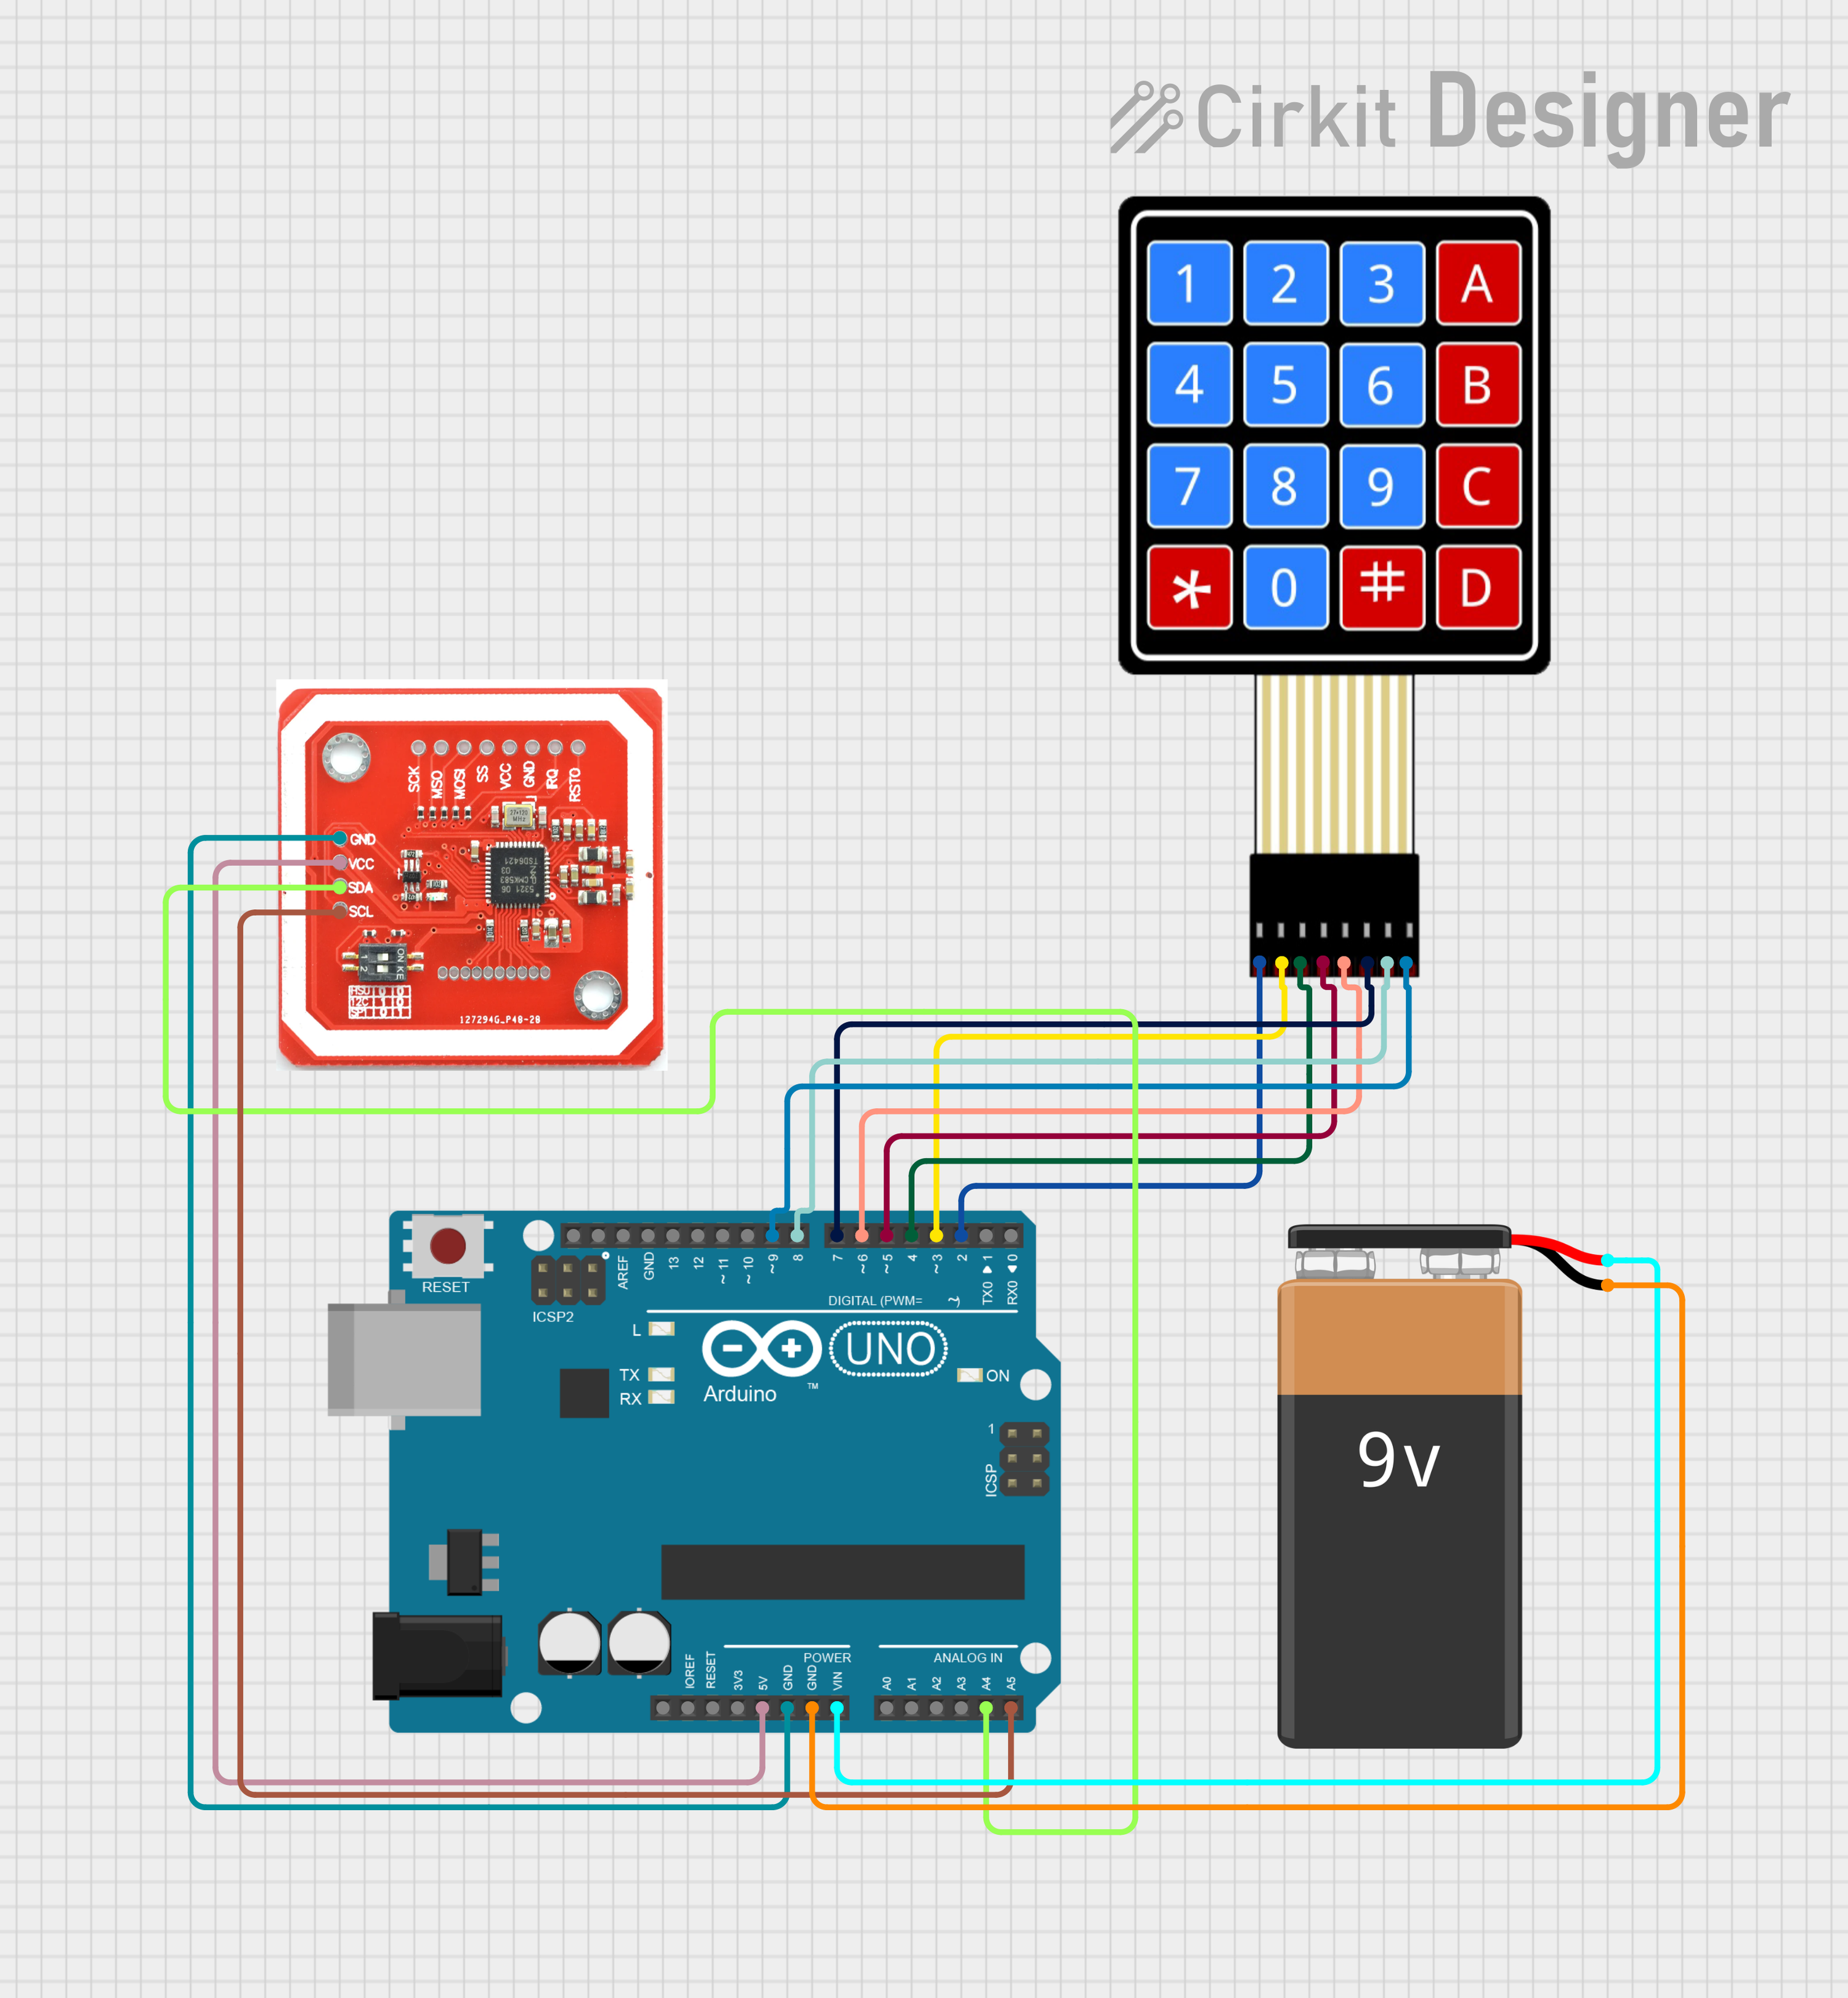
The circuit in question is designed to interface an Arduino UNO with a 4x4 Membrane Matrix Keypad and an NFC/RFID reader. The Arduino UNO is powered by a 9V battery and communicates with the NFC/RFID reader via I2C protocol using the A4 (SDA) and A5 (SCL) pins. The keypad is connected to the digital pins D2 to D9 on the Arduino UNO. The circuit is intended to capture user input from the keypad and read NFC tags using the NFC/RFID reader, displaying the results on an LCD screen.
Component List
Arduino UNO
- Microcontroller board based on the ATmega328P
- It has 14 digital input/output pins, 6 analog inputs, a 16 MHz quartz crystal, a USB connection, a power jack, an ICSP header, and a reset button.
4X4 Membrane Matrix Keypad
- A 16-button keypad that provides a useful human interface component for projects.
- It has 8 pins to interface with the microcontroller: 4 row pins and 4 column pins.
NFC/RFID reader
- A module that operates at 13.56 MHz and is capable of reading NFC/RFID tags.
- It has 4 pins for interfacing: GND, VCC, SDA, and SCL.
9V Battery
- A standard 9V battery used to power the Arduino UNO.
- It has 2 pins: positive (+) and negative (-).
Wiring Details
Arduino UNO
- 5V connected to NFC/RFID reader VCC
- GND connected to NFC/RFID reader GND and 9V Battery negative (-)
- Vin connected to 9V Battery positive (+)
- A4 (SDA) connected to NFC/RFID reader SDA
- A5 (SCL) connected to NFC/RFID reader SCL
- D2 to D9 connected to the 4X4 Membrane Matrix Keypad pins R1 to C4 respectively
4X4 Membrane Matrix Keypad
- R1 to R4 connected to Arduino UNO pins D2 to D5 respectively
- C1 to C4 connected to Arduino UNO pins D6 to D9 respectively
NFC/RFID reader
- GND connected to Arduino UNO GND
- VCC connected to Arduino UNO 5V
- SDA connected to Arduino UNO A4 (SDA)
- SCL connected to Arduino UNO A5 (SCL)
9V Battery
- + connected to Arduino UNO Vin
- - connected to Arduino UNO GND
Documented Code
Arduino UNO Code
#include <Wire.h>
#include <Keypad.h>
#include <LiquidCrystal.h>
#include <Adafruit_PN532.h>

// Keypad configuration
const byte ROWS = 4; // Four rows
const byte COLS = 4; // Four columns
char keys[ROWS][COLS] = {
  {'1', '2', '3', 'A'},
  {'4', '5', '6', 'B'},
  {'7', '8', '9', 'C'},
  {'*', '0', '#', 'D'}
};
byte rowPins[ROWS] = {9, 8, 7, 6}; // Connect to the row pinouts of the keypad
byte colPins[COLS] = {5, 4, 3, 2}; // Connect to the column pinouts of the keypad

Keypad keypad = Keypad(makeKeymap(keys), rowPins, colPins, ROWS, COLS);

// LCD configuration
LiquidCrystal lcd(12, 11, 5, 4, 3, 2); // Adjust pins as needed

// NFC configuration
#define SDA_PIN 10
#define SCL_PIN 13
Adafruit_PN532 nfc(SDA_PIN, SCL_PIN);

void setup() {
  lcd.begin(16, 2); // Initialize LCD
  nfc.begin();      // Initialize NFC
  lcd.print("Ready!");
}

void loop() {
  // Check for keypad input
  char key = keypad.getKey();
  if (key) {
    lcd.clear();
    lcd.print("Key Pressed: ");
    lcd.print(key);
    delay(1000); // Display for a while
  }

  // Check for NFC tag
  if (nfc.tagPresent()) {
    // read the NFC tag ID
    String tagID = nfc.readPassiveTargetID(PN532_MIFARE_ISO14443A);
    lcd.clear();
    lcd.print("NFC ID: ");
    lcd.print(tagID);
    delay(2000); // Display for a while
  }
}
4X4 Membrane Matrix Keypad Code
void setup() {
  // put your setup code here, to run once:

}

void loop() {
  // put your main code here, to run repeatedly:

}
(Note: The code for the 4X4 Membrane Matrix Keypad is minimal and does not include functionality. It is likely that the keypad is intended to be used with the Arduino UNO code provided above.)