
Arduino UNO Controlled Gas Detection System with Servo and Buzzer Alerts
View and Edit Project In Cirkit Designer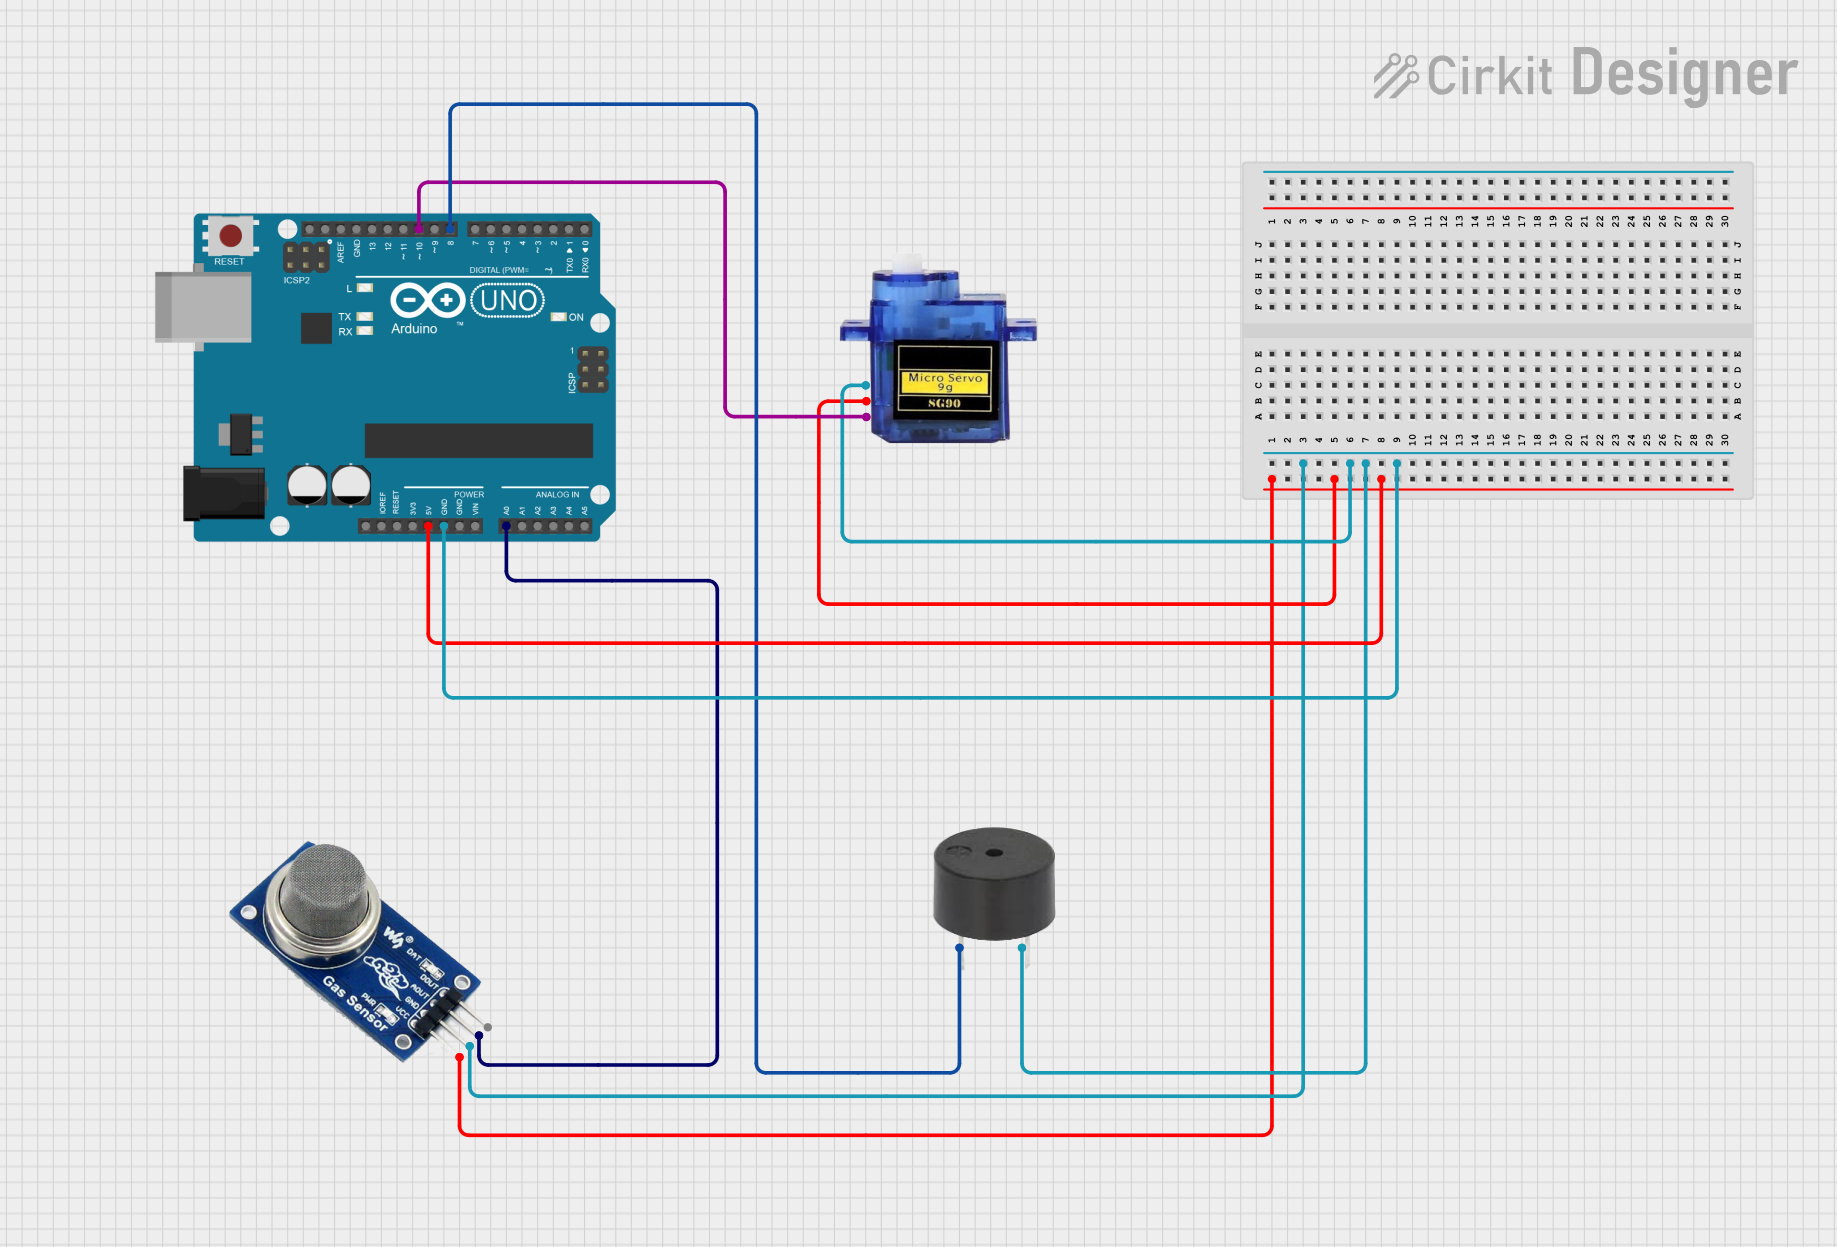
Circuit Documentation
Summary
The circuit in question is composed of an Arduino UNO microcontroller, a Micro servo 9G, a buzzer, and an MQ2 gas sensor. The Arduino UNO acts as the central processing unit, controlling the servo and buzzer, and reading data from the MQ2 sensor. The servo is controlled via a PWM signal, the buzzer is toggled on or off, and the MQ2 sensor provides analog data related to gas concentration levels. The power distribution is managed through the 5V and GND pins of the Arduino, which are shared with the servo and the MQ2 sensor. The buzzer is also connected to the GND pin of the Arduino for its operation.
Component List
Arduino UNO
- Description: A microcontroller board based on the ATmega328P.
- Pins Used: IOREF, Reset, 3.3V, 5V, GND, Vin, A0-A5, SCL, SDA, AREF, D0-D13.
Micro servo 9G
- Description: A small and lightweight servo motor suitable for various applications.
- Pins Used: GND, +5V, PWM.
Buzzer
- Description: An electronic buzzer capable of producing a tone when powered.
- Pins Used: PIN, GND.
MQ2 Gas Sensor
- Description: A gas sensor used for detecting a variety of gases including LPG, smoke, and alcohol vapor.
- Pins Used: VCC, GND, AOUT, DOUT.
Wiring Details
Arduino UNO
- 5V connected to Micro servo 9G (+5V) and MQ2 (VCC).
- GND connected to Micro servo 9G (GND), buzzer (GND), and MQ2 (GND).
- A0 connected to MQ2 (AOUT).
- D10 connected to Micro servo 9G (PWM).
- D8 connected to buzzer (PIN).
Micro servo 9G
- GND connected to Arduino UNO (GND).
- +5V connected to Arduino UNO (5V).
- PWM connected to Arduino UNO (D10).
Buzzer
- PIN connected to Arduino UNO (D8).
- GND connected to Arduino UNO (GND).
MQ2 Gas Sensor
- VCC connected to Arduino UNO (5V).
- GND connected to Arduino UNO (GND).
- AOUT connected to Arduino UNO (A0).
Documented Code
Arduino UNO Code (sketch.ino)
void setup() {
  // put your setup code here, to run once:

}

void loop() {
  // put your main code here, to run repeatedly:

}
This code template provides the basic structure for an Arduino sketch, with setup() function to initialize settings and loop() function to contain the main logic that will run continuously. Specific functionality for controlling the servo, reading from the MQ2 sensor, and toggling the buzzer should be implemented within these functions.