
Circuit Documentation
Summary
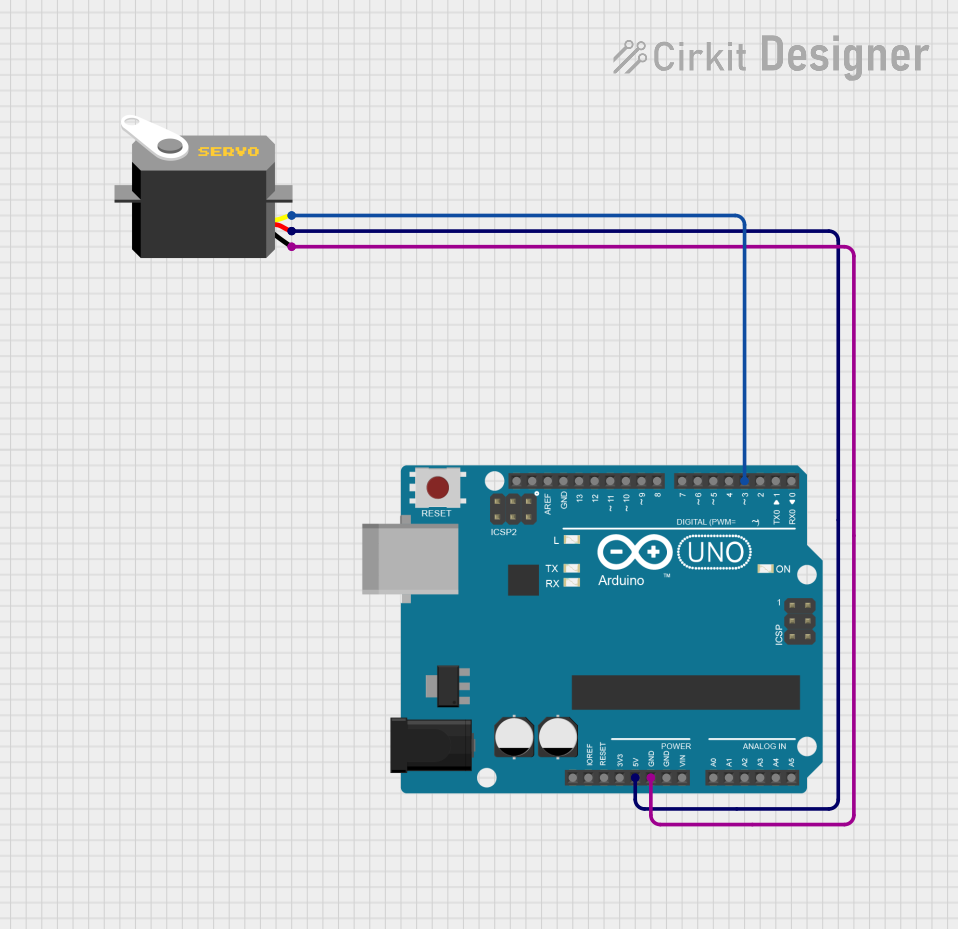
This document provides a detailed overview of a simple circuit that includes an Arduino UNO microcontroller and a servo motor. The Arduino UNO is used to control the servo motor by sending pulse-width modulation (PWM) signals through one of its digital pins. The servo motor is powered directly from the Arduino's 5V output. This setup is commonly used in hobbyist projects for controlling mechanical components such as robotic arms, small fans, or actuators.
Component List
Arduino UNO
- Description: A microcontroller board based on the ATmega328P.
- Pins: UNUSED, IOREF, Reset, 3.3V, 5V, GND, Vin, A0-A5, SCL, SDA, AREF, D0-D13
- Purpose: Acts as the central processing unit of the circuit, running the user-defined code to interact with connected devices, such as the servo motor.
Servo
- Description: A rotary actuator or linear actuator that allows for precise control of angular or linear position.
- Pins: gnd, vcc, pulse
- Purpose: To perform mechanical actions as instructed by the control signals from the Arduino UNO.
Wiring Details
Arduino UNO
- 5V: Provides power to the servo motor.
- GND: Common ground with the servo motor.
- D3: Sends PWM signals to control the servo motor.
Servo
- vcc: Connected to the 5V output from the Arduino UNO to receive power.
- gnd: Connected to the ground (GND) on the Arduino UNO to complete the power circuit.
- pulse: Receives PWM control signals from digital pin D3 of the Arduino UNO.
Documented Code
Arduino UNO Code - sketch.ino
void setup() {
  // put your setup code here, to run once:

}

void loop() {
  // put your main code here, to run repeatedly:

}
This code template provides the basic structure for an Arduino sketch, with setup() function to initialize settings once and a loop() function that runs continuously. To control the servo, code for generating PWM signals on pin D3 should be added to the loop() function.
Additional Notes
- The provided code is a template and requires further implementation for specific servo control.
- The
documentation.txtfile is empty and thus not included in this document. - The circuit design and code should be reviewed and tested to ensure proper operation before deployment.