
Circuit Documentation
Summary of the Circuit
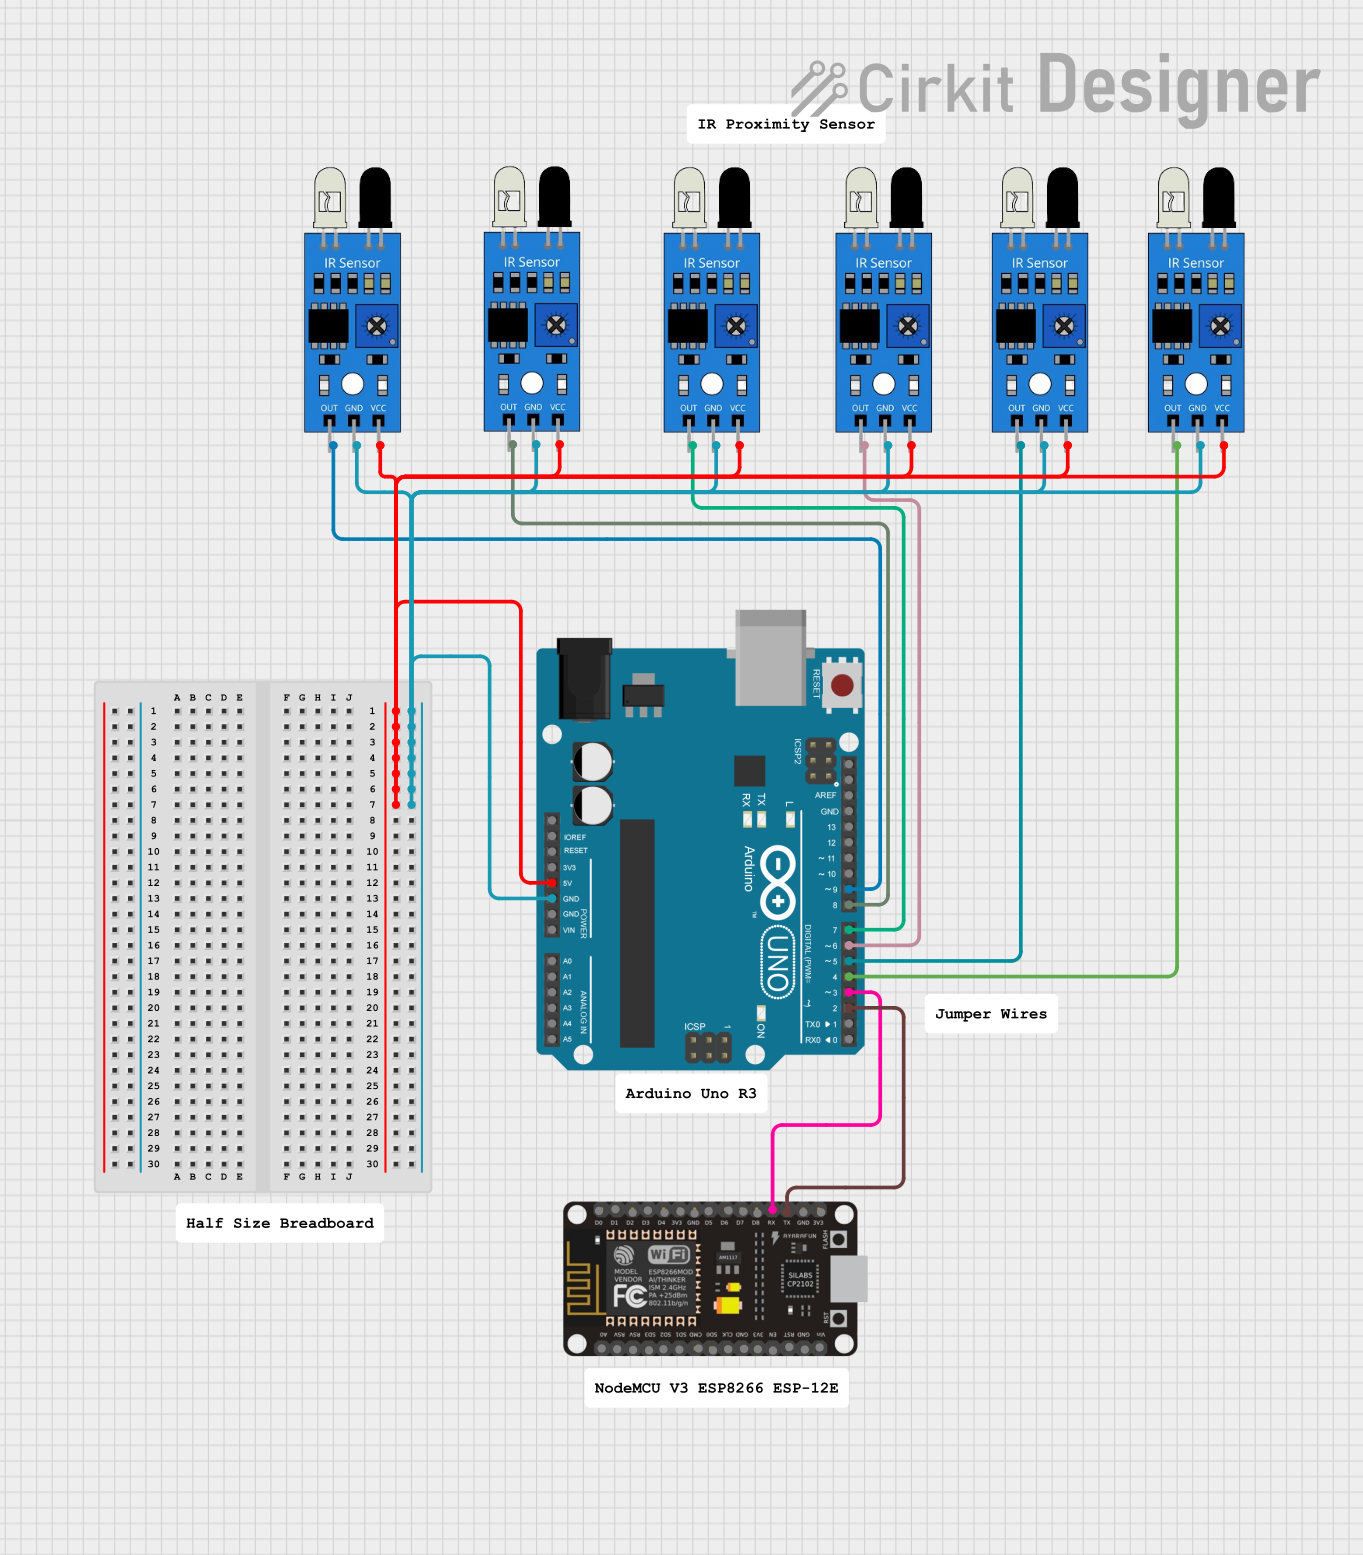
This circuit integrates an Arduino UNO with multiple infrared (IR) sensors and an ESP8266 NodeMCU module. The Arduino UNO serves as the central processing unit, interfacing with the IR sensors to receive input signals. The ESP8266 NodeMCU module is connected to the Arduino UNO for potential WiFi capabilities. The IR sensors are powered by the 5V output from the Arduino UNO and are grounded to the common ground of the circuit. The output pins of the IR sensors are connected to various digital input pins on the Arduino UNO to read the sensors' states. The ESP8266 NodeMCU's RX and TX pins are connected to the Arduino's D3 and D2 pins, respectively, for serial communication.
Component List
- Arduino UNO: A microcontroller board based on the ATmega328P, featuring digital and analog I/O pins.
- IR Sensors: Sensors that detect infrared light to sense the presence of objects or motion.
- ESP8266 NodeMCU: A low-cost Wi-Fi microchip with full TCP/IP stack and microcontroller capability.
Wiring Details
Arduino UNO
- 5V: Powers the VCC pins of all IR sensors.
- GND: Common ground for all IR sensors and the ESP8266 NodeMCU.
- D9: Connected to the output of one IR sensor.
- D8: Connected to the output of another IR sensor.
- D7: Connected to the output of another IR sensor.
- D6: Connected to the output of another IR sensor.
- D5: Connected to the output of another IR sensor.
- D4: Connected to the output of another IR sensor.
- D3: Connected to the RX pin of the ESP8266 NodeMCU.
- D2: Connected to the TX pin of the ESP8266 NodeMCU.
IR Sensors
- VCC: Connected to the 5V output from the Arduino UNO.
- GND: Connected to the common ground.
- OUT: Each sensor's output is connected to a unique digital input pin on the Arduino UNO (D4 to D9).
ESP8266 NodeMCU
- RX: Connected to the D3 pin of the Arduino UNO.
- TX: Connected to the D2 pin of the Arduino UNO.
- 3V3: Not connected in this circuit.
- GND: Connected to the common ground.
- Other pins are not used in this circuit.
Documented Code
Arduino UNO Code (sketch.ino)
void setup() {
  // put your setup code here, to run once:

}

void loop() {
  // put your main code here, to run repeatedly:

}
Note: The provided code for the Arduino UNO is a template with empty setup and loop functions. The user is expected to fill in the code to initialize the pins connected to the IR sensors as inputs and to handle the communication with the ESP8266 NodeMCU.
ESP8266 NodeMCU Code
No code was provided for the ESP8266 NodeMCU.
End of documentation.