
Arduino UNO-Based Smart Weather Station with IR and Rain Sensors
View and Edit Project In Cirkit Designer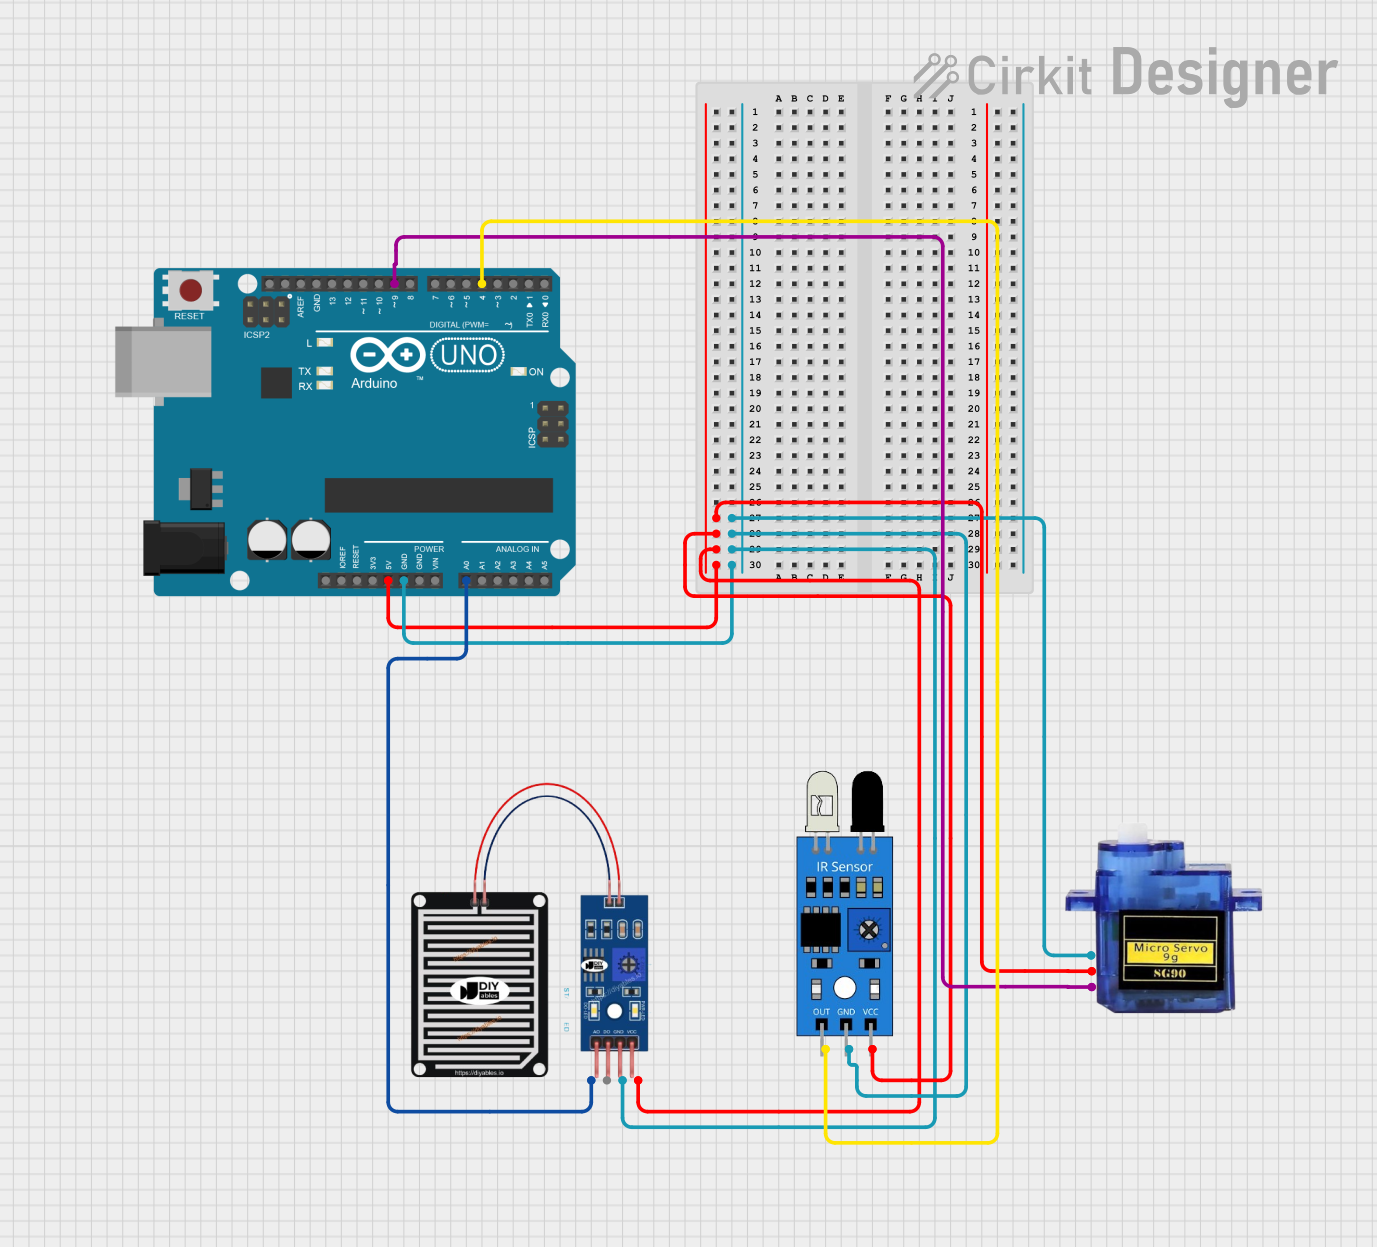
Circuit Documentation
Summary
This circuit involves an Arduino UNO microcontroller interfacing with a Micro Servo 9G, an IR sensor, and a Rain Sensor. The Arduino UNO provides power and control signals to the sensors and the servo motor. The IR sensor detects obstacles, the Rain Sensor detects moisture levels, and the Micro Servo 9G performs mechanical movements based on the control signals from the Arduino.
Component List
Arduino UNO
- Description: A microcontroller board based on the ATmega328P.
- Pins: UNUSED, IOREF, Reset, 3.3V, 5V, GND, Vin, A0, A1, A2, A3, A4, A5, SCL, SDA, AREF, D13, D12, D11, D10, D9, D8, D7, D6, D5, D4, D3, D2, D1, D0
Micro Servo 9G
- Description: A small servo motor used for precise control of angular position.
- Pins: GND, +5V, PWM
IR Sensor
- Description: An infrared sensor used for obstacle detection.
- Pins: out, gnd, vcc
Rain Sensor
- Description: A sensor used to detect the presence of rain or moisture.
- Pins: AO, DO, GRD, VCC
Wiring Details
Arduino UNO
- 5V: Connected to +5V of Micro Servo 9G, vcc of IR Sensor, VCC of Rain Sensor
- GND: Connected to GND of Micro Servo 9G, gnd of IR Sensor, GRD of Rain Sensor
- A0: Connected to AO of Rain Sensor
- D9: Connected to PWM of Micro Servo 9G
- D4: Connected to out of IR Sensor
Micro Servo 9G
- GND: Connected to GND of Arduino UNO
- +5V: Connected to 5V of Arduino UNO
- PWM: Connected to D9 of Arduino UNO
IR Sensor
- out: Connected to D4 of Arduino UNO
- gnd: Connected to GND of Arduino UNO
- vcc: Connected to 5V of Arduino UNO
Rain Sensor
- AO: Connected to A0 of Arduino UNO
- DO: Not connected
- GRD: Connected to GND of Arduino UNO
- VCC: Connected to 5V of Arduino UNO
Code Documentation
Arduino UNO Code
sketch.ino
void setup() {
  // put your setup code here, to run once:

}

void loop() {
  // put your main code here, to run repeatedly:

}
documentation.txt