
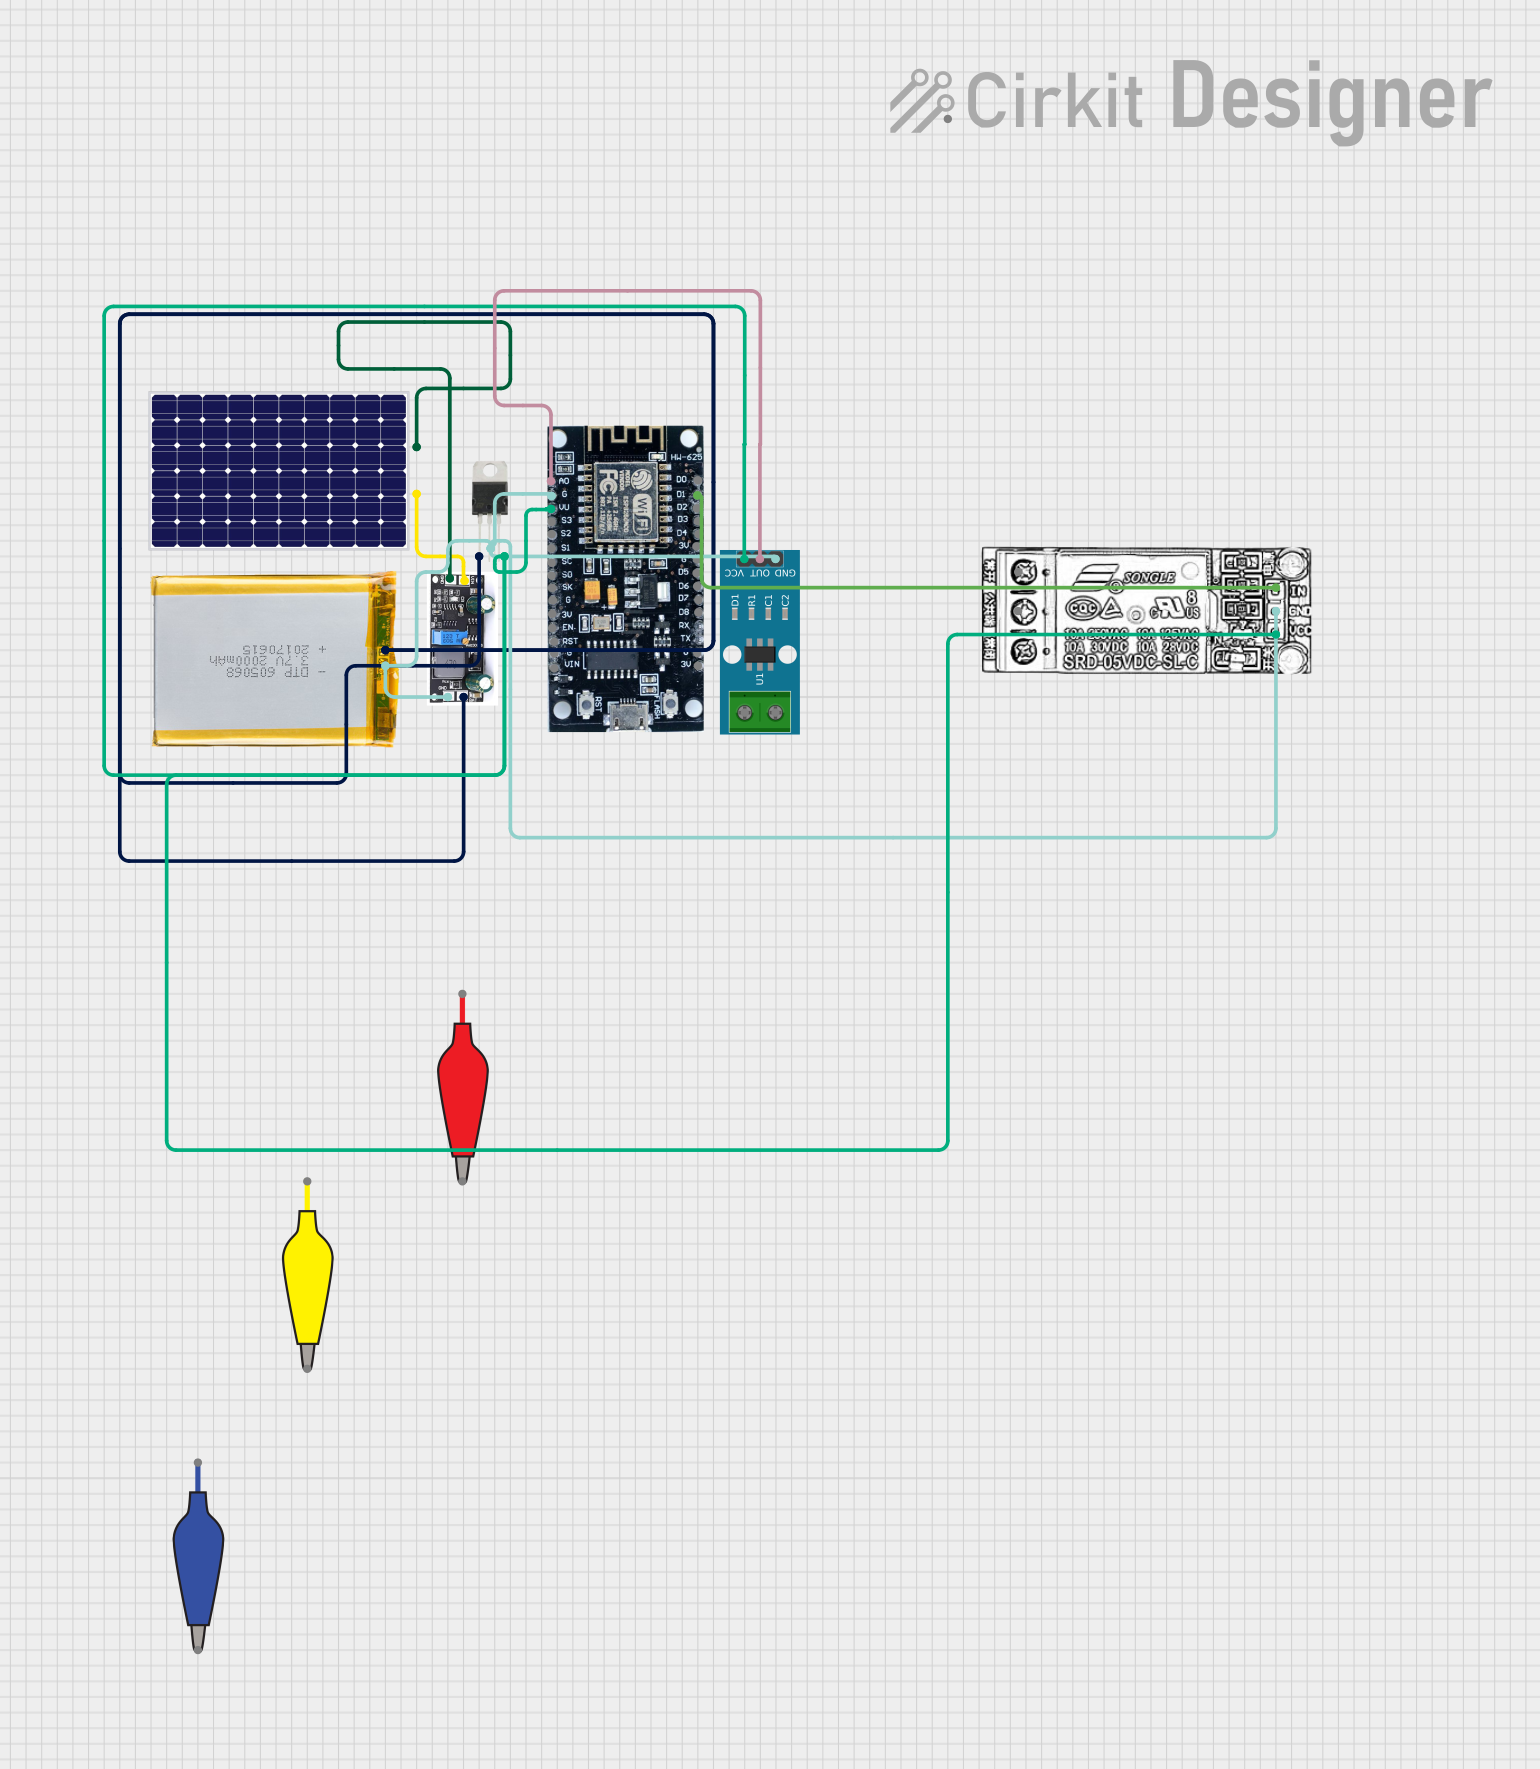
Circuit Documentation
Summary of the Circuit
This circuit is designed to harness solar power to charge a 2000mAh battery and provide a regulated 5V output to power an ESP8266 microcontroller and a relay module. The ESP8266 reads the output from an ACS712 current sensor and controls the relay based on the current detected. The system is capable of connecting to a WiFi network and sending signals to a server when the current threshold is exceeded.
Component List
Solar Panel
- Description: A photovoltaic panel that converts sunlight into electrical energy.
- Pins:
+,-
LM7805 Voltage Regulator
- Description: A fixed-voltage integrated circuit voltage regulator designed to provide a stable 5V DC output.
- Pins:
IN PIN,OUT PIN,GND
Charge Controller
- Description: Manages the power going into the battery bank from the solar panel.
- Pins:
GND,BAT,Vin
ACS712 Current Sensor
- Description: A hall-effect-based linear current sensor capable of measuring both AC and DC currents.
- Pins:
1,2,GND,OUT,VCC
2000mAh Battery
- Description: A rechargeable battery that stores electrical energy.
- Pins:
VCC,GND
ESP8266 Microcontroller
- Description: A low-cost Wi-Fi microchip with full TCP/IP stack and microcontroller capability.
- Pins:
3V,G,D8,D7,D6,D5,D4,D3,D2,D1,D0,A0,S3,S2,S1,SC,S0,SK,EN,VIN,RST,VU
Relay Module
- Description: An electrically operated switch that allows you to turn on or off a circuit using voltage and/or current much higher than a microcontroller can handle.
- Pins:
NC,COM,INPUT,GND,VCC
Alligator Clip Cables (Blue, Red, Yellow)
- Description: Used to connect components temporarily without soldering.
- Pins:
Pin,Alligator
Wiring Details
Solar Panel
+connected to Charge ControllerVin-connected to Charge ControllerGND
LM7805 Voltage Regulator
IN PINconnected to 2000mAh BatteryGNDOUT PINconnected to ACS712 Current SensorVCC, Relay ModuleVCC, and ESP8266VUGNDconnected to ACS712 Current SensorGND, 2000mAh BatteryVCC, Charge ControllerGND, Relay ModuleGND, and ESP8266G
Charge Controller
GNDconnected to Solar Panel-, ACS712 Current SensorGND, 2000mAh BatteryVCC, LM7805GND, Relay ModuleGND, and ESP8266GBATconnected to 2000mAh BatteryGNDVinconnected to Solar Panel+
ACS712 Current Sensor
GNDconnected to 2000mAh BatteryVCC, LM7805GND, Charge ControllerGND, Relay ModuleGND, and ESP8266GOUTconnected to ESP8266A0VCCconnected to LM7805OUT PIN
2000mAh Battery
VCCconnected to ACS712 Current SensorGND, LM7805GND, and Charge ControllerGNDGNDconnected to LM7805IN PINand Charge ControllerBAT
ESP8266 Microcontroller
Gconnected to ACS712 Current SensorGND, LM7805GND, Charge ControllerGND, and Relay ModuleGNDVUconnected to LM7805OUT PINA0connected to ACS712 Current SensorOUTD1connected to Relay ModuleINPUT
Relay Module
GNDconnected to ACS712 Current SensorGND, LM7805GND, Charge ControllerGND, and ESP8266GVCCconnected to LM7805OUT PININPUTconnected to ESP8266D1
Documented Code
#include <ESP8266WiFi.h>
#include <ESP8266HTTPClient.h>

const int currentSensorPin = A0; // Analog pin connected to current sensor
const int relayPin = D1;         // Digital pin connected to relay module
const int threshold = 512;       // Threshold value for current detection

const char* ssid = "your_SSID";
const char* password = "12345678";
const char* serverUrl = "http://your_server/turn_off_switch";

void setup() {
  pinMode(currentSensorPin, INPUT);
  pinMode(relayPin, OUTPUT);
  digitalWrite(relayPin, LOW); // Ensure relay is off initially

  Serial.begin(115200);
  WiFi.begin(ssid, password);

  while (WiFi.status() != WL_CONNECTED) {
    delay(1000);
    Serial.println("Connecting to WiFi...");
  }
  Serial.println("Connected to WiFi");
}

void loop() {
  int sensorValue = analogRead(currentSensorPin);
  Serial.println(sensorValue);

  if (sensorValue > threshold) {
    // Current detected at the first naked wire
    digitalWrite(relayPin, HIGH); // Turn on the relay (or off, depending on your relay type)
    sendSignalToServer();
  } else {
    digitalWrite(relayPin, LOW); // Ensure relay is off
  }

  delay(1000); // Adjust delay as needed
}

void sendSignalToServer() {
  if (WiFi.status() == WL_CONNECTED) {
    HTTPClient http;
    http.begin(serverUrl);
    int httpCode = http.GET();

    if (httpCode > 0) {
      String payload = http.getString();
      Serial.println(payload);
    } else {
      Serial.println("Error in sending signal");
    }
    http.end();
  }
}
This code is designed to run on the ESP8266 microcontroller. It initializes the WiFi connection, reads the current sensor value, and controls the relay based on the current threshold. If the current exceeds the threshold, it sends a signal to a server.