
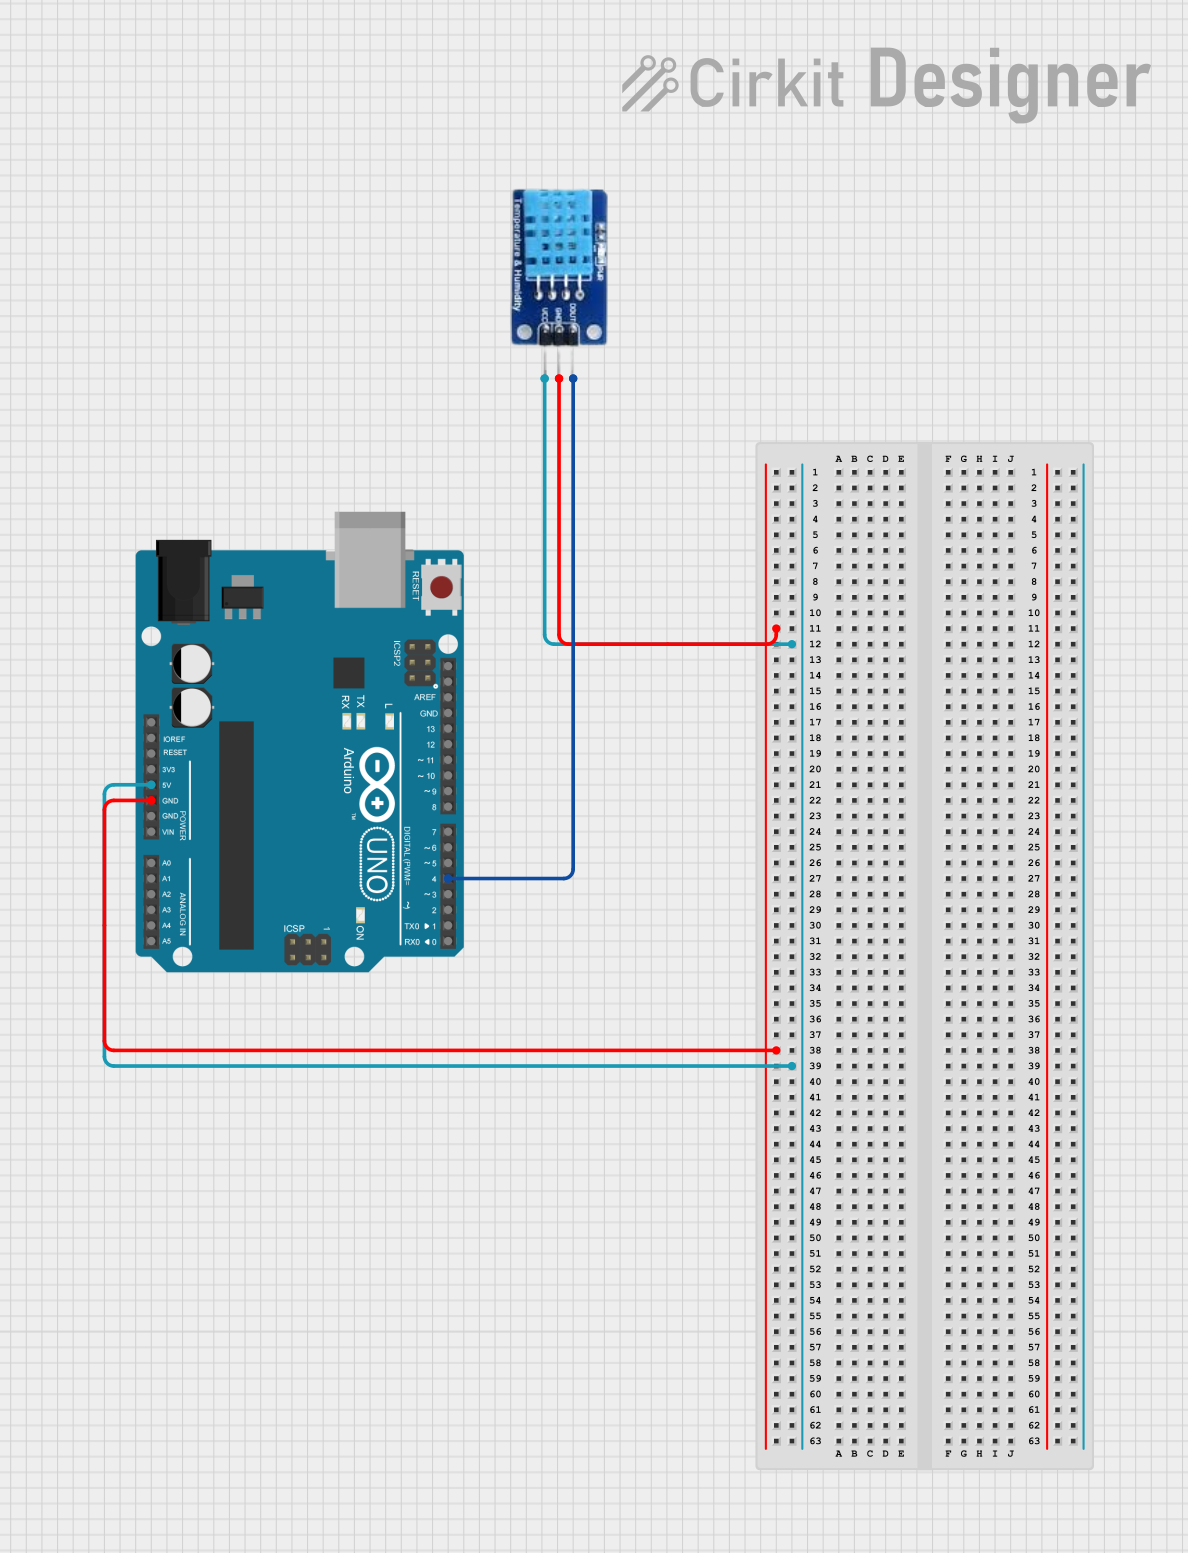
Circuit Documentation
Summary
This document provides a detailed overview of a simple circuit that interfaces an Arduino UNO with a DHT11 temperature and humidity sensor. The Arduino UNO serves as the microcontroller for reading data from the DHT11 sensor and transmitting the information via its serial interface. The circuit is powered by the Arduino UNO's 5V output, and the sensor's data pin is connected to one of the digital I/O pins on the Arduino.
Component List
Arduino UNO
- Description: A microcontroller board based on the ATmega328P.
- Pins Used:
IOREFReset3.3V5VGNDVinA0toA5SCLSDAAREFD13toD0
DHT11
- Description: A basic, ultra low-cost digital temperature and humidity sensor.
- Pins Used:
DATAGNDVCC
Wiring Details
Arduino UNO
5Vconnected to DHT11VCCGNDconnected to DHT11GNDD4connected to DHT11DATA
DHT11
VCCconnected to Arduino UNO5VGNDconnected to Arduino UNOGNDDATAconnected to Arduino UNOD4
Documented Code
The following code is written for the Arduino UNO to interface with the DHT11 sensor. It initializes the sensor and reads the temperature and humidity values, which are then printed to the serial monitor.
#include <dht11.h>
#define DHT11PIN 4

dht11 DHT11;

void setup()
{
  Serial.begin(9600);
}

void loop()
{
  Serial.println();

  int chk = DHT11.read(DHT11PIN);

  Serial.print("Humidity (%): ");
  Serial.println((float)DHT11.humidity, 2);

  Serial.print("Temperature (C): ");
  Serial.println((float)DHT11.temperature, 2);

  delay(2000);
}
The code includes the dht11.h library, which provides the necessary functions to communicate with the DHT11 sensor. The DHT11PIN macro is defined as pin 4, which corresponds to the digital I/O pin on the Arduino UNO that the sensor's data line is connected to. The setup() function initializes the serial communication at 9600 baud rate. The loop() function reads the sensor data and prints the humidity and temperature to the serial monitor every 2 seconds.