
Arduino UNO-Based Smart Irrigation System with Soil Moisture and Water Level Sensors
View and Edit Project In Cirkit Designer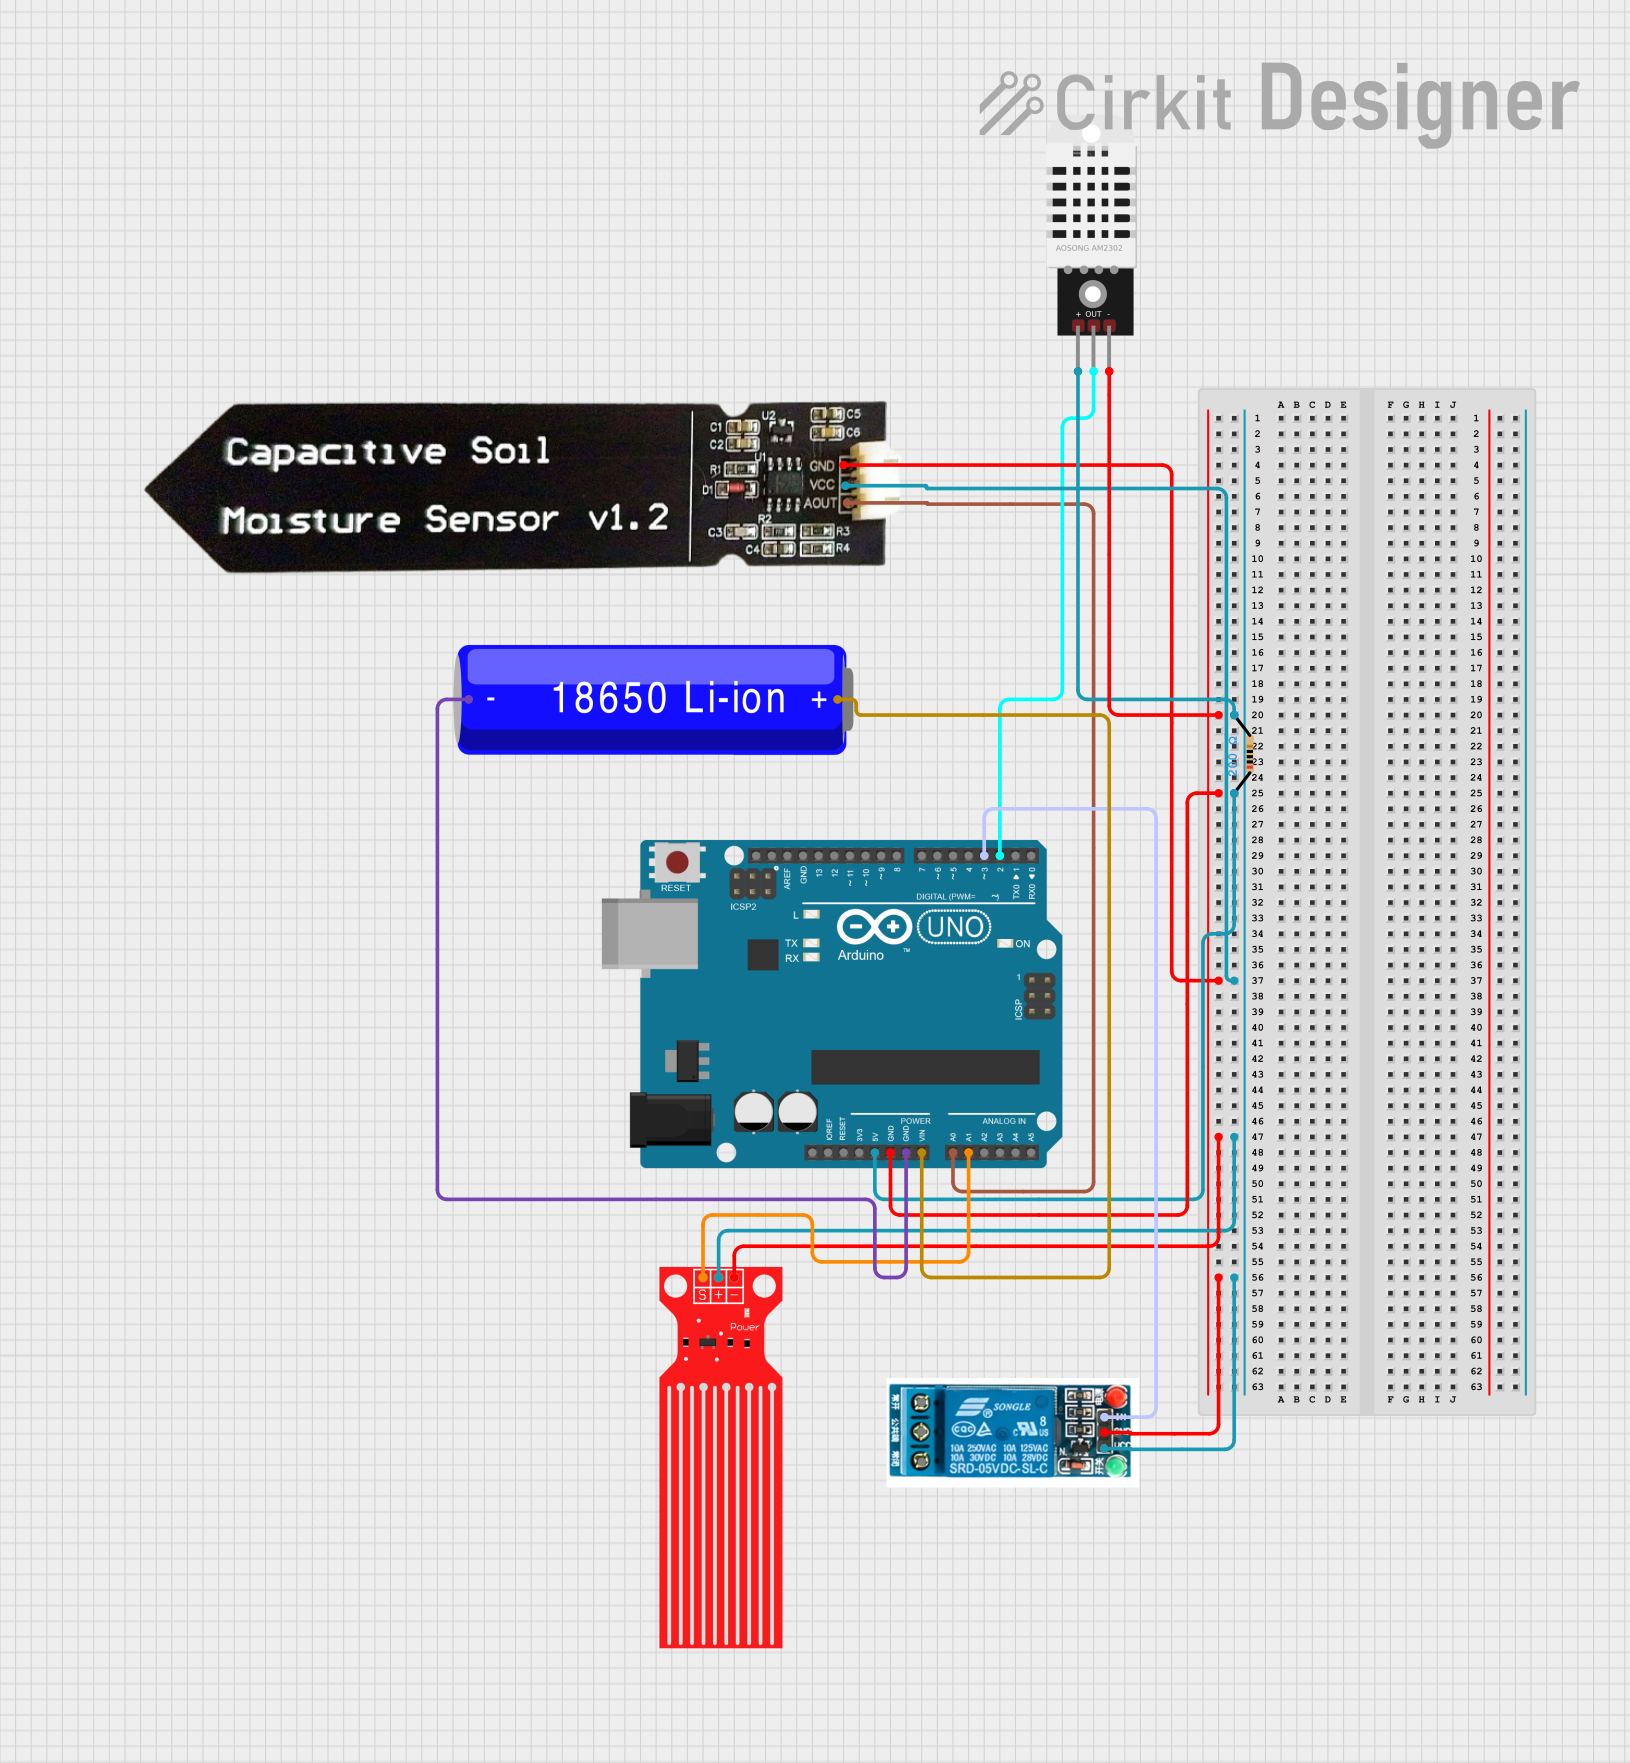
Circuit Documentation
Summary
This circuit is designed to monitor soil moisture, water level, and temperature/humidity using various sensors. The data is processed by an Arduino UNO, which also controls a 5V relay. The circuit is powered by a 18650 Li-ion battery.
Component List
Capacitive Soil Moisture Sensor V1.2
- Pins: GND, VCC, AOUT
- Description: Measures soil moisture levels.
- Purpose in Circuit: Provides analog output corresponding to soil moisture.
DHT22
- Pins: +, Out, -
- Description: Measures temperature and humidity.
- Purpose in Circuit: Provides digital output for temperature and humidity data.
Water Level Sensor
- Pins: SIG, VCC, GND
- Description: Measures water level.
- Purpose in Circuit: Provides analog output corresponding to water level.
Arduino UNO
- Pins: UNUSED, IOREF, Reset, 3.3V, 5V, GND, Vin, A0, A1, A2, A3, A4, A5, SCL, SDA, AREF, D13, D12, D11, D10, D9, D8, D7, D6, D5, D4, D3, D2, D1, D0
- Description: Microcontroller board.
- Purpose in Circuit: Central processing unit for the circuit.
5V Relay
- Pins: Normally Open, Common terminal, Normally Closed, In, GND, VCC
- Description: Electromechanical switch.
- Purpose in Circuit: Controls high-power devices.
18650 Li-ion Battery
- Pins: -, +
- Description: Rechargeable battery.
- Purpose in Circuit: Powers the circuit.
Resistor
- Pins: pin1, pin2
- Description: 200 Ohms resistor.
- Purpose in Circuit: Current limiting.
Wiring Details
Capacitive Soil Moisture Sensor V1.2
- GND connected to Arduino UNO GND
- VCC connected to Arduino UNO 5V
- AOUT connected to Arduino UNO A0
DHT22
- - connected to Arduino UNO GND
- + connected to Resistor pin1
- Out connected to Arduino UNO D2
- Resistor pin2 connected to Arduino UNO 5V
Water Level Sensor
- GND connected to Arduino UNO GND
- VCC connected to Arduino UNO 5V
- SIG connected to Arduino UNO A1
Arduino UNO
- GND connected to 18650 Li-ion Battery -
- Vin connected to 18650 Li-ion Battery +
- D3 connected to 5V Relay In
5V Relay
- GND connected to Arduino UNO GND
- VCC connected to Arduino UNO 5V
- In connected to Arduino UNO D3
18650 Li-ion Battery
- - connected to Arduino UNO GND
- + connected to Arduino UNO Vin
Resistor
- pin1 connected to DHT22 +
- pin2 connected to Arduino UNO 5V
Documented Code
Arduino UNO Code (sketch.ino)
void setup() {
  // put your setup code here, to run once:

}

void loop() {
  // put your main code here, to run repeatedly:

}
Additional Documentation (documentation.txt)
This documentation provides a comprehensive overview of the circuit, including a summary, detailed component list, wiring details, and the code used in the microcontroller.