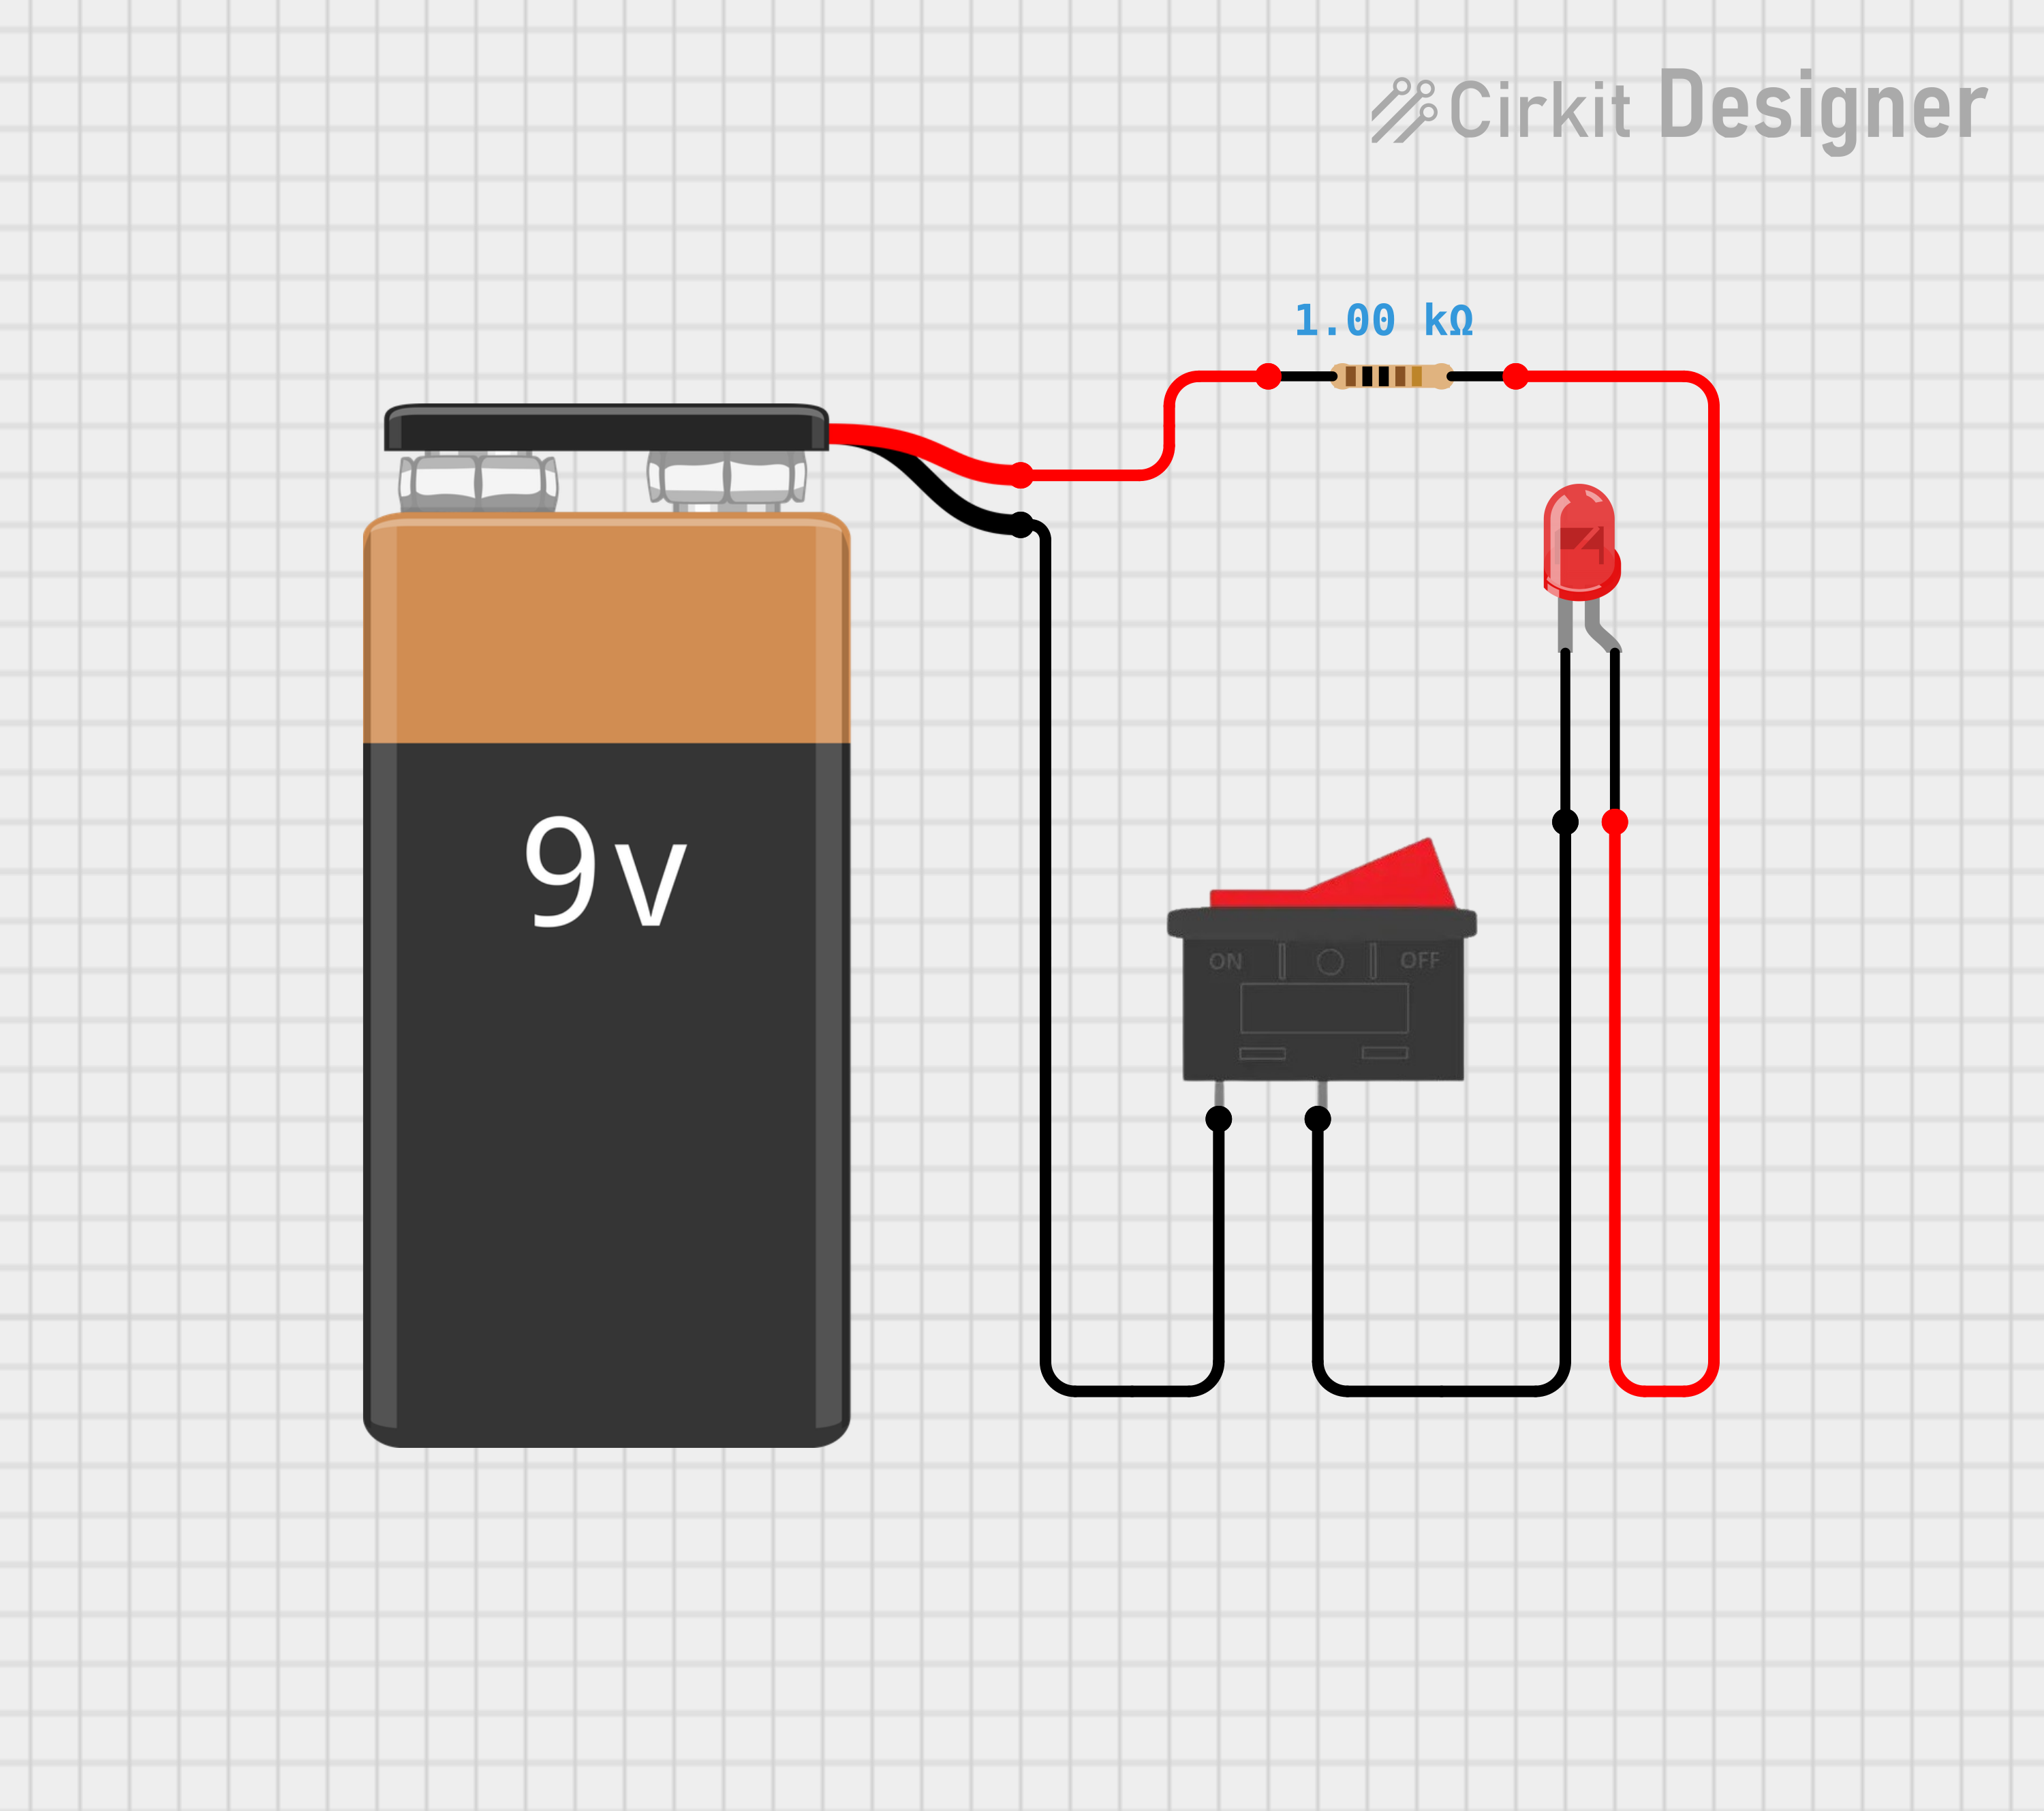
Simple LED Circuit with Rocker Switch and Resistor

Circuit Documentation
Summary of the Circuit
The circuit described by the provided inputs is a simple LED circuit with a power source, a switch, and a current-limiting resistor. The circuit uses a 9V battery to power a red LED. A rocker switch is used to control the power flow to the LED, allowing the user to turn the LED on and off. A resistor is included in series with the LED to limit the current and prevent damage to the LED.
Component List
9V Battery
- Description: A standard 9V battery used as the power source for the circuit.
LED: Two Pin (red)
- Description: A red light-emitting diode (LED) that emits light when powered.
- Purpose: To emit light when the circuit is powered and the switch is closed.
Rocker Switch
- Description: A simple on-off switch that can open or close the circuit.
- Purpose: To allow the user to control the power flow to the LED.
Resistor
- Description: A passive component used to limit the current through the LED.
- Properties: 1000 Ohms resistance.
- Purpose: To prevent excessive current from flowing through the LED, which could potentially damage it.
Wiring Details
9V Battery
- Negative Terminal (-): Connected to pin 1 of the Rocker Switch.
- Positive Terminal (+): Connected to pin 1 of the Resistor.
LED: Two Pin (red)
- Cathode: Connected to pin 2 of the Rocker Switch.
- Anode: Connected to pin 2 of the Resistor.
Rocker Switch
- Pin 1: Connected to the negative terminal of the 9V Battery.
- Pin 2: Connected to the cathode of the LED.
Resistor
- Pin 1: Connected to the positive terminal of the 9V Battery.
- Pin 2: Connected to the anode of the LED.
Documented Code
There is no microcontroller or embedded code associated with this circuit as per the provided inputs. Therefore, this section is not applicable to the current documentation.
This document provides a basic overview of the circuit, including the purpose and wiring of each component. If a microcontroller or additional functionality is added to the circuit in the future, the documentation should be updated accordingly to include the relevant code and its explanation.