
Circuit Documentation
Summary of the Circuit
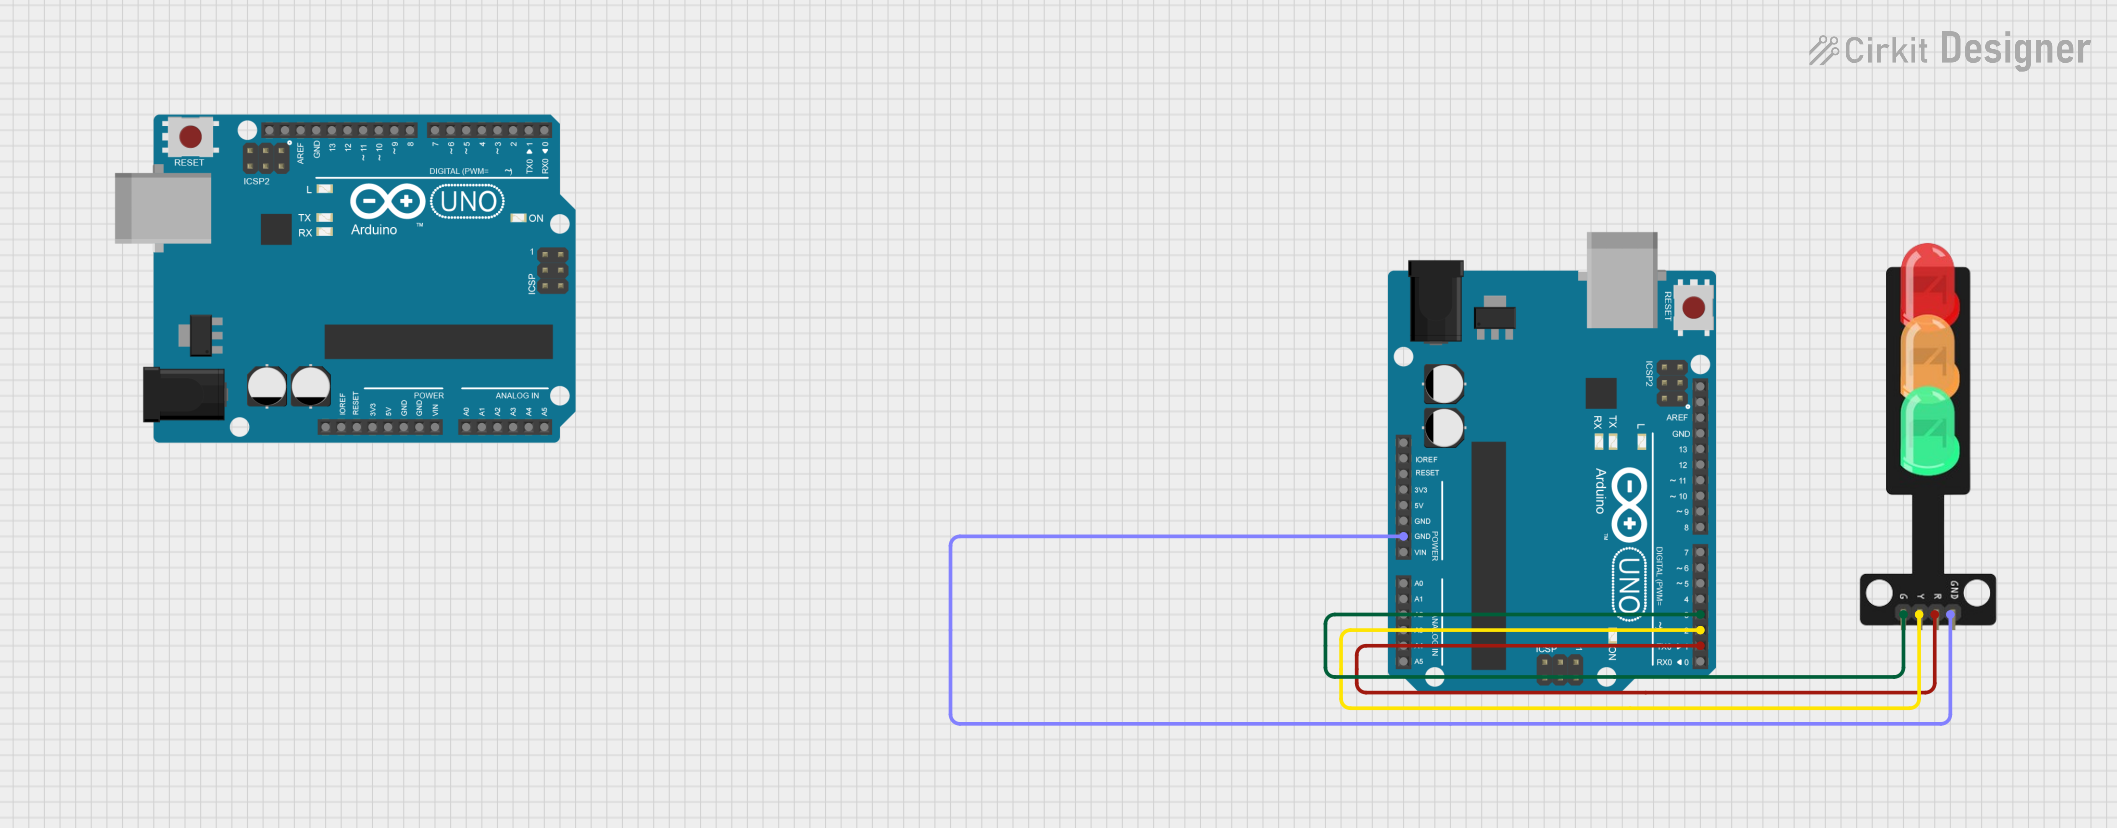
This circuit is designed to control a traffic light system using two Arduino UNO microcontrollers. The system operates a traffic light by cycling through green, yellow, and red LEDs in a predefined sequence. One Arduino UNO is programmed to control the sequence of the traffic light, while the purpose of the second Arduino UNO is not defined within the provided code.
Component List
Arduino UNO
- Description: A microcontroller board based on the ATmega328P.
- Purpose: One Arduino is used to control the traffic light sequence. The purpose of the second Arduino is unspecified.
- Pins: UNUSED, IOREF, Reset, 3.3V, 5V, GND, Vin, A0-A5, SCL, SDA, AREF, D0-D13
Traffic Light
- Description: A simple traffic light module with three LEDs (Green, Yellow, Red) and a common ground.
- Purpose: To display the traffic light sequence controlled by the Arduino UNO.
- Pins: Green, Yellow, Red, GND
Wiring Details
Arduino UNO (controlling the traffic light)
- GND connected to Traffic Light GND
- D3 connected to Traffic Light Green LED
- D2 connected to Traffic Light Yellow LED
- D1 connected to Traffic Light Red LED
Arduino UNO (unspecified purpose)
- No wiring details provided.
Traffic Light
- GND connected to Arduino UNO GND
- Green connected to Arduino UNO D3
- Yellow connected to Arduino UNO D2
- Red connected to Arduino UNO D1
Documented Code
Code for the Arduino UNO (controlling the traffic light)
/*
 * This Arduino sketch controls a traffic light system.
 * The sequence is as follows:
 * - Green LED on for 5 seconds
 * - Yellow LED on for 2 seconds
 * - Red LED on for 5 seconds
 * The sequence repeats indefinitely.
 */

// Pin definitions
const int greenLedPin = 3;
const int yellowLedPin = 2;
const int redLedPin = 1;

void setup() {
  // Initialize the LED pins as outputs
  pinMode(greenLedPin, OUTPUT);
  pinMode(yellowLedPin, OUTPUT);
  pinMode(redLedPin, OUTPUT);
}

void loop() {
  // Green LED on for 5 seconds
  digitalWrite(greenLedPin, HIGH);
  delay(5000);
  digitalWrite(greenLedPin, LOW);

  // Yellow LED on for 2 seconds
  digitalWrite(yellowLedPin, HIGH);
  delay(2000);
  digitalWrite(yellowLedPin, LOW);

  // Red LED on for 5 seconds
  digitalWrite(redLedPin, HIGH);
  delay(5000);
  digitalWrite(redLedPin, LOW);
}
Code for the Arduino UNO (unspecified purpose)
void setup() {
  // put your setup code here, to run once:

}

void loop() {
  // put your main code here, to run repeatedly:

}
The second Arduino UNO does not have a specified role in the circuit based on the provided code. It is initialized with an empty setup and loop function, indicating that it may be intended for future expansion or for a separate part of the project not included in the provided documentation.