
Arduino UNO-Based Laser Emitter with I2C LCD Display and Buzzer
View and Edit Project In Cirkit Designer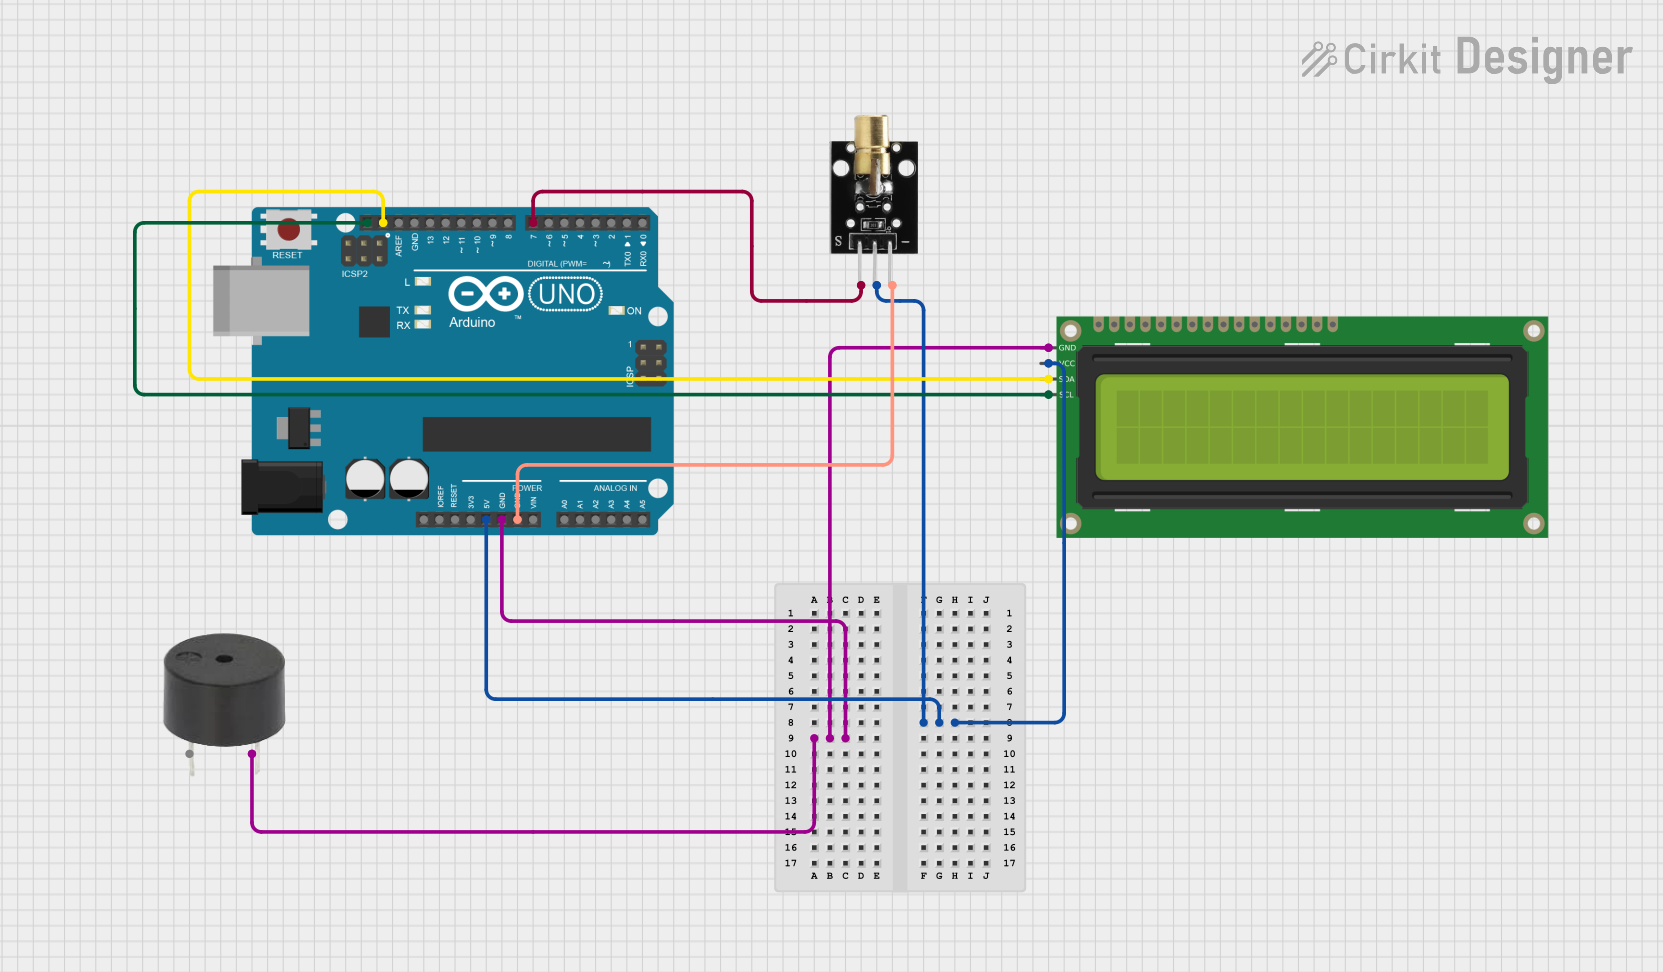
Circuit Documentation
Summary
This document provides a detailed overview of a circuit that includes an Arduino UNO, a 16x2 I2C LCD, a KY-008 Laser Emitter, and a buzzer. The document covers the components used, their wiring details, and the code running on the Arduino UNO.
Component List
Arduino UNO
- Description: A microcontroller board based on the ATmega328P.
- Pins: UNUSED, IOREF, Reset, 3.3V, 5V, GND, Vin, A0, A1, A2, A3, A4, A5, SCL, SDA, AREF, D13, D12, D11, D10, D9, D8, D7, D6, D5, D4, D3, D2, D1, D0
16x2 I2C LCD
- Description: A 16x2 character LCD display with I2C interface.
- Pins: GND, VCC, SDA, SCL
KY-008 Laser Emitter
- Description: A laser emitter module.
- Pins: SIG, 5v, GND
Buzzer
- Description: A simple buzzer for sound output.
- Pins: PIN, GND
Wiring Details
Arduino UNO
- 5V: Connected to VCC of 16x2 I2C LCD and 5v of KY-008 Laser Emitter
- GND: Connected to GND of 16x2 I2C LCD, GND of KY-008 Laser Emitter, and GND of buzzer
- SCL: Connected to SCL of 16x2 I2C LCD
- SDA: Connected to SDA of 16x2 I2C LCD
- D7: Connected to SIG of KY-008 Laser Emitter
16x2 I2C LCD
- VCC: Connected to 5V of Arduino UNO
- GND: Connected to GND of Arduino UNO
- SCL: Connected to SCL of Arduino UNO
- SDA: Connected to SDA of Arduino UNO
KY-008 Laser Emitter
- 5v: Connected to 5V of Arduino UNO
- GND: Connected to GND of Arduino UNO
- SIG: Connected to D7 of Arduino UNO
Buzzer
- PIN: Not connected
- GND: Connected to GND of Arduino UNO
Code
Arduino UNO Code
void setup() {
  // put your setup code here, to run once:

}

void loop() {
  // put your main code here, to run repeatedly:

}
This code is a basic template for the Arduino UNO. The setup function is used to initialize any settings, and the loop function runs continuously after the setup is complete. Currently, the code does not perform any specific actions.