
Circuit Documentation
Summary
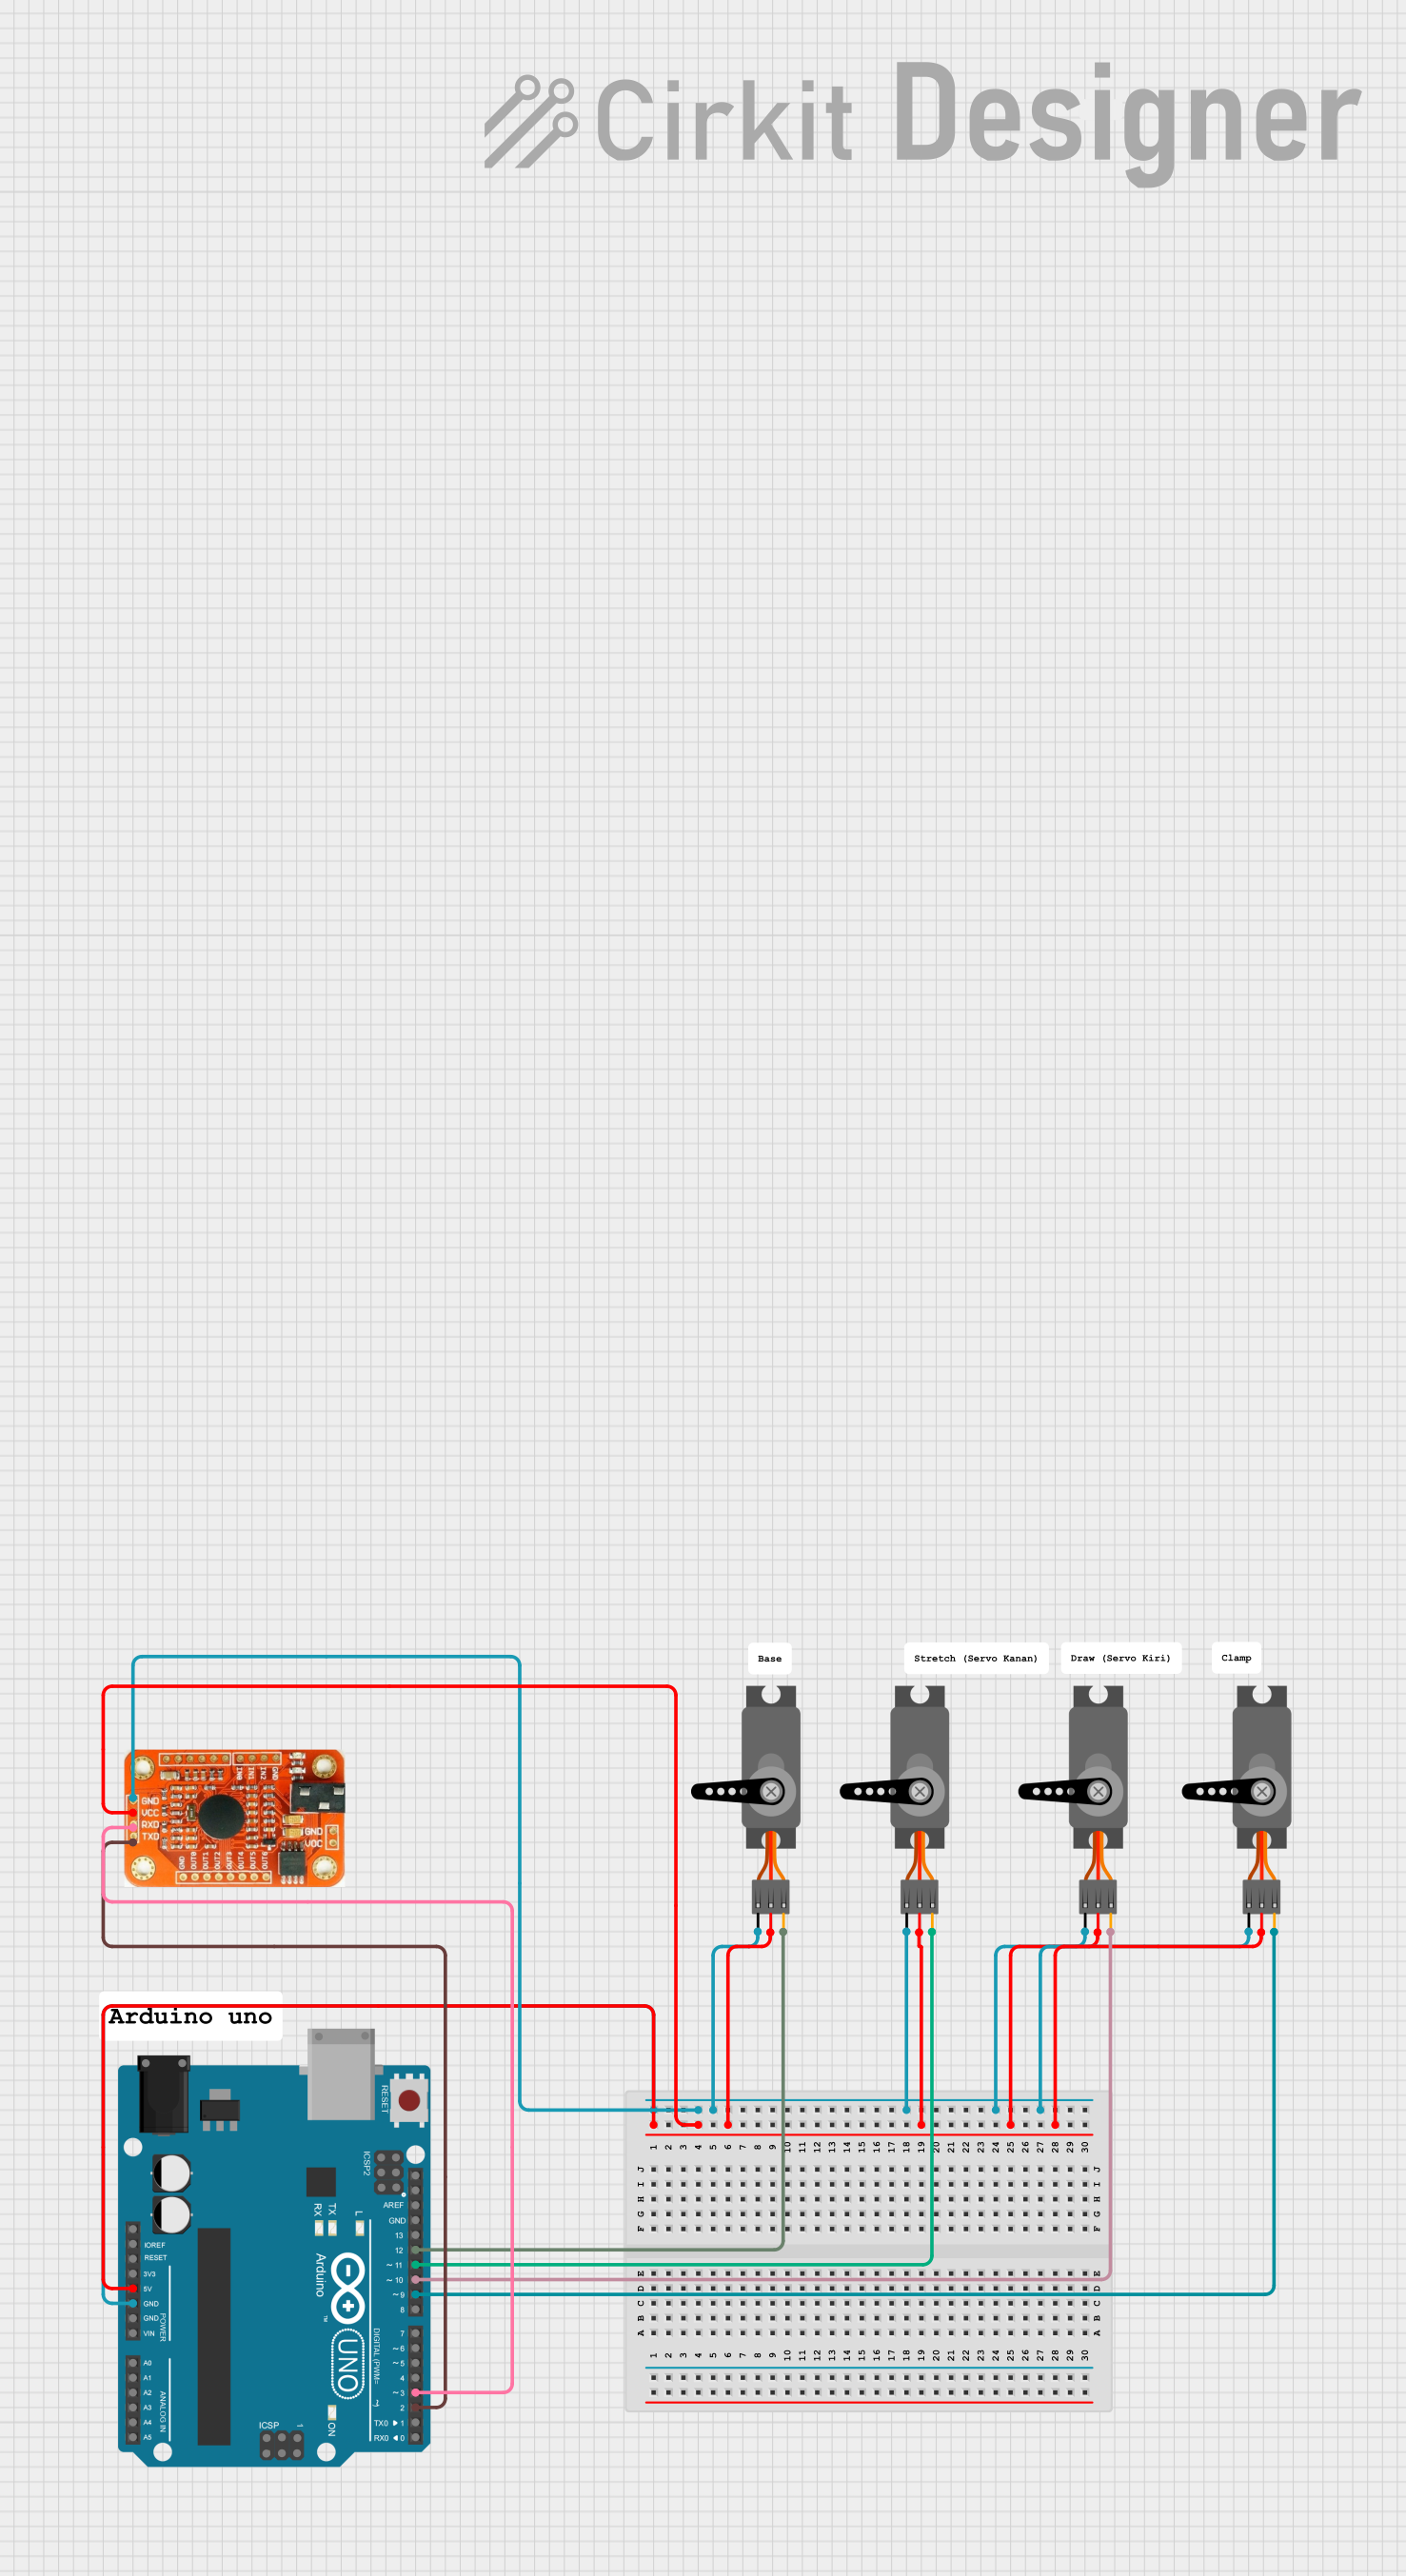
This circuit consists of an Arduino UNO microcontroller, a voice recognition module, and four servo motors. The Arduino UNO serves as the central controller, interfacing with the voice recognition module to receive voice commands and controlling the servo motors based on these commands.
Component List
Arduino UNO
- Description: A microcontroller board based on the ATmega328P.
- Pins: UNUSED, IOREF, Reset, 3.3V, 5V, GND, Vin, A0, A1, A2, A3, A4, A5, SCL, SDA, AREF, D13, D12, D11, D10, D9, D8, D7, D6, D5, D4, D3, D2, D1, D0, +, -
Servo Motor (x4)
- Description: A motor that can be controlled to move to a specific position.
- Pins: GND, VCC, PWM
Voice Recognition Module
- Description: A module that can recognize voice commands and send corresponding signals to the microcontroller.
- Pins: GND, VCC, RDX, RTX
Wiring Details
Arduino UNO
- 5V: Connected to VCC of the Voice Recognition Module and all Servo Motors.
- GND: Connected to GND of the Voice Recognition Module and all Servo Motors.
- D12: Connected to PWM of Servo Motor 1.
- D11: Connected to PWM of Servo Motor 2.
- D10: Connected to PWM of Servo Motor 3.
- D9: Connected to PWM of Servo Motor 4.
- D3: Connected to RDX of the Voice Recognition Module.
- D2: Connected to RTX of the Voice Recognition Module.
Servo Motor 1
- GND: Connected to GND of the Arduino UNO.
- VCC: Connected to 5V of the Arduino UNO.
- PWM: Connected to D12 of the Arduino UNO.
Servo Motor 2
- GND: Connected to GND of the Arduino UNO.
- VCC: Connected to 5V of the Arduino UNO.
- PWM: Connected to D11 of the Arduino UNO.
Servo Motor 3
- GND: Connected to GND of the Arduino UNO.
- VCC: Connected to 5V of the Arduino UNO.
- PWM: Connected to D10 of the Arduino UNO.
Servo Motor 4
- GND: Connected to GND of the Arduino UNO.
- VCC: Connected to 5V of the Arduino UNO.
- PWM: Connected to D9 of the Arduino UNO.
Voice Recognition Module
- GND: Connected to GND of the Arduino UNO.
- VCC: Connected to 5V of the Arduino UNO.
- RDX: Connected to D3 of the Arduino UNO.
- RTX: Connected to D2 of the Arduino UNO.
Documented Code
Arduino UNO Code
void setup() {
  // put your setup code here, to run once:

}

void loop() {
  // put your main code here, to run repeatedly:

}
This code is a basic template for the Arduino UNO. The setup() function is where you initialize your components and settings, and the loop() function is where you place the main logic that runs repeatedly. You will need to add the specific code to handle the voice recognition and control the servo motors based on the recognized commands.