
Arduino Mega 2560 Smart Lock System with Ethernet and Touchscreen Control
View and Edit Project In Cirkit Designer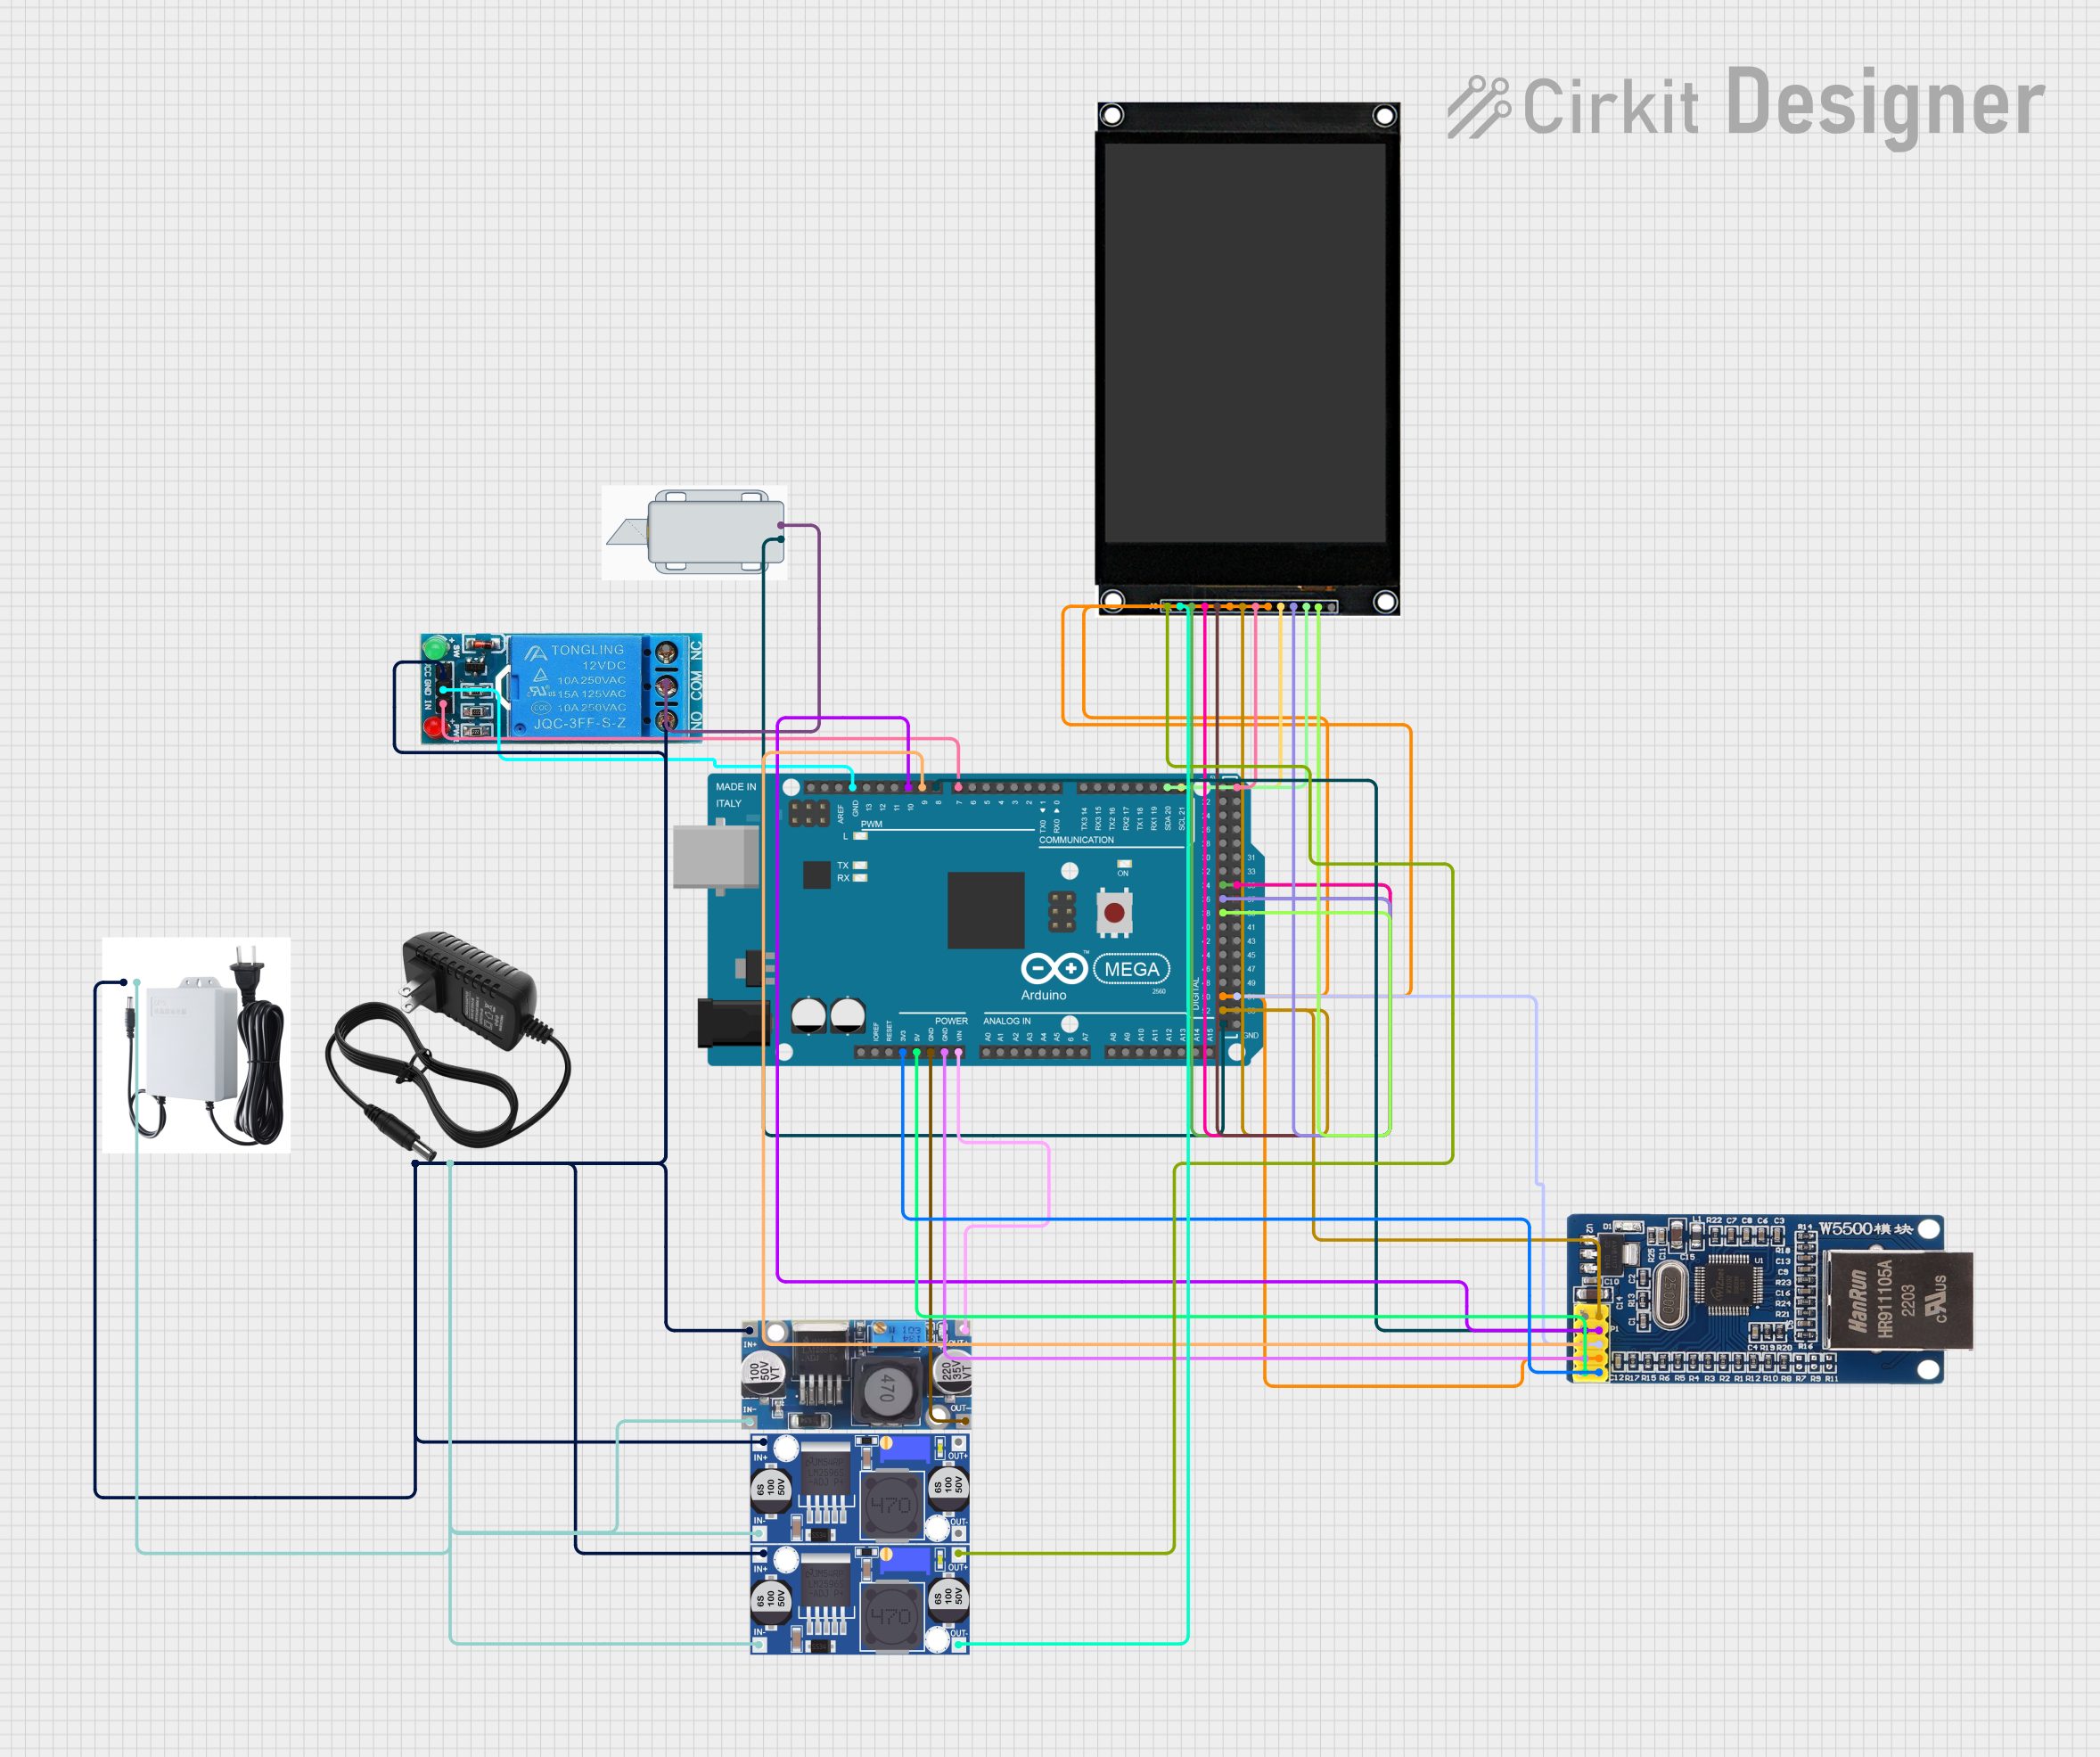
Circuit Documentation
Summary
This circuit involves an Arduino Mega 2560 microcontroller interfacing with various components including a 12V solenoid lock, a single-channel relay, an Ethernet module, a touchscreen display, and multiple power supplies and converters. The circuit is designed to control the solenoid lock and communicate over Ethernet while displaying information on the touchscreen.
Component List
12V Solenoid Lock
- Description: Electromechanical lock that operates on 12V.
- Pins:
-,+
12V Power Supply
- Description: Provides 12V power to the circuit.
- Pins:
+,-
Step Down Buck Converter
- Description: Converts higher voltage to a lower voltage.
- Pins:
IN +,IN - GND,OUT +,OUT - GND
Module Ethernet W5500
- Description: Ethernet module for network communication.
- Pins:
NC,INT,RST,GND,5V,SCK,SS,MOSI,MISO,3.3V
V380 PRO 12V 1.5A Uninterruptible Power Supply Mini UPS Battery Backup Mini UPS WiFi Router Modem
- Description: Provides uninterruptible power supply.
- Pins:
Positive,Negative
12V Single Channel Relay
- Description: Relay module for switching high power devices.
- Pins:
NC,COM,NO,IN,GND,VCC
ST7796 3.5ips Module Touchscreen
- Description: Touchscreen display module.
- Pins:
VCC,GND,LCD_CS,LCD_RST,SOI(MOSI),SCK,LED,SOO(MOSI),CTP_SCL,CTP_RST,CPT_SDA,LCD_RS,CPT_INT,SD_CS
Buck Converter
- Description: Converts higher voltage to a lower voltage.
- Pins:
IN+,IN-,OUT+,OUT-
Arduino Mega 2560
- Description: Microcontroller board based on the ATmega2560.
- Pins:
IOREF,RESET,3V3,5V,GND,VIN,A0toA15,D21/SCL,D20/SDA,D19/RX1,D18/TX1,D17 PWM/RX2,D16 PWM/TX2,D15/RX3,D14/TX3,D0 RX0toD13 PWM,AREF,SDA,SCL,D52,D50,D48,D46,D44,D42,D40,D38,D36,D34,D32,D30,D28,D26,D24,D22,D53,D51,D49,D47,D45,D43,D41,D39,D37,D35,D33,D31,D29,D27,D25,D23
Wiring Details
12V Solenoid Lock
-connected toGNDof Arduino Mega 2560+connected toCOMof 12V Single Channel Relay
12V Power Supply
+connected toIN+of Buck Converter,IN+of Step Down Buck Converter,IN+of another Buck Converter,Positiveof V380 PRO UPS,NOandVCCof 12V Single Channel Relay-connected toIN-of Buck Converter,IN - GNDof Step Down Buck Converter,IN-of another Buck Converter,Negativeof V380 PRO UPS
Step Down Buck Converter
IN +connected to+of 12V Power SupplyIN - GNDconnected to-of 12V Power SupplyOUT +connected toVINof Arduino Mega 2560OUT - GNDconnected toGNDof Arduino Mega 2560
Module Ethernet W5500
3.3Vconnected to3V3of Arduino Mega 25605Vconnected to5Vof Arduino Mega 2560GNDconnected toGNDof Arduino Mega 2560INTconnected toD8 PWMof Arduino Mega 2560RSTconnected toD9 PWMof Arduino Mega 2560SSconnected toD10 PWMof Arduino Mega 2560SCKconnected toD52of Arduino Mega 2560MOSIconnected toD51of Arduino Mega 2560MISOconnected toD50of Arduino Mega 2560
V380 PRO 12V 1.5A Uninterruptible Power Supply Mini UPS Battery Backup Mini UPS WiFi Router Modem
Positiveconnected to-of 12V Power SupplyNegativeconnected to+of 12V Power Supply
12V Single Channel Relay
INconnected toD7 PWMof Arduino Mega 2560GNDconnected toGNDof Arduino Mega 2560COMconnected to+of 12V Solenoid LockNOconnected to+of 12V Power SupplyVCCconnected to+of 12V Power Supply
ST7796 3.5ips Module Touchscreen
VCCconnected toOUT+of Buck ConverterGNDconnected toOUT-of Buck ConverterCTP_SCLconnected toD21/SCLof Arduino Mega 2560CPT_SDAconnected toD20/SDAof Arduino Mega 2560SCKconnected toD52of Arduino Mega 2560SOI(MOSI)connected toD50of Arduino Mega 2560SOO(MOSI)connected toD50of Arduino Mega 2560CPT_INTconnected toD38of Arduino Mega 2560CTP_RSTconnected toD36of Arduino Mega 2560LCD_CSconnected toD34of Arduino Mega 2560LCD_RSconnected toD37of Arduino Mega 2560LCD_RSTconnected toD35of Arduino Mega 2560LEDconnected to5Vof Arduino Mega 2560
Buck Converter
IN+connected to+of 12V Power SupplyIN-connected to-of 12V Power SupplyOUT+connected toVCCof ST7796 3.5ips Module TouchscreenOUT-connected toGNDof ST7796 3.5ips Module Touchscreen
Documented Code
Arduino Mega 2560 Code
sketch.ino
void setup() {
  // put your setup code here, to run once:

}

void loop() {
  // put your main code here, to run repeatedly:

}
documentation.txt