
Circuit Documentation
Summary
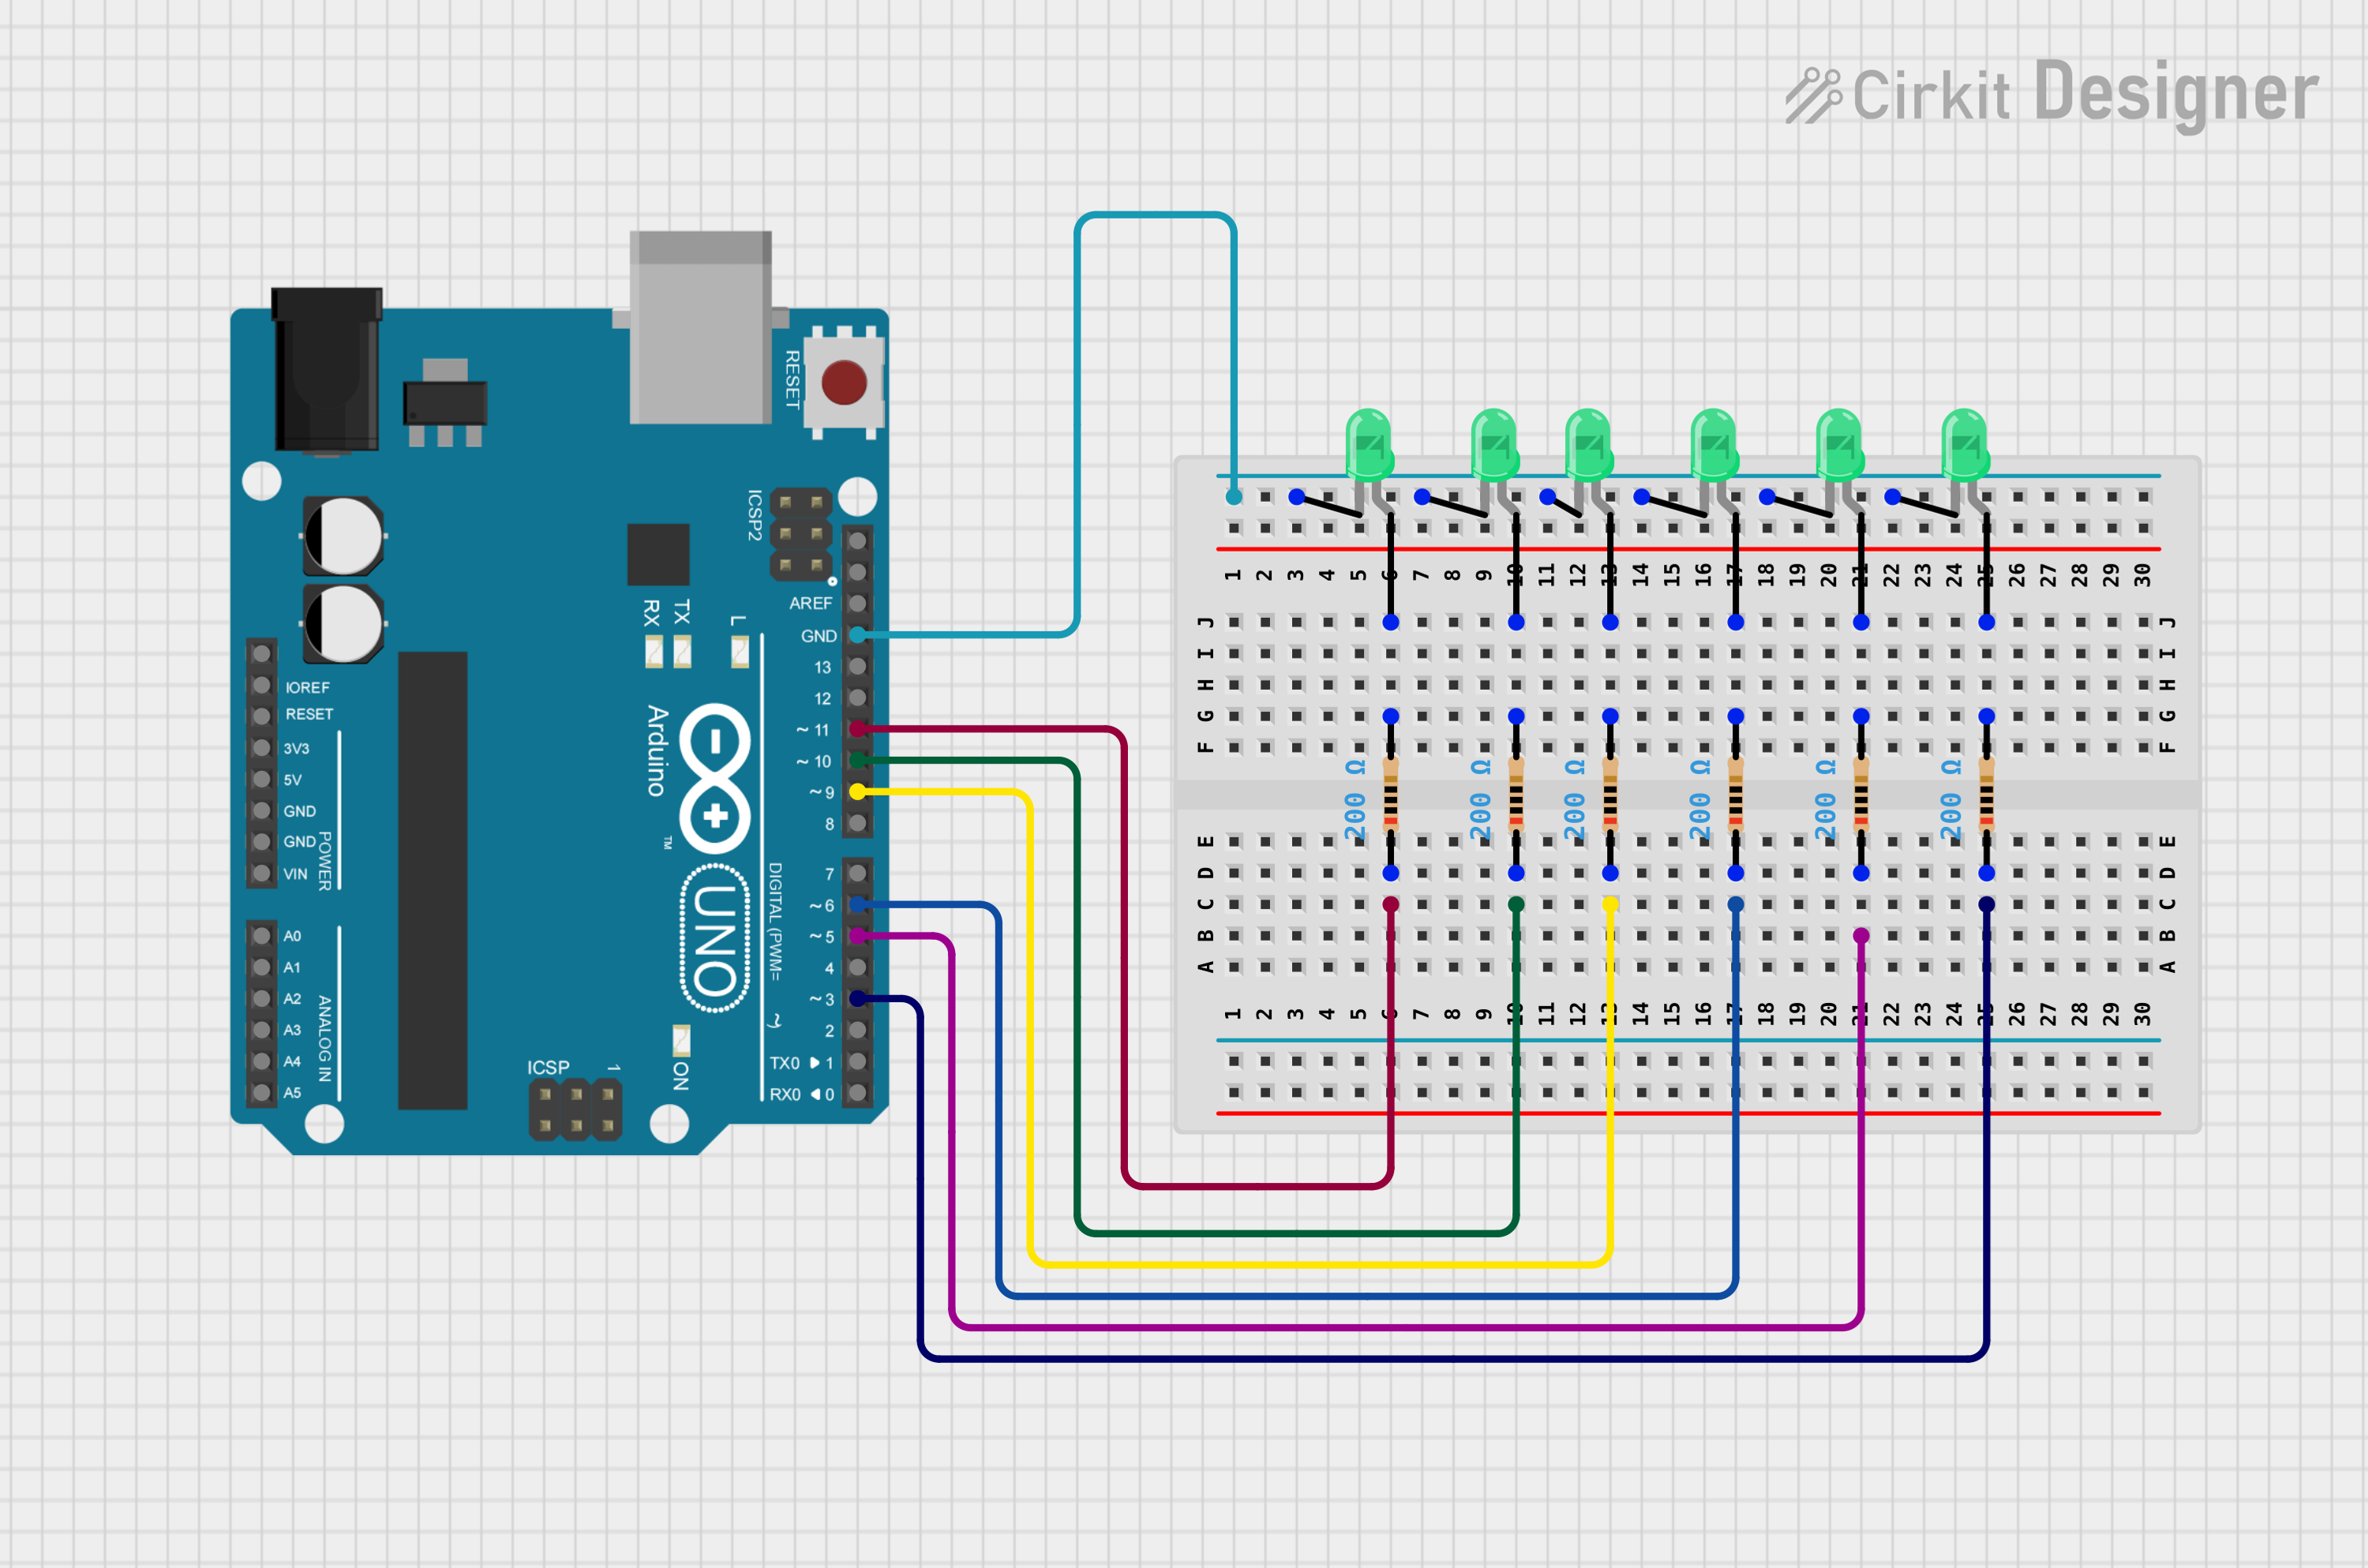
This circuit is designed to control six green LEDs using an Arduino UNO microcontroller. Each LED is connected to a PWM-capable pin on the Arduino, allowing for the brightness of the LEDs to be controlled through pulse-width modulation (PWM). The LEDs are connected in series with resistors to limit the current through them, and all cathodes of the LEDs are connected to the ground (GND) of the Arduino.
Component List
Arduino UNO
- Description: A microcontroller board based on the ATmega328P.
- Purpose: Acts as the central controller for the circuit, generating PWM signals to control the brightness of the LEDs.
LED: Two Pin (green)
- Description: A standard green light-emitting diode.
- Purpose: Emits light when powered, with brightness controlled by the Arduino's PWM output.
Resistor
- Description: A passive two-terminal electrical component with a fixed resistance value.
- Purpose: Limits the current flowing through the LEDs to prevent damage.
Wiring Details
Arduino UNO
- Digital Pins (PWM): Connected to one side of the resistors.
- GND: Connected to the cathodes of all the LEDs.
LED: Two Pin (green)
- Anode: Connected to the other side of the corresponding resistor.
- Cathode: Connected to the GND of the Arduino UNO.
Resistor
- One Side (pin1): Connected to a PWM-capable pin on the Arduino UNO.
- Other Side (pin2): Connected to the anode of the corresponding LED.
Documented Code
/*
 * This Arduino sketch controls six green LEDs connected to PWM-capable pins.
 * The brightness of each LED is incremented in a loop using PWM.
 */

const int ledPins[] = {3, 5, 6, 9, 10, 11}; // Array of PWM-capable pins connected to LEDs
const int numLeds = 6; // Number of LEDs in the circuit
int pwmValue = 0; // Variable to store the PWM value

void setup() {
  // Initialize all LED pins as outputs
  for (int i = 0; i < numLeds; i++) {
    pinMode(ledPins[i], OUTPUT);
  }
}

void loop() {
  // Increment PWM value
  pwmValue++;
  if (pwmValue > 255) {
    pwmValue = 0; // Reset PWM value after reaching the maximum
  }
  // Set PWM value to all LEDs
  for (int i = 0; i < numLeds; i++) {
    analogWrite(ledPins[i], pwmValue);
  }
  // Delay to see the change in brightness
  delay(10);
}
Filename: sketch.ino
Description: The code defines an array of pin numbers corresponding to the PWM-capable pins on the Arduino UNO that are connected to the LEDs. In the setup() function, these pins are set as outputs. The loop() function increments the pwmValue variable and writes this value to each LED pin using analogWrite(), which controls the brightness of the LEDs. The loop then pauses for a short delay to make the change in brightness observable.