Cirkit Designer
Your all-in-one circuit design IDE
Home /
Project Documentation
Arduino UNO Based User Input Interface with LCD Display and Keypad
Circuit Documentation
Summary of the Circuit
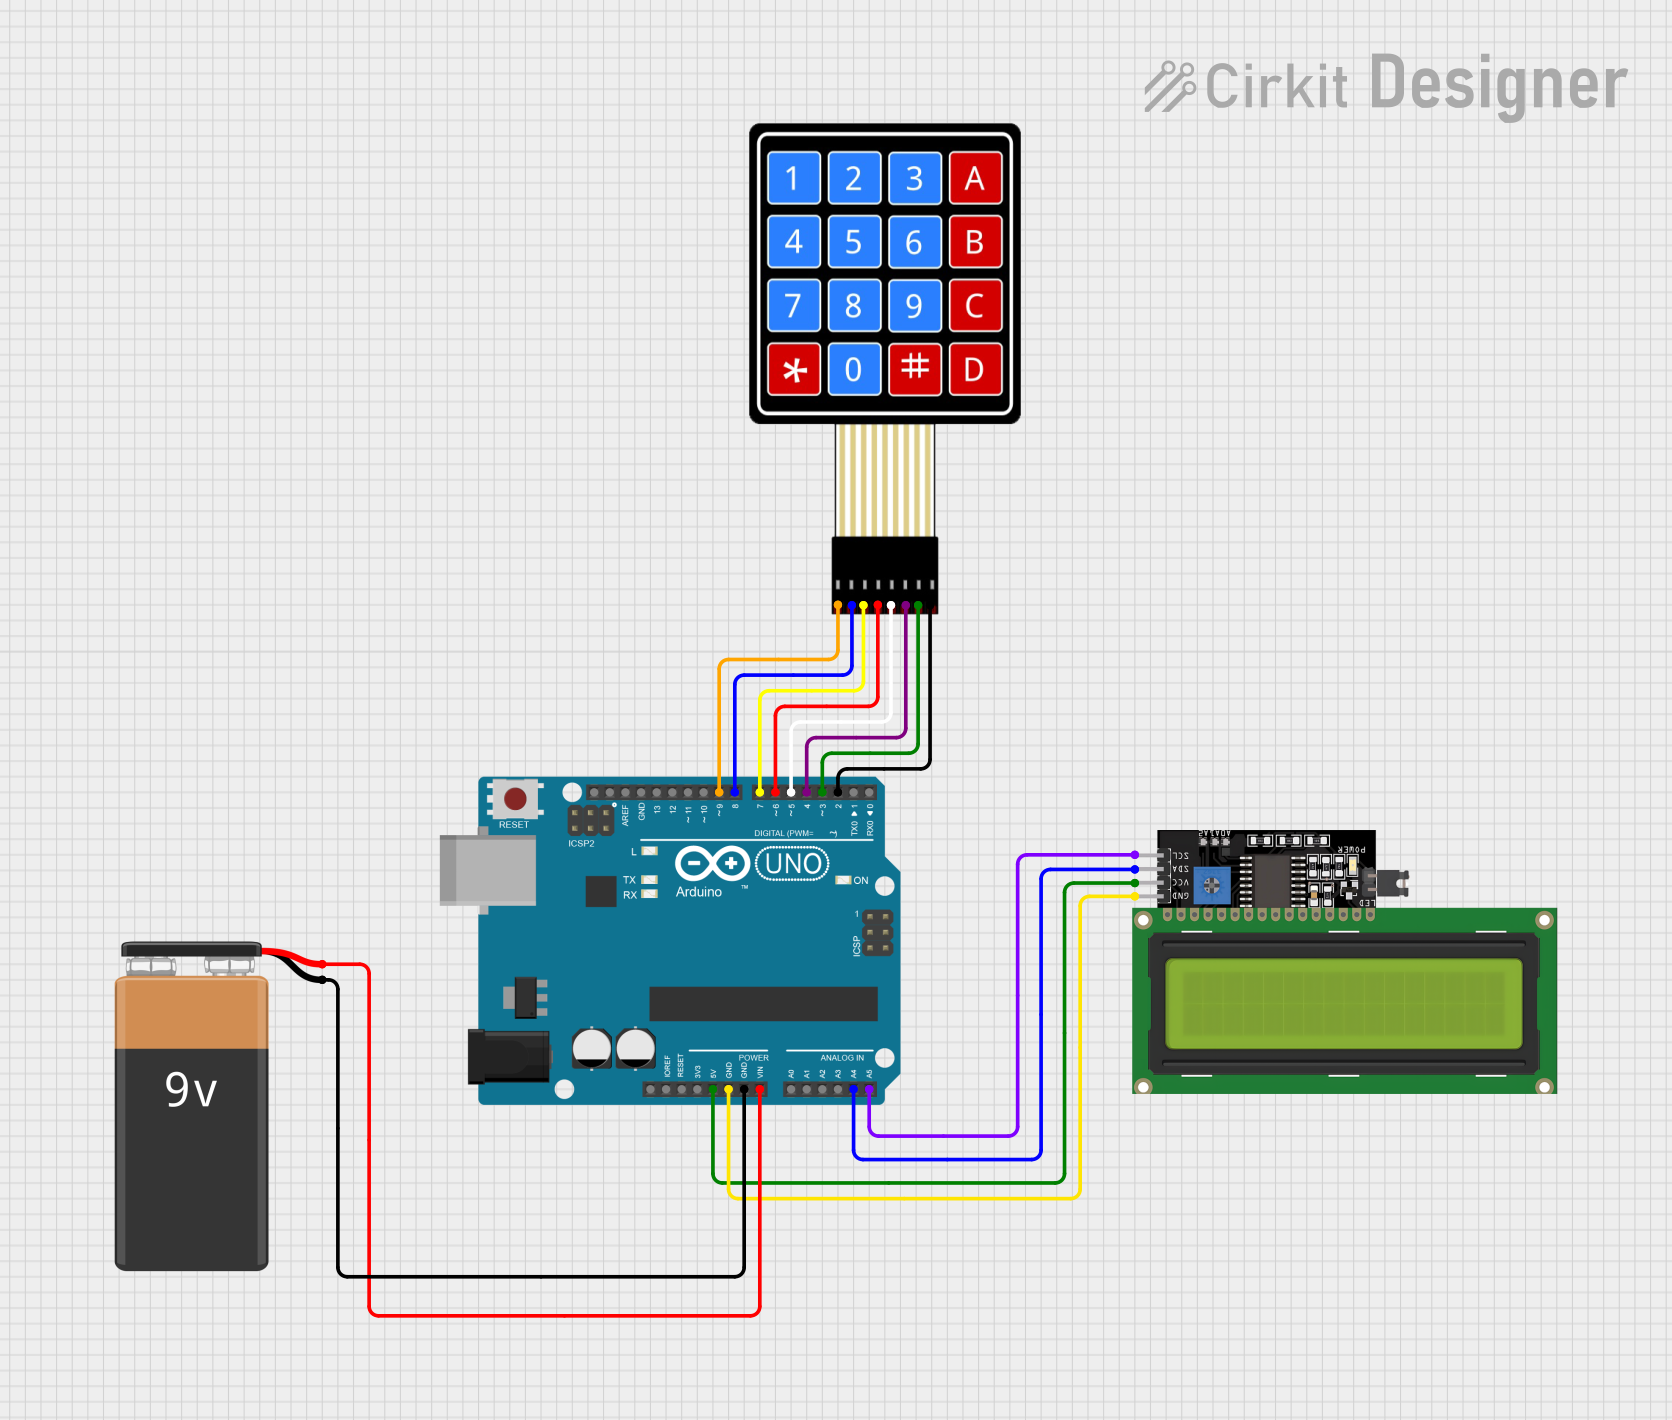
This circuit is designed to interface an Arduino UNO microcontroller with an LCD Display (16x4 characters) using an I2C communication protocol and a 4x4 Membrane Matrix Keypad for user input. The Arduino UNO is powered by a 9V battery, which is connected to its Vin pin for voltage input and one of its GND pins for ground. The LCD display is powered by the 5V output from the Arduino and shares a common ground. The keypad is interfaced with the digital pins of the Arduino for detecting button presses.
Component List
9V Battery
- Description: Provides power to the circuit.
- Pins: [-, +]
LCD Display 16x4 I2C
- Description: Displays information to the user.
- Pins: [SCL, SDA, VCC, GND]
4X4 Membrane Matrix Keypad
- Description: Allows user input through button presses.
- Pins: [R1, R2, R3, R4, C1, C2, C3, C4]
Arduino UNO
- Description: The main microcontroller unit that controls the circuit.
- Pins: [IOREF, Reset, 3.3V, 5V, GND, Vin, A0-A5, SCL, SDA, AREF, D0-D13]
Wiring Details
9V Battery
+to Arduino UNO Vin-to Arduino UNO GND
LCD Display 16x4 I2C
SCLto Arduino UNO A5SDAto Arduino UNO A4VCCto Arduino UNO 5VGNDto Arduino UNO GND
4X4 Membrane Matrix Keypad
R1to Arduino UNO D9R2to Arduino UNO D8R3to Arduino UNO D7R4to Arduino UNO D6C1to Arduino UNO D5C2to Arduino UNO D4C3to Arduino UNO D3C4to Arduino UNO D2
Arduino UNO
Vinconnected to 9V Battery +GNDconnected to 9V Battery - and LCD Display GND5Vconnected to LCD Display VCCA4connected to LCD Display SDAA5connected to LCD Display SCL- Digital pins
D2toD9connected to the corresponding pins of the 4X4 Membrane Matrix Keypad
Documented Code
Arduino UNO Code (sketch.ino)
void setup() {
  // put your setup code here, to run once:

}

void loop() {
  // put your main code here, to run repeatedly:

}
Additional Notes
- The provided code is a template and does not contain any functional code for operating the LCD display or the keypad.
- The user is expected to implement the setup and loop functions to initialize the I2C communication with the LCD and to handle the keypad input.
- The code should include libraries for I2C communication and keypad handling, which are not provided in the template.