
Arduino UNO RFID Access Control System with LCD Feedback and Keypad Input
View and Edit Project In Cirkit Designer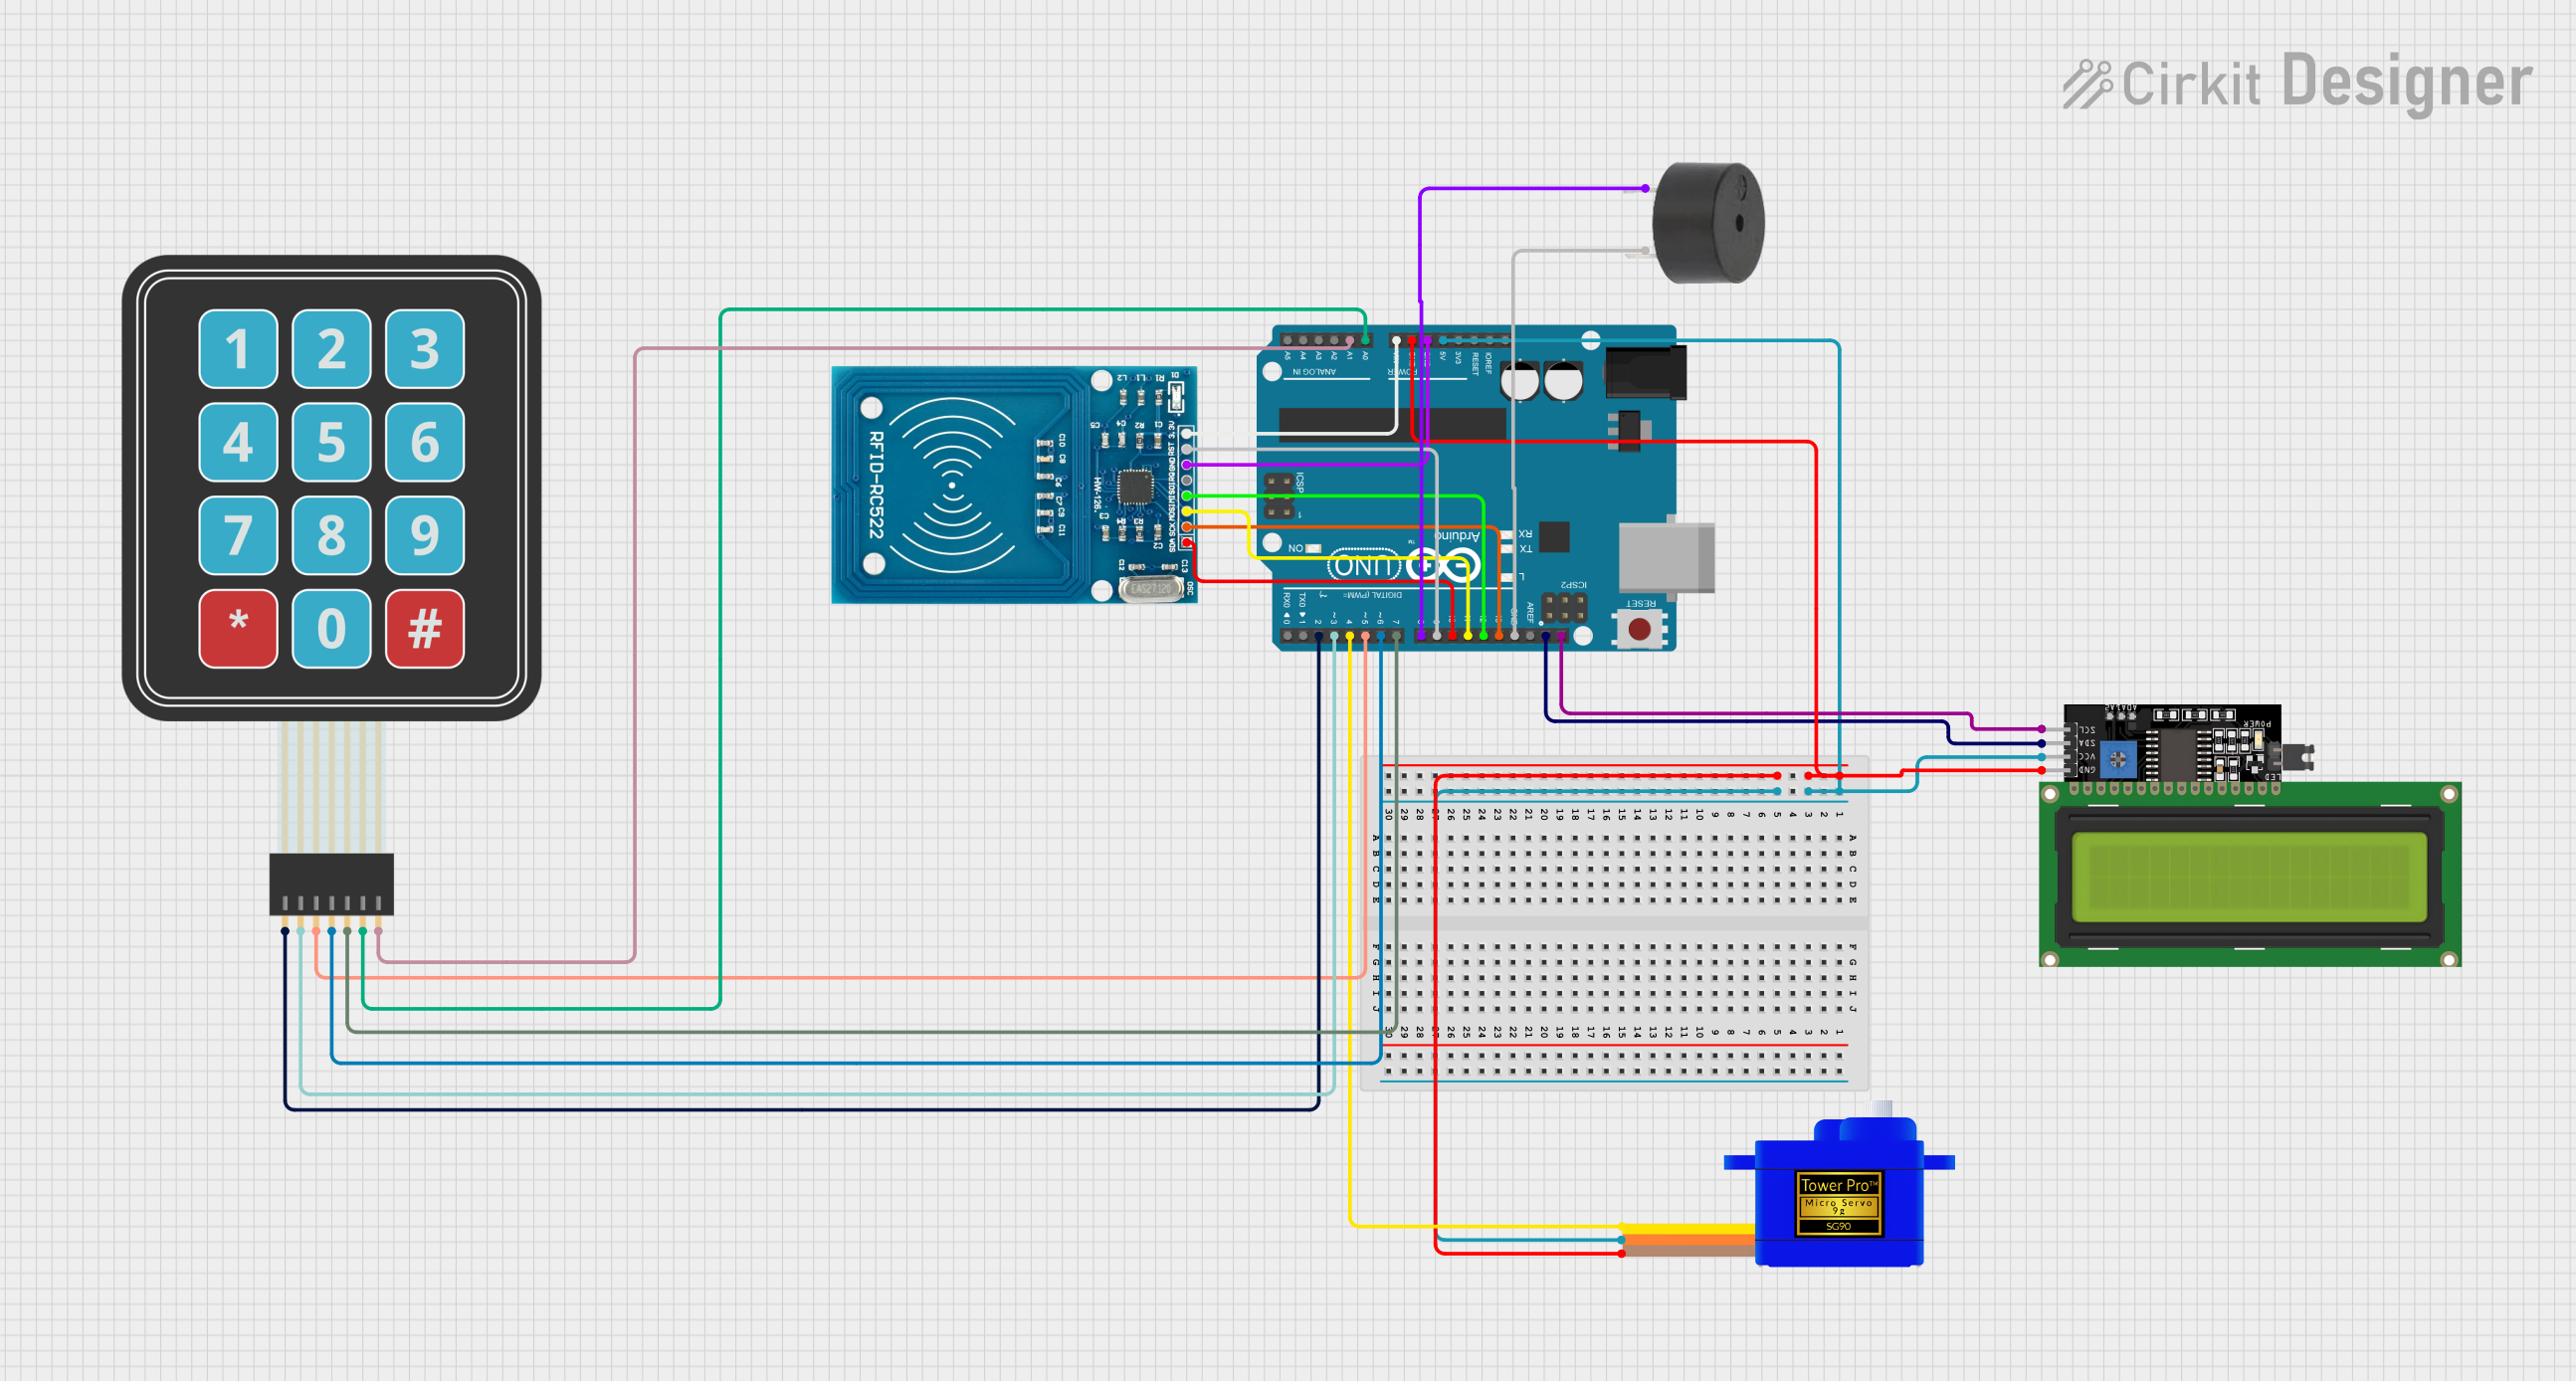
Circuit Documentation
Summary
This circuit integrates various components controlled by an Arduino UNO microcontroller to perform a range of functions. The system includes an RFID-RC522 module for RFID reading, an LCD Display for user interface, a Servomotor SG90 for actuation, a buzzer for audio feedback, and a Membrane Matrix Keypad for user input. The circuit is designed to be powered by the Arduino UNO, which also provides the necessary control signals to each component.
Component List
RFID-RC522
- Description: An RFID reader/writer module for contactless communication at 13.56MHz.
- Pins: VCC (3.3V), RST, GND, IRQ, MISO, MOSI, SCK, SDA
Arduino UNO
- Description: A microcontroller board based on the ATmega328P, widely used for building digital devices and interactive objects.
- Pins: UNUSED, IOREF, Reset, 3.3V, 5V, GND, Vin, A0-A5, SCL, SDA, AREF, D0-D13
LCD Display 16x4 I2C
- Description: A 16x4 character LCD display with an I2C interface for displaying text and numbers.
- Pins: SCL, SDA, VCC, GND
Servomotor SG90
- Description: A small and lightweight servo motor capable of precise control.
- Pins: SIG, VCC, GND
Buzzer
- Description: An electronic buzzer for producing simple tones and sounds.
- Pins: PIN, GND
Membrane Matrix Keypad
- Description: A simple interface for user input using buttons arranged in rows and columns.
- Pins: Row 1-4, Column 1-3
Wiring Details
RFID-RC522
- VCC (3.3V) connected to Arduino UNO Vin
- RST connected to Arduino UNO D9
- GND connected to Arduino UNO GND
- MISO connected to Arduino UNO D12
- MOSI connected to Arduino UNO D11
- SCK connected to Arduino UNO D13
- SDA connected to Arduino UNO D10
Arduino UNO
- 5V and GND pins provide power to the LCD Display and Servomotor
- Vin provides 3.3V to the RFID-RC522
- Digital and analog pins are used for control signals and communication with other components
LCD Display 16x4 I2C
- SCL connected to Arduino UNO SCL
- SDA connected to Arduino UNO SDA
- VCC connected to Arduino UNO 5V
- GND connected to Arduino UNO GND
Servomotor SG90
- SIG connected to Arduino UNO D4
- VCC connected to Arduino UNO 5V
- GND connected to Arduino UNO GND
Buzzer
- PIN connected to Arduino UNO D8
- GND connected to Arduino UNO GND
Membrane Matrix Keypad
- Column 1 connected to Arduino UNO D7
- Column 2 connected to Arduino UNO A0
- Column 3 connected to Arduino UNO A1
- Row 1 connected to Arduino UNO D2
- Row 2 connected to Arduino UNO D3
- Row 3 connected to Arduino UNO D5
- Row 4 connected to Arduino UNO D6
Documented Code
void setup() {
  // put your setup code here, to run once:

}

void loop() {
  // put your main code here, to run repeatedly:

}
Filename: sketch.ino
Note: The provided code is a template and does not include specific functionality. It should be populated with the setup and loop functions required to control the components in the circuit.