
Arduino Nano IR Sensor Controlled 12V Relay with Battery Power
View and Edit Project In Cirkit Designer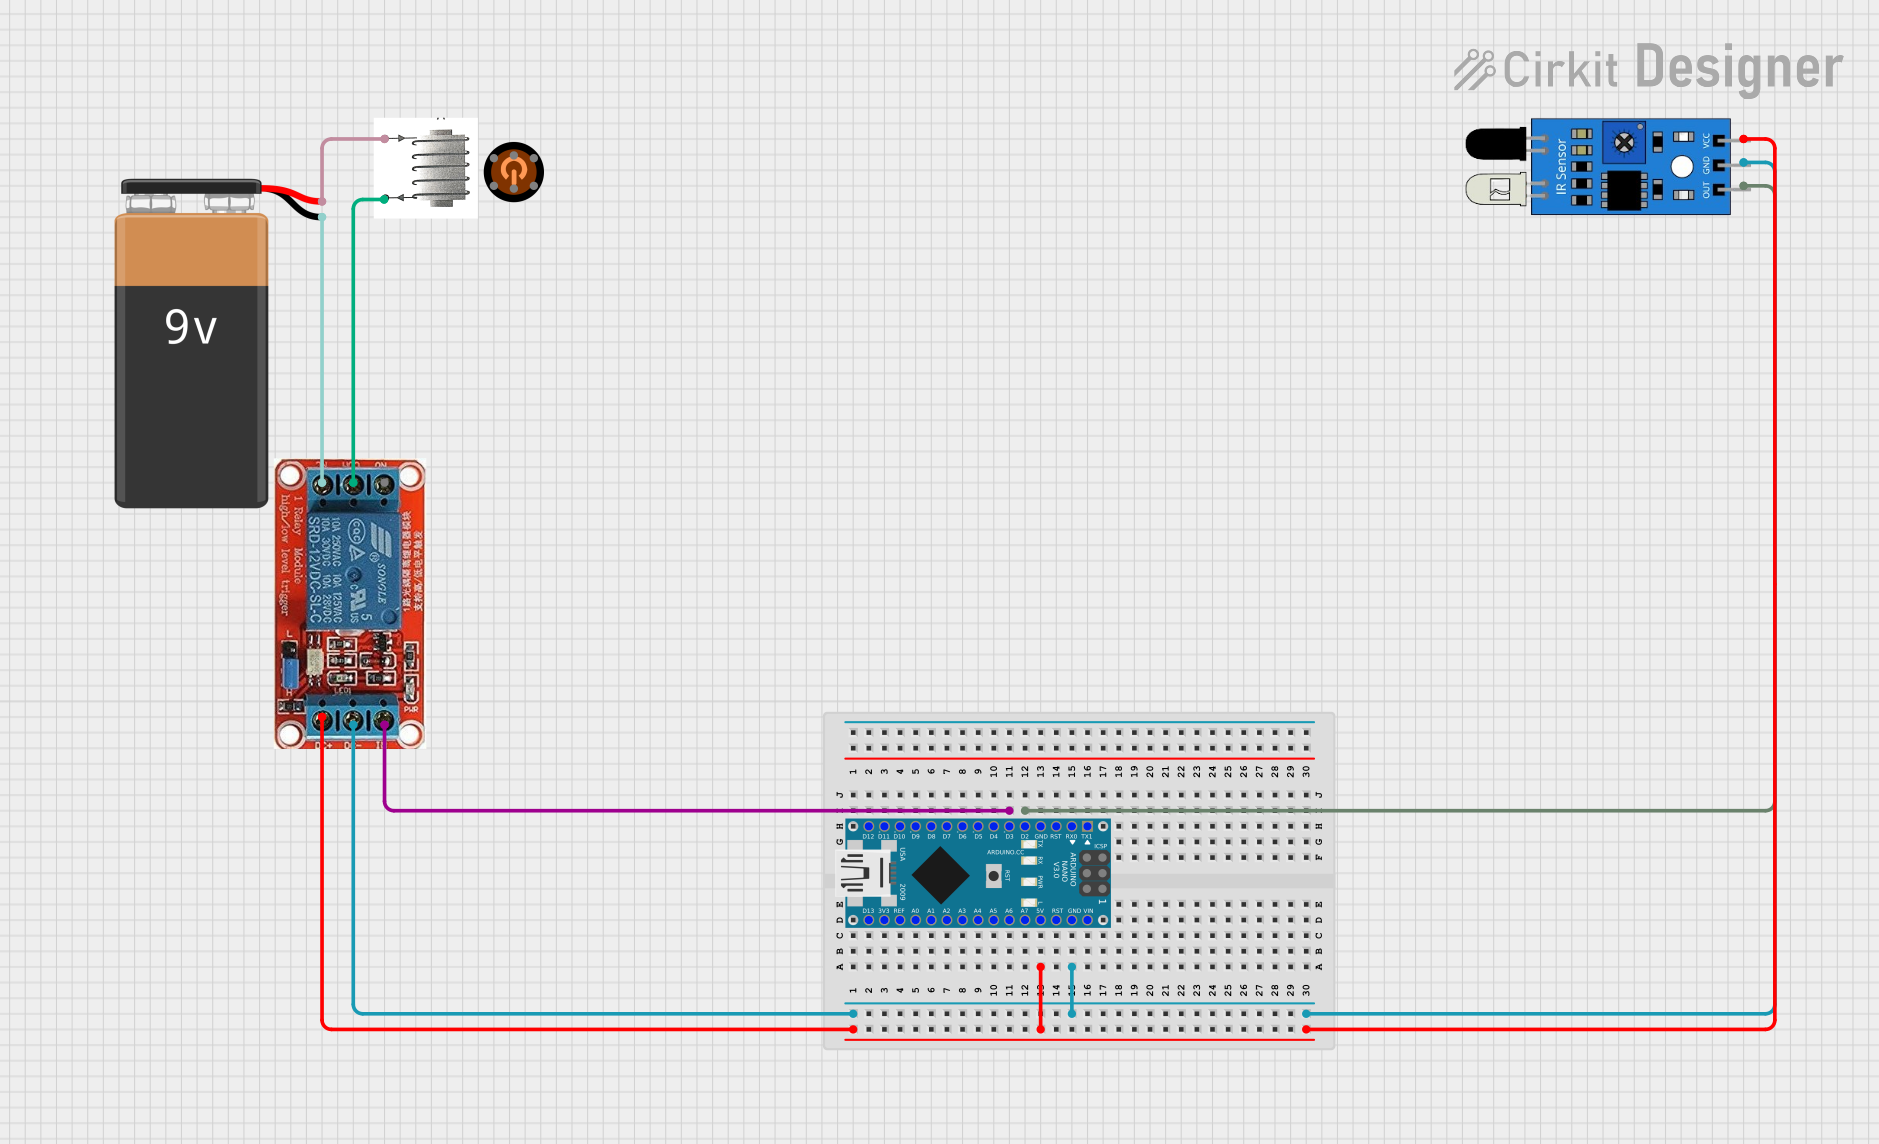
Circuit Documentation
Summary
This circuit involves an Arduino Nano microcontroller, a 12V relay, an IR sensor, a 9V battery, a push button, and a component labeled "NamChamDien". The Arduino Nano controls the relay and reads input from the IR sensor. The relay is used to switch a load connected to the "NamChamDien" component, which is powered by the 9V battery.
Component List
Arduino Nano
- Description: A small, complete, and breadboard-friendly board based on the ATmega328P.
- Pins: D1/TX, D0/RX, RESET, GND, D2, D3, D4, D5, D6, D7, D8, D9, D10, D11/MOSI, D12/MISO, VIN, 5V, A7, A6, A5, A4, A3, A2, A1, A0, AREF, 3V3, D13/SCK
12V Relay
- Description: An electromechanical switch used to control a high-power circuit with a low-power signal.
- Pins: NO, COM, NC, IN, DC-, DC+
IR Sensor
- Description: An infrared sensor used to detect objects or measure distance.
- Pins: out, gnd, vcc
9V Battery
- Description: A standard 9V battery used to power the "NamChamDien" component.
- Pins: -, +
3104 Push Button
- Description: A push button used for user input.
- Pins: pin 2, pin 5, pin 1, pin 3, pin 6, pin 4
NamChamDien
- Description: A component labeled "NamChamDien" with unspecified functionality.
- Pins: None specified
Wiring Details
Arduino Nano
- D3: Connected to IN of the 12V Relay
- D2: Connected to out of the IR Sensor
- 5V: Connected to DC+ of the 12V Relay and vcc of the IR Sensor
- GND: Connected to DC- of the 12V Relay and gnd of the IR Sensor
12V Relay
- IN: Connected to D3 of the Arduino Nano
- DC+: Connected to 5V of the Arduino Nano
- DC-: Connected to GND of the Arduino Nano
- COM: Connected to NamChamDien
- NC: Connected to - of the 9V Battery
IR Sensor
- out: Connected to D2 of the Arduino Nano
- gnd: Connected to GND of the Arduino Nano
- vcc: Connected to 5V of the Arduino Nano
9V Battery
- -: Connected to NC of the 12V Relay
- +: Connected to NamChamDien
NamChamDien
- Connected to COM of the 12V Relay
- Connected to + of the 9V Battery
Code Documentation
Arduino Nano Code
void setup() {
  // put your setup code here, to run once:

}

void loop() {
  // put your main code here, to run repeatedly:

}
This code is a basic template for the Arduino Nano. The setup() function is where you initialize your components and settings, and the loop() function is where the main logic of your program runs repeatedly. Currently, the code does not perform any specific actions and serves as a starting point for further development.