Cirkit Designer
Your all-in-one circuit design IDE
Home /
Project Documentation
Arduino UNO RFID Access Control with Solenoid Lock

Circuit Documentation
Summary
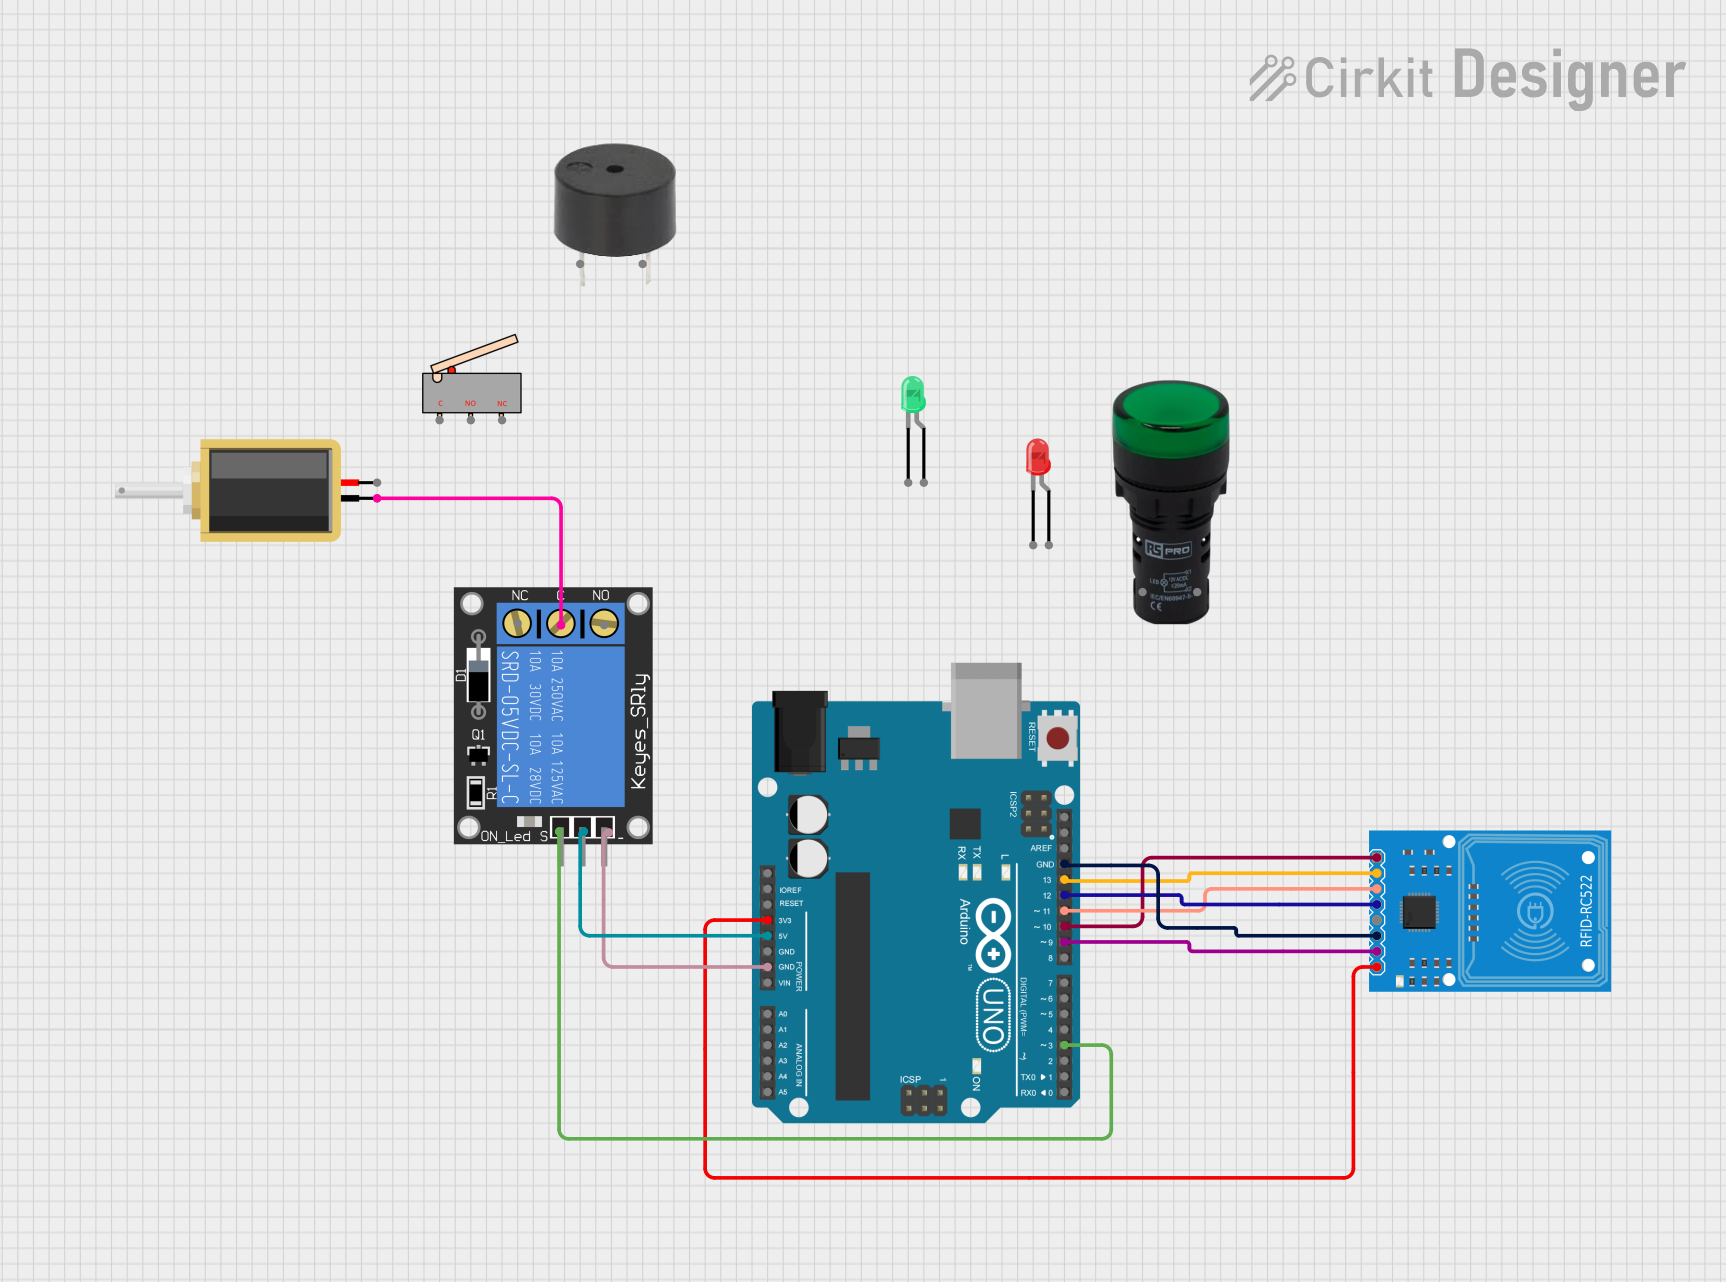
This circuit integrates an RFID-RC522 module with an Arduino UNO for RFID reading capabilities. The Arduino UNO also controls a 1-Channel Relay which in turn can drive a solenoid. The circuit is powered by the Arduino UNO's voltage outputs, and the ground connections are shared across the components. The RFID-RC522 communicates with the Arduino UNO via the SPI interface. The relay module is controlled by one of the Arduino's digital pins.
Component List
RFID-RC522
- Description: An RFID reader/writer module.
- Pins: SDA, SCK, MOSI, MISO, IRQ, GND, RST, 3.3V
Arduino UNO
- Description: A microcontroller board based on the ATmega328P.
- Pins: UNUSED, IOREF, Reset, 3.3V, 5V, GND, Vin, A0-A5, SCL, SDA, AREF, D0-D13
Solenoid
- Description: An electromechanical device used for creating a controlled magnetic field.
- Pins: pin1, pin2
1-Channel Relay (5V 10A)
- Description: An electrically operated switch that allows you to turn on or off a circuit using voltage and/or current much higher than a microcontroller can handle.
- Pins: NC, signal, C, power, NO, ground
Limit Switch
- Description: A switch that is actuated by the motion of a machine part or presence of an object.
- Pins: C, NO, NC
Buzzer
- Description: An audio signaling device.
- Pins: PIN, GND
LED: Two Pin (green)
- Description: A green light-emitting diode.
- Pins: cathode, anode
LED: Two Pin (red)
- Description: A red light-emitting diode.
- Pins: cathode, anode
Pilot Lamp Green
- Description: A green indicator lamp.
- Pins: X1, X2
Wiring Details
RFID-RC522
- 3.3V connected to Arduino UNO 3.3V
- GND connected to Arduino UNO GND
- SCK connected to Arduino UNO D13
- MISO connected to Arduino UNO D12
- MOSI connected to Arduino UNO D11
- SDA connected to Arduino UNO D10
- RST connected to Arduino UNO D9
Arduino UNO
- 3.3V connected to RFID-RC522 3.3V
- 5V connected to 1-Channel Relay power
- GND connected to 1-Channel Relay ground and RFID-RC522 GND
- D13 connected to RFID-RC522 SCK
- D12 connected to RFID-RC522 MISO
- D11 connected to RFID-RC522 MOSI
- D10 connected to RFID-RC522 SDA
- D9 connected to RFID-RC522 RST
- D3 connected to 1-Channel Relay signal
Solenoid
- pin1 connected to 1-Channel Relay C
1-Channel Relay (5V 10A)
- power connected to Arduino UNO 5V
- ground connected to Arduino UNO GND
- signal connected to Arduino UNO D3
- C connected to Solenoid pin1
Documented Code
sketch.ino
void setup() {
  // put your setup code here, to run once:

}

void loop() {
  // put your main code here, to run repeatedly:

}
documentation.txt
(No additional documentation provided)