
Arduino UNO Controlled Servo Motor with Precise Angle Control
View and Edit Project In Cirkit Designer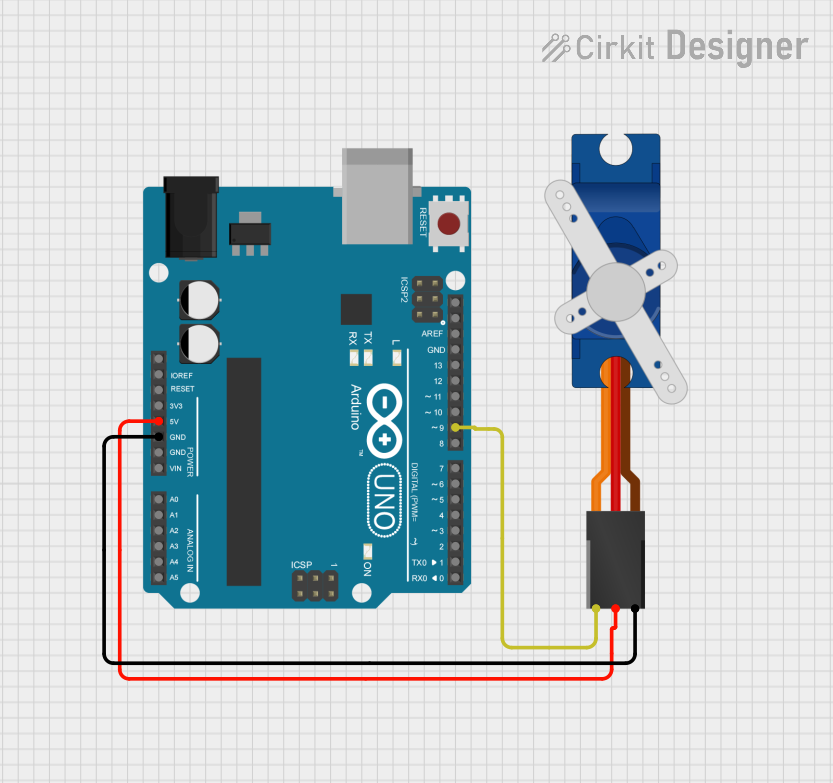
Circuit Documentation
Summary
This circuit consists of an Arduino UNO microcontroller and a Tower Pro SG90 servo motor. The Arduino UNO is used to control the servo motor, which is powered and controlled through specific pins on the Arduino. The provided code for the Arduino UNO initializes the servo and moves it between two positions at regular intervals.
Component List
Arduino UNO
- Description: A microcontroller board based on the ATmega328P.
- Pins: UNUSED, IOREF, Reset, 3.3V, 5V, GND, Vin, A0, A1, A2, A3, A4, A5, SCL, SDA, AREF, D13, D12, D11, D10, D9, D8, D7, D6, D5, D4, D3, D2, D1, D0
Tower Pro SG90 Servo
- Description: A small and lightweight servo motor.
- Pins: Signal, +5V, GND
Wiring Details
Arduino UNO
- 5V: Connected to +5V of the Tower Pro SG90 servo.
- GND: Connected to GND of the Tower Pro SG90 servo.
- D9: Connected to Signal of the Tower Pro SG90 servo.
Tower Pro SG90 Servo
- +5V: Connected to 5V of the Arduino UNO.
- GND: Connected to GND of the Arduino UNO.
- Signal: Connected to D9 of the Arduino UNO.
Code Documentation
Arduino UNO Code
#include <Servo.h>

Servo s1;

void setup() {
  // put your setup code here, to run once:
  s1.attach(9);
}

void loop() {
  // put your main code here, to run repeatedly:
  s1.write(180);
  delay(1000);
  s1.write(90);
  delay(1000);
}
Tower Pro SG90 Servo Code
void setup() {
  // put your setup code here, to run once:
}

void loop() {
  // put your main code here, to run repeatedly:
}
This documentation provides a comprehensive overview of the circuit, including the components used, their wiring details, and the code required to operate the circuit.