
Circuit Documentation
Summary of the Circuit
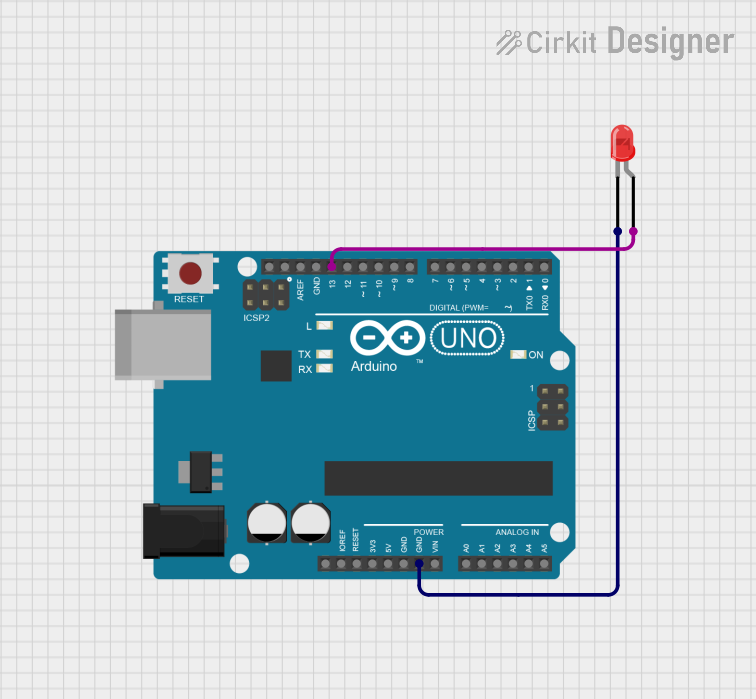
This circuit consists of an Arduino UNO microcontroller board and a two-pin red LED. The Arduino UNO is used to control the LED, turning it on and off at a regular interval. The LED is connected to one of the digital pins of the Arduino (D13) and to the ground (GND) pin. The microcontroller is programmed to output a high voltage to the LED, causing it to light up, and then a low voltage to turn it off, creating a blinking effect.
Component List
Arduino UNO
- Description: A microcontroller board based on the ATmega328P.
- Pins Used:
IOREFReset3.3V5VGNDVinA0toA5SCLSDAAREFD13toD0
LED: Two Pin (red)
- Description: A basic red light-emitting diode.
- Pins Used:
cathodeanode
Wiring Details
Arduino UNO
- GND is connected to the
cathodeof the LED. - D13 is connected to the
anodeof the LED.
LED: Two Pin (red)
- cathode is connected to the
GNDon the Arduino UNO. - anode is connected to the
D13on the Arduino UNO.
Documented Code
Arduino UNO Blink Code
void setup() {
  pinMode(13, OUTPUT); // Set digital pin 13 (D13) as an output
}

void loop() {
  digitalWrite(13, HIGH); // Turn the LED on (HIGH is the voltage level)
  delay(1000);            // Wait for a second (1000 milliseconds)
  digitalWrite(13, LOW);  // Turn the LED off by making the voltage LOW
  delay(1000);            // Wait for a second
}
File Name: sketch.ino
This code configures digital pin 13 (D13) on the Arduino UNO as an output to control the LED. In the loop function, the LED is turned on and off with a one-second interval between each state change.