
Circuit Documentation
Summary
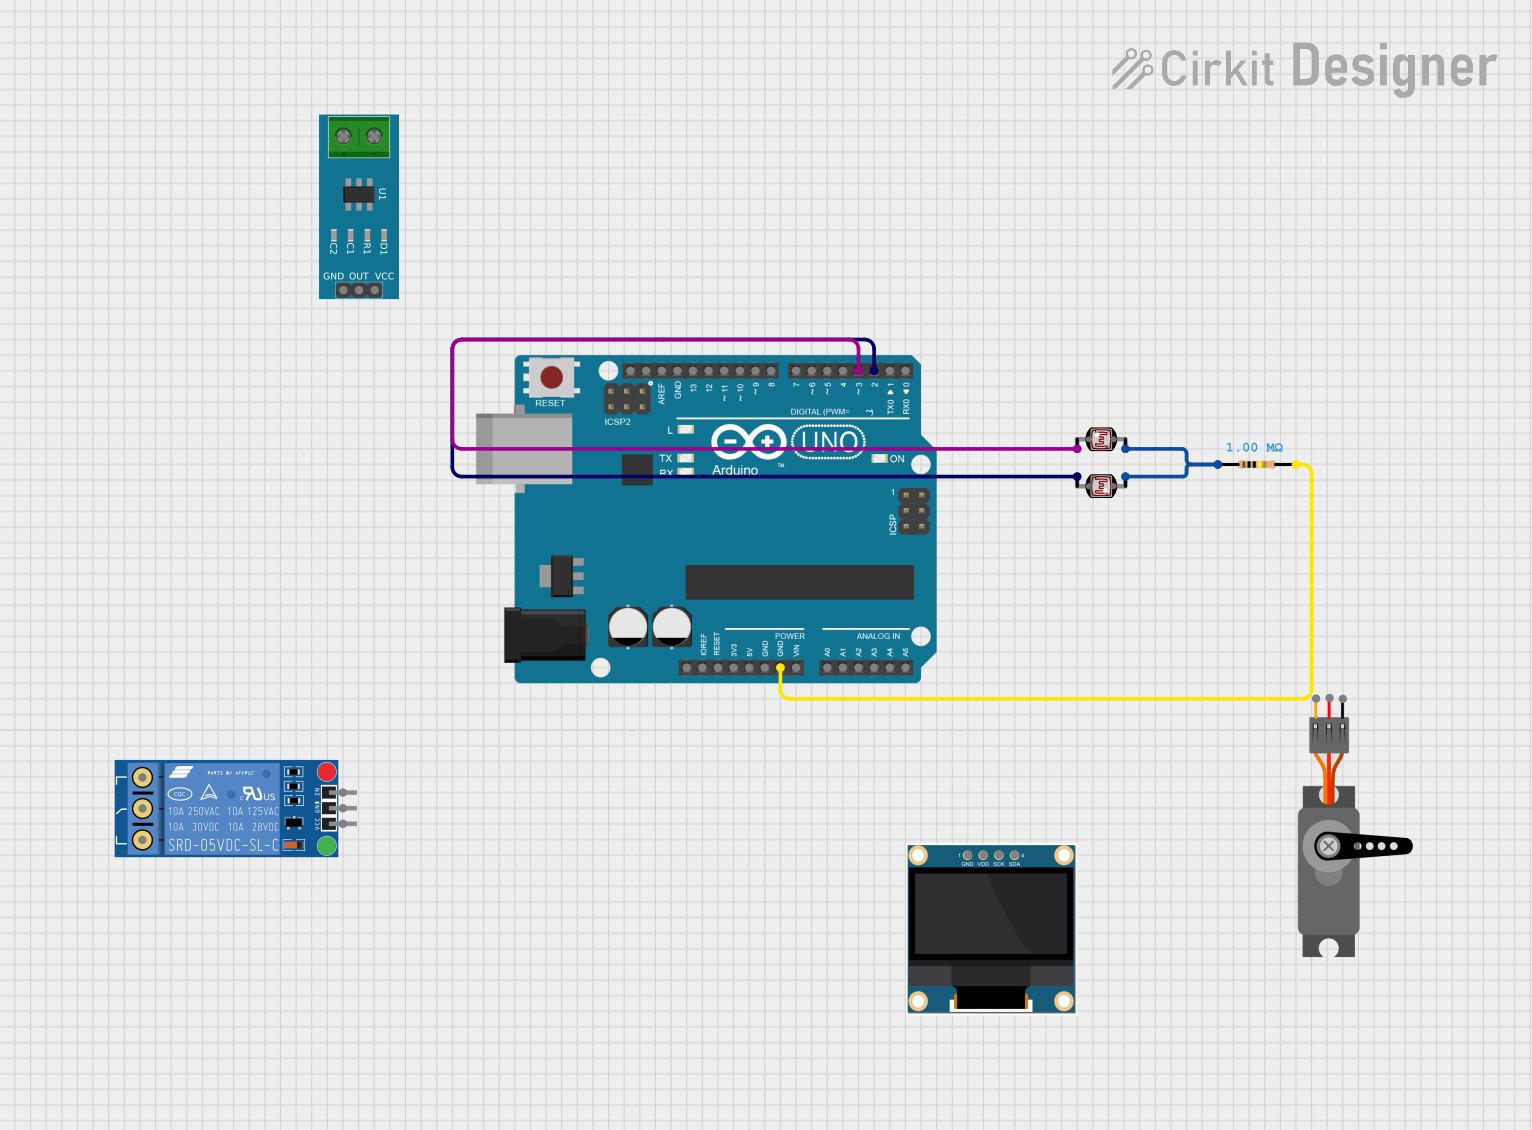
This circuit involves an Arduino UNO microcontroller interfacing with various components including two photocells (LDRs), a current sensor, a servo motor, an OLED display, a relay, and a resistor. The circuit is designed to read light levels from the photocells, control a servo motor, display information on an OLED screen, and manage current sensing and relay operations.
Component List
Arduino UNO
- Description: A microcontroller board based on the ATmega328P.
- Pins: UNUSED, IOREF, Reset, 3.3V, 5V, GND, Vin, A0, A1, A2, A3, A4, A5, SCL, SDA, AREF, D13, D12, D11, D10, D9, D8, D7, D6, D5, D4, D3, D2, D1, D0
Photocell (LDR)
- Description: A light-dependent resistor used to detect light levels.
- Pins: pin 0, pin 1
Photocell (LDR)
- Description: A light-dependent resistor used to detect light levels.
- Pins: pin 0, pin 1
Current Sensor 5A
- Description: A sensor used to measure current up to 5A.
- Pins: 1, 2, GND, OUT, VCC
Servo
- Description: A motor used for precise control of angular position.
- Pins: GND, VCC, PWM
0.96" OLED
- Description: A small OLED display used for displaying information.
- Pins: GND, VDD, SCK, SDA
KF-301 Relay
- Description: A relay module used for switching high power devices.
- Pins: signal, power, ground, NC, C, NO
Resistor
- Description: A resistor with a resistance of 1M Ohms.
- Pins: pin1, pin2
- Properties: Resistance: 1M Ohms
Wiring Details
Arduino UNO
- GND is connected to Resistor pin2.
- D3 is connected to Photocell (LDR) pin 0.
- D2 is connected to Photocell (LDR) pin 1.
Photocell (LDR)
- pin 0 of the first LDR is connected to Arduino UNO D3.
- pin 1 of the first LDR is connected to pin 0 of the second LDR and Resistor pin1.
- pin 1 of the second LDR is connected to Arduino UNO D2.
Resistor
- pin1 is connected to Photocell (LDR) pin 1.
- pin2 is connected to Arduino UNO GND.
Code Documentation
Arduino UNO Code
void setup() {
  // put your setup code here, to run once:

}

void loop() {
  // put your main code here, to run repeatedly:

}
This code is a basic template for the Arduino UNO. The setup() function is where you initialize your components and settings, and the loop() function is where the main logic of your program runs repeatedly.
Additional Documentation
The additional documentation file is empty and can be used to add further details or notes about the circuit and its operation.