
Arduino UNO-Based Water Flow Monitoring System with LCD Display
View and Edit Project In Cirkit Designer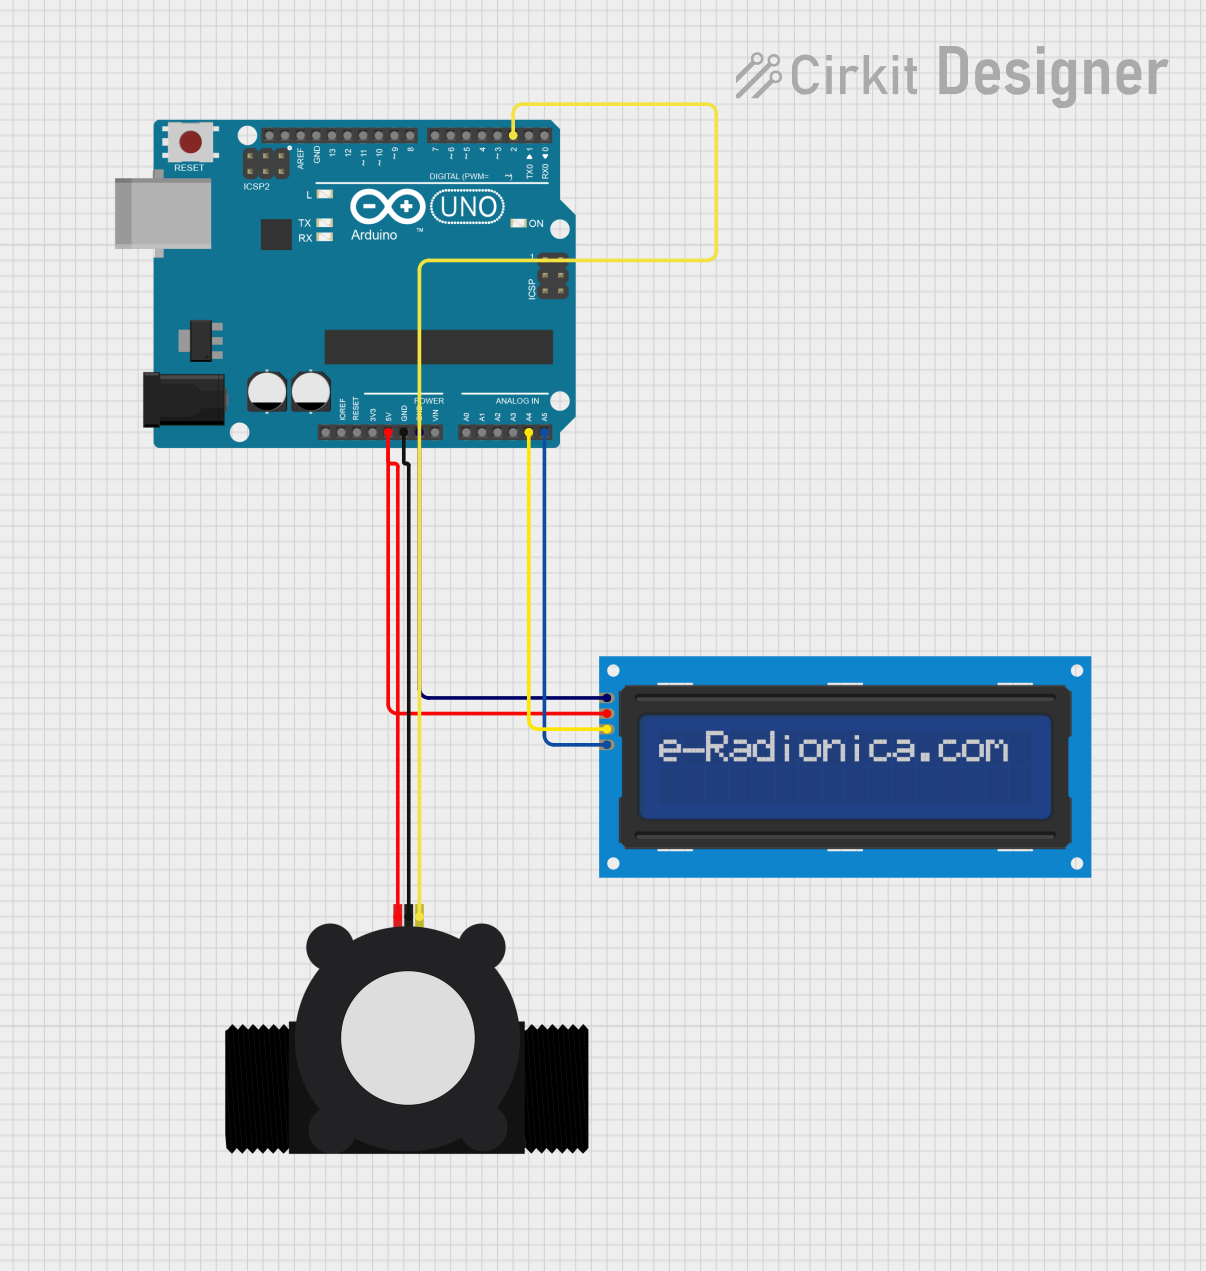
Circuit Documentation
Summary
This circuit consists of an Arduino UNO microcontroller, a YF-S201 Water Flow Meter, and an LCD screen 16x2 I2C. The Arduino UNO serves as the central control unit, interfacing with the water flow meter to measure water flow and displaying the data on the LCD screen.
Component List
Arduino UNO
- Description: A microcontroller board based on the ATmega328P.
- Pins: UNUSED, IOREF, Reset, 3.3V, 5V, GND, Vin, A0, A1, A2, A3, A4, A5, SCL, SDA, AREF, D13, D12, D11, D10, D9, D8, D7, D6, D5, D4, D3, D2, D1, D0
YF-S201 Water Flow Meter
- Description: A sensor used to measure the flow rate of water.
- Pins: SIG, GND, VCC
LCD screen 16x2 I2C
- Description: A 16x2 character LCD display with I2C interface.
- Pins: SCL, SDA, VCC, GND
Wiring Details
Arduino UNO
- D2: Connected to SIG of YF-S201 Water Flow Meter
- GND: Connected to GND of YF-S201 Water Flow Meter and GND of LCD screen 16x2 I2C
- 5V: Connected to VCC of YF-S201 Water Flow Meter and VCC of LCD screen 16x2 I2C
- A5: Connected to SCL of LCD screen 16x2 I2C
- A4: Connected to SDA of LCD screen 16x2 I2C
YF-S201 Water Flow Meter
- SIG: Connected to D2 of Arduino UNO
- GND: Connected to GND of Arduino UNO
- VCC: Connected to 5V of Arduino UNO
LCD screen 16x2 I2C
- SCL: Connected to A5 of Arduino UNO
- SDA: Connected to A4 of Arduino UNO
- VCC: Connected to 5V of Arduino UNO
- GND: Connected to GND of Arduino UNO
Code Documentation
Arduino UNO Code
sketch.ino
void setup() {
  // put your setup code here, to run once:

}

void loop() {
  // put your main code here, to run repeatedly:

}
documentation.txt