
Ghostbusters Trap Simulation with Arduino Mega and Adafruit Modules
View and Edit Project In Cirkit Designer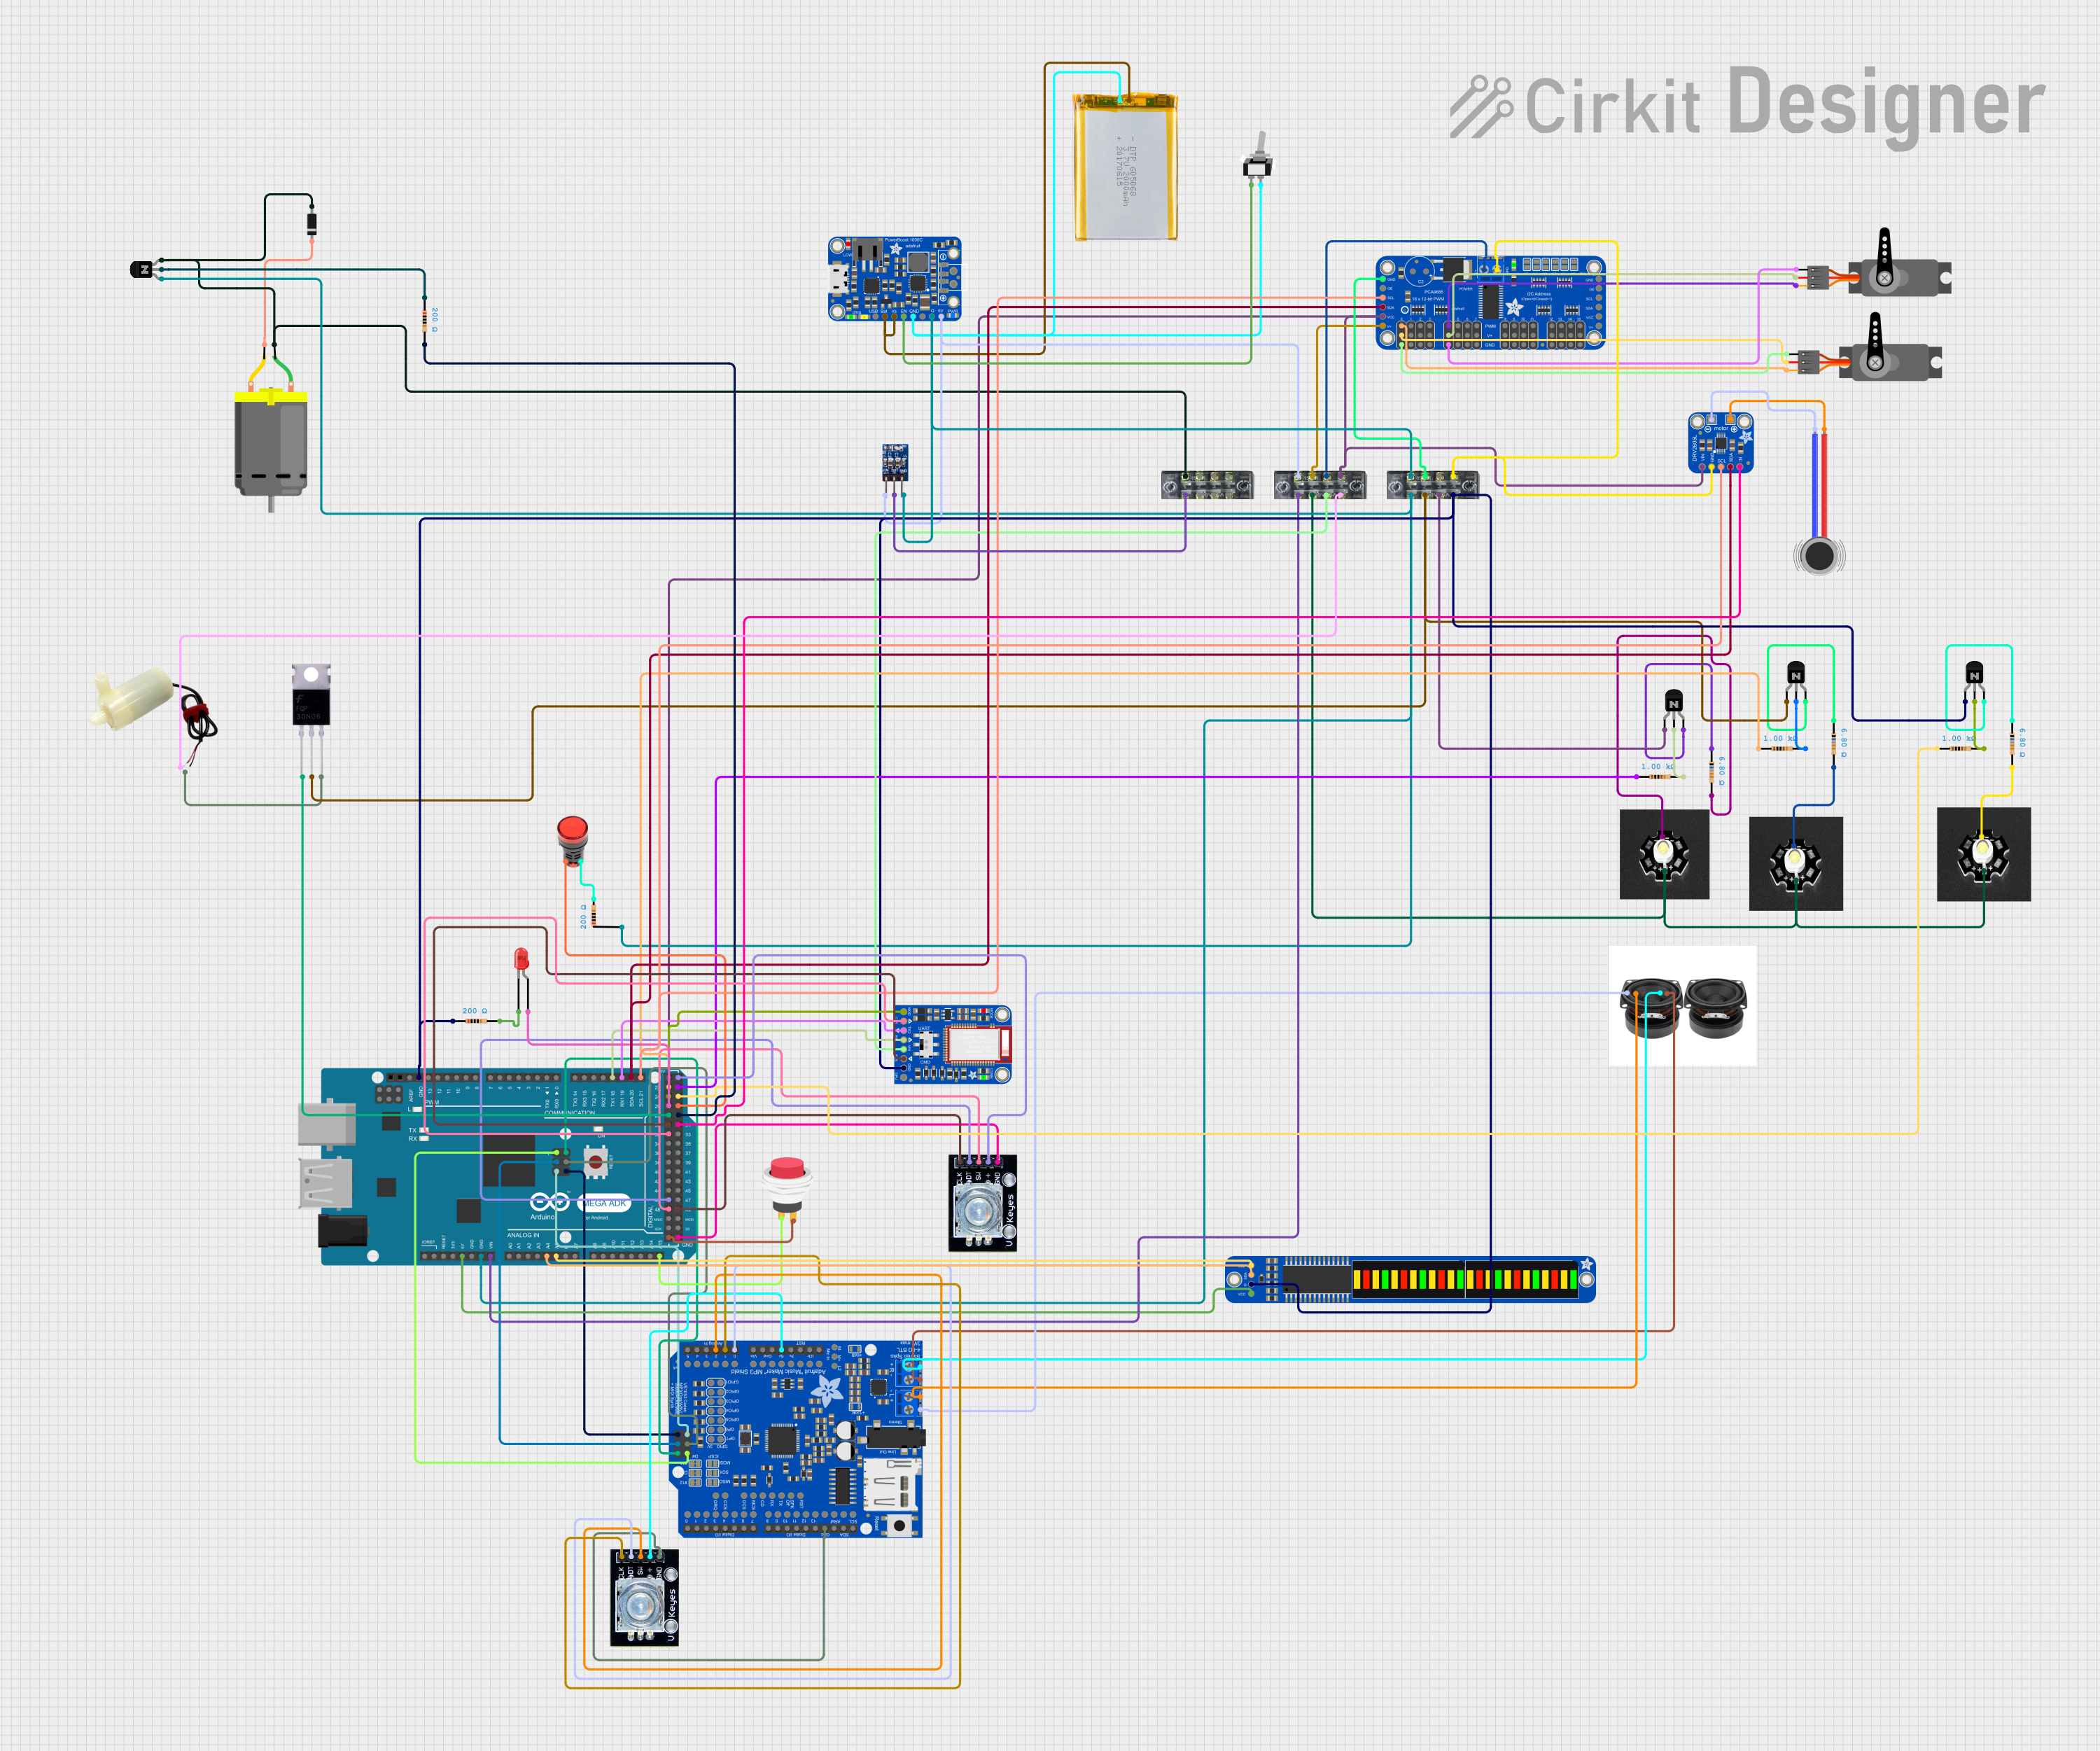
Circuit Documentation
Summary
This circuit is designed to simulate a ghost trap from the movie Ghostbusters. It features a variety of components including servos, LEDs, a bargraph, a haptic motor, a DC motor, and a water pump to create an effect of a ghost being trapped and the trap experiencing an electrical failure. The sequence can be activated by a Bluetooth input or an encoder knob switch, which also controls the volume. The circuit is controlled by an Arduino Mega ADK microcontroller, which interfaces with various modules and actuators to create the desired effects.
Component List
Microcontrollers
- Arduino Mega ADK (Rev3): The main controller for the circuit, interfacing with all other components to manage the ghost trap simulation.
Actuators
- Servo: Used to create mechanical movements as part of the simulation.
- Vibration Motor: Provides haptic feedback during the simulation.
- 5v mini water pump: Simulates the effect of a ghost being trapped.
- DC Motor: Part of the mechanical simulation for the ghost trap.
- Speaker: Outputs audio for the simulation.
Power Management
- Adafruit PowerBoost 1000C: Boosts battery voltage to 5V and charges the battery.
- 2000mAh Battery: Provides power to the circuit.
Sensors and Input Devices
- Rotary Encoder: Used for user input to control the volume and activate the sequence.
- 2Pin Push Switch: An additional input device for user interaction.
Communication Modules
- Adafruit Bluefruit LE UART Friend: Bluetooth module for wireless communication.
Indicators
- Adafruit 16-Channel 12-bit PWM Servo Driver - I2C: Controls multiple PWM outputs for servos and LEDs.
- Adafruit DRV2605L: Haptic controller for driving the vibration motor.
- Lamp Red: Visual indicator for the simulation.
- Adafruit Bi-Color 24-Bar Bargraph w/ I2C Backpack: Visual display for the simulation.
- LED: Two Pin (red): Simple indicator LED.
Power Regulation
- ams1117 3.3: Voltage regulator providing 3.3V output.
Switches
- Toggle Switch spst: A single-pole single-throw switch for power control.
- Terminal Blocks: Used for making easy and secure connections of wires.
Protection and Control
- Mosfet: Acts as a switch for controlling high current loads.
- NPN Transistor (EBC): Used as a switch or amplifier in the circuit.
- Diode: Prevents backflow of current, protecting components like the DC motor.
- Resistor: Various resistors used for current limiting and voltage division.
Wiring Details
Arduino Mega ADK (Rev3)
- Connected to various components for control and data exchange.
- Provides power to components like the Rotary Encoder and Adafruit Bi-Color 24-Bar Bargraph.
- Receives input from the Rotary Encoder and 2Pin Push Switch.
- Controls actuators like the Servo, Vibration Motor, DC Motor, and 5v mini water pump.
- Interfaces with the Adafruit Bluefruit LE UART Friend for Bluetooth communication.
Servos
- Powered by the Adafruit 16-Channel 12-bit PWM Servo Driver.
- Ground connected to the common ground in the circuit.
- PWM signals controlled by the Adafruit 16-Channel 12-bit PWM Servo Driver.
Vibration Motor
- Driven by the Adafruit DRV2605L haptic controller.
- Power and ground connected to the Adafruit DRV2605L.
5v mini water pump
- Controlled by a Mosfet for on/off operation.
- Power sourced from the Adafruit PowerBoost 1000C through a terminal block.
DC Motor
- Connected to an NPN Transistor for control.
- Diode used for back EMF protection.
- Powered by the Adafruit PowerBoost 1000C through a terminal block.
Speaker
- Connected to the Adafruit Music Maker Shield with Amp for audio output.
Adafruit PowerBoost 1000C
- Connected to a 2000mAh Battery for power supply.
- Provides 5V output to various components in the circuit.
Rotary Encoder
- Connected to the Arduino Mega ADK for user input.
- Provides control for volume and activation of the sequence.
Adafruit Bluefruit LE UART Friend
- Interfaces with the Arduino Mega ADK for Bluetooth communication.
Adafruit 16-Channel 12-bit PWM Servo Driver - I2C
- Receives power from the terminal block.
- Controls servos and LEDs through PWM signals.
Adafruit DRV2605L
- Controls the Vibration Motor.
- Receives input signal from the Arduino Mega ADK.
Lamp Red
- Controlled by the Arduino Mega ADK.
- Connected to a resistor for current limiting.
Adafruit Bi-Color 24-Bar Bargraph w/ I2C Backpack
- Receives power from the Arduino Mega ADK.
- Controlled via I2C communication.
LEDs
- Controlled by the Arduino Mega ADK.
- Connected to resistors for current limiting.
ams1117 3.3
- Regulates voltage to 3.3V for components requiring lower voltage.
Toggle Switch spst
- Controls the power enable line for the Adafruit PowerBoost 1000C.
Terminal Blocks
- Used for connecting various power and ground lines in the circuit.
Mosfet
- Controls the 5v mini water pump.
NPN Transistor (EBC)
- Used to control the DC Motor and LEDs.
Diode
- Provides back EMF protection for the DC Motor.
Resistors
- Used for current limiting and voltage division throughout the circuit.
Documented Code
/*
 * Ghostbusters Trap Simulation
 * This code simulates a ghost trap from the movie Ghostbusters.
 * It controls servos, LEDs, a bargraph, a haptic motor, a DC motor,
 * and a water pump to create an effect of a ghost being trapped
 * and the trap experiencing an electrical failure.
 * The sequence can be activated by a Bluetooth input or the encoder knob switch.
 * The encoder knob also controls the volume.
 */

#include <Adafruit_PWMServoDriver.h>
#include <Adafruit_VS1053.h>
#include <Adafruit_LEDBackpack.h>
#include <Wire.h>
#include <Servo.h>
#include <SoftwareSerial.h>

#define LED_D26 26
#define LED_D27 27
#define LED_D22 22
#define LED_D23 23
#define LED_D25 25
#define SWITCH_PIN 31
#define HAPTIC_PIN 20
#define DC_MOTOR_PIN 29
#define PUMP_PIN 28
#define ENCODER_SW_PIN 48
#define ENCODER_CLK_PIN 49
#define ENCODER_DT_PIN 46
#define BLUETOOTH_RX 18
#define BLUETOOTH_TX 19

Adafruit_PWMServoDriver pwm = Adafruit_PWMServoDriver();
Adafruit_VS1053_FilePlayer musicPlayer = Adafruit_VS1053_FilePlayer();
Adafruit_24bargraph bargraph = Adafruit_24bargraph();
Servo leftServo;
Servo rightServo;
SoftwareSerial bluetooth(BLUETOOTH_TX, BLUETOOTH_RX);

volatile int lastEncoded = 0;
volatile long encoderValue = 0;
long lastencoderValue = 0;
int lastMSB = 0;
int lastLSB = 0;

void setup() {
  pinMode(LED_D26, OUTPUT);
  pinMode(LED_D27, OUTPUT);
  pinMode(LED_D22, OUTPUT);
  pinMode(LED_D23, OUTPUT);
  pinMode(LED_D25, OUTPUT);
  pinMode(SWITCH_PIN, INPUT);
  pinMode(HAPTIC_PIN, OUTPUT);
  pinMode(DC_MOTOR_PIN, OUTPUT);
  pinMode(PUMP_PIN, OUTPUT);
  pinMode(ENCODER_SW_PIN, INPUT);
  pinMode(ENCODER_CLK_PIN, INPUT);
  pinMode(ENCODER_DT_PIN, INPUT);

  attachInterrupt(digitalPinToInterrupt(ENCODER_CLK_PIN), updateEncoder, CHANGE);
  attachInterrupt(digitalPinToInterrupt(ENCODER_DT_PIN), updateEncoder, CHANGE);

  pwm.begin();
  pwm.setPWMFreq(60);

  leftServo.attach(0);
  rightServo.attach(4);

  musicPlayer.begin();
  musicPlayer.useInterrupt(VS1053_FILEPLAYER_PIN_INT);
  musicPlayer.setVolume(20, 20);

  bargraph.begin(0x70);

  bluetooth.begin(9600);

  playSound("turn_on.mp3");
}

void loop() {
  if (digitalRead(SWITCH_PIN) == HIGH || digitalRead(ENCODER_SW_PIN) == HIGH ||
      bluetooth.available()) {
    if (bluetooth.read() == 'A') {
      activateSequence();
    }
  }

  long newEncoderValue = encoderValue / 4;
  if (newEncoderValue != lastencoderValue) {
    int volume = map(newEncoderValue, 0, 1023, 0, 100);
    musicPlayer.setVolume(volume, volume);
    lastencoderValue = newEncoderValue;
  }
}

void playSound(const char *filename) {
  musicPlayer.startPlayingFile(filename);
}

void activateSequence() {
  playSound("Battery_Drained.mp3");
  digitalWrite(LED_D27, HIGH);
  digitalWrite(LED_D