Arduino UNO Joystick Controller with Serial Output
Circuit Documentation
Summary
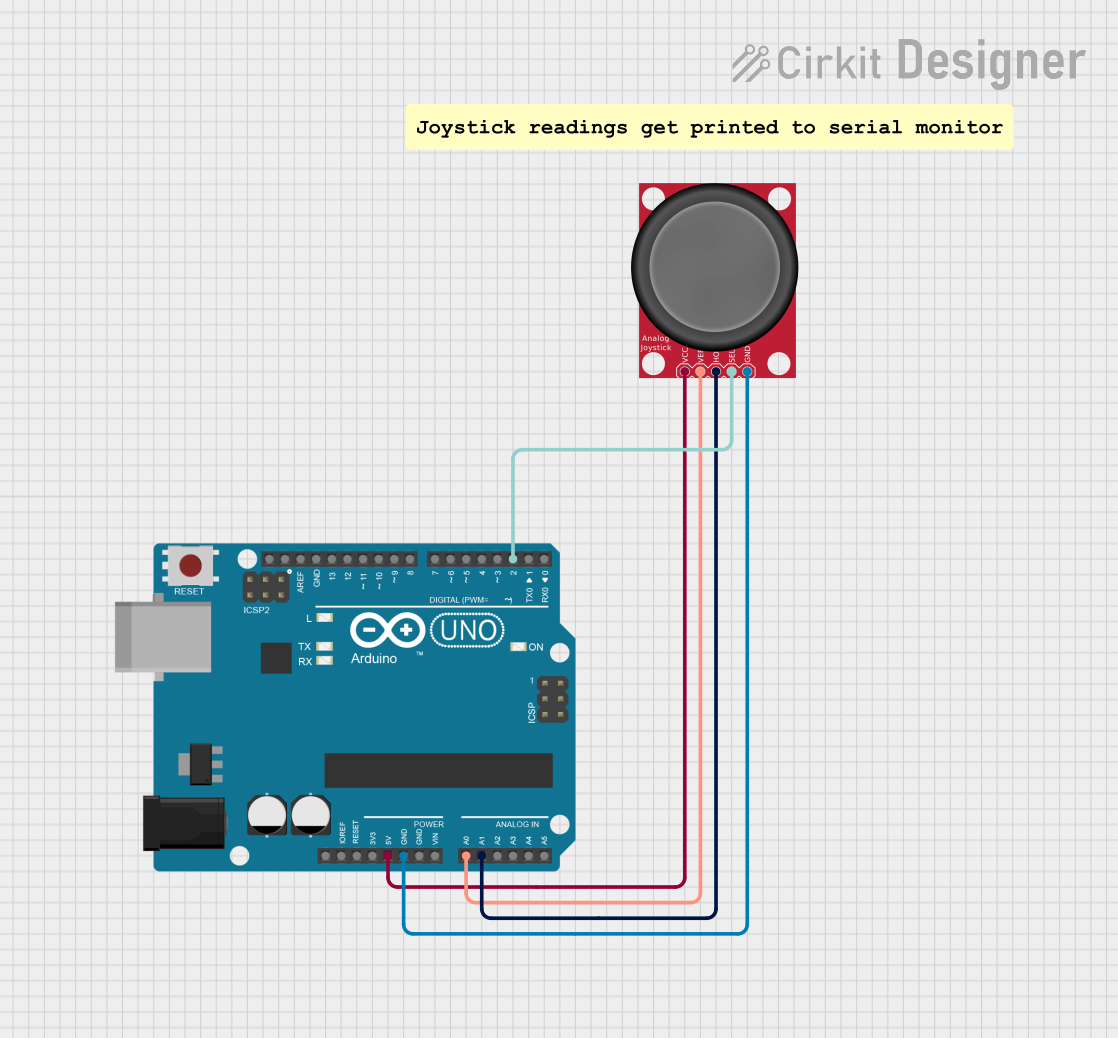
This circuit utilizes an Arduino UNO microcontroller and an Analog Joystick to read the joystick's position and button state. The Arduino processes the joystick's vertical and horizontal movements and the button press, outputting the values to the serial monitor for debugging or further processing.
Component List
Arduino UNO
- Description: A microcontroller board based on the ATmega328P. It is used for various electronic projects and can be programmed using the Arduino IDE.
- Purpose: Acts as the main controller for reading inputs from the joystick and sending data to the serial monitor.
Analog Joystick
- Description: A two-axis joystick with a push button. It provides analog output for the vertical and horizontal positions and a digital output for the button press.
- Purpose: Allows user input for controlling applications or games by providing positional data and a button press.
Wiring Details
Arduino UNO
5V: Connected to the VCC pin of the Analog Joystick.
GND: Connected to the GND pin of the Analog Joystick.
A0: Connected to the VERT pin of the Analog Joystick (reads vertical position).
A1: Connected to the HORZ pin of the Analog Joystick (reads horizontal position).
D2: Connected to the SEL pin of the Analog Joystick (reads button press).
Documented Code
void setup() {
  Serial.begin(9600); // Start serial communication at 9600 baud
  pinMode(2, INPUT_PULLUP); // Set pin D2 as input with internal pull-up resistor
}

void loop() {
  int vertValue = analogRead(A0); // Read vertical position
  int horzValue = analogRead(A1); // Read horizontal position
  int selValue = digitalRead(2); // Read button press (0 if pressed, 1 if not pressed)

  Serial.print("Vertical: ");
  Serial.print(vertValue);
  Serial.print(" Horizontal: ");
  Serial.print(horzValue);
  Serial.print(" Button: ");
  Serial.println(selValue == LOW ? "Pressed" : "Not Pressed");

  delay(500); // Delay for half a second
}
This code initializes the serial communication and sets up the necessary pin modes. In the loop, it continuously reads the joystick's vertical and horizontal positions and the button state, printing the results to the serial monitor every half second.