Cirkit Designer
Your all-in-one circuit design IDE
Home /
Project Documentation
ESP32-Based Smart IR Sensor System with LCD Display and Servo Motor

Circuit Documentation
Summary
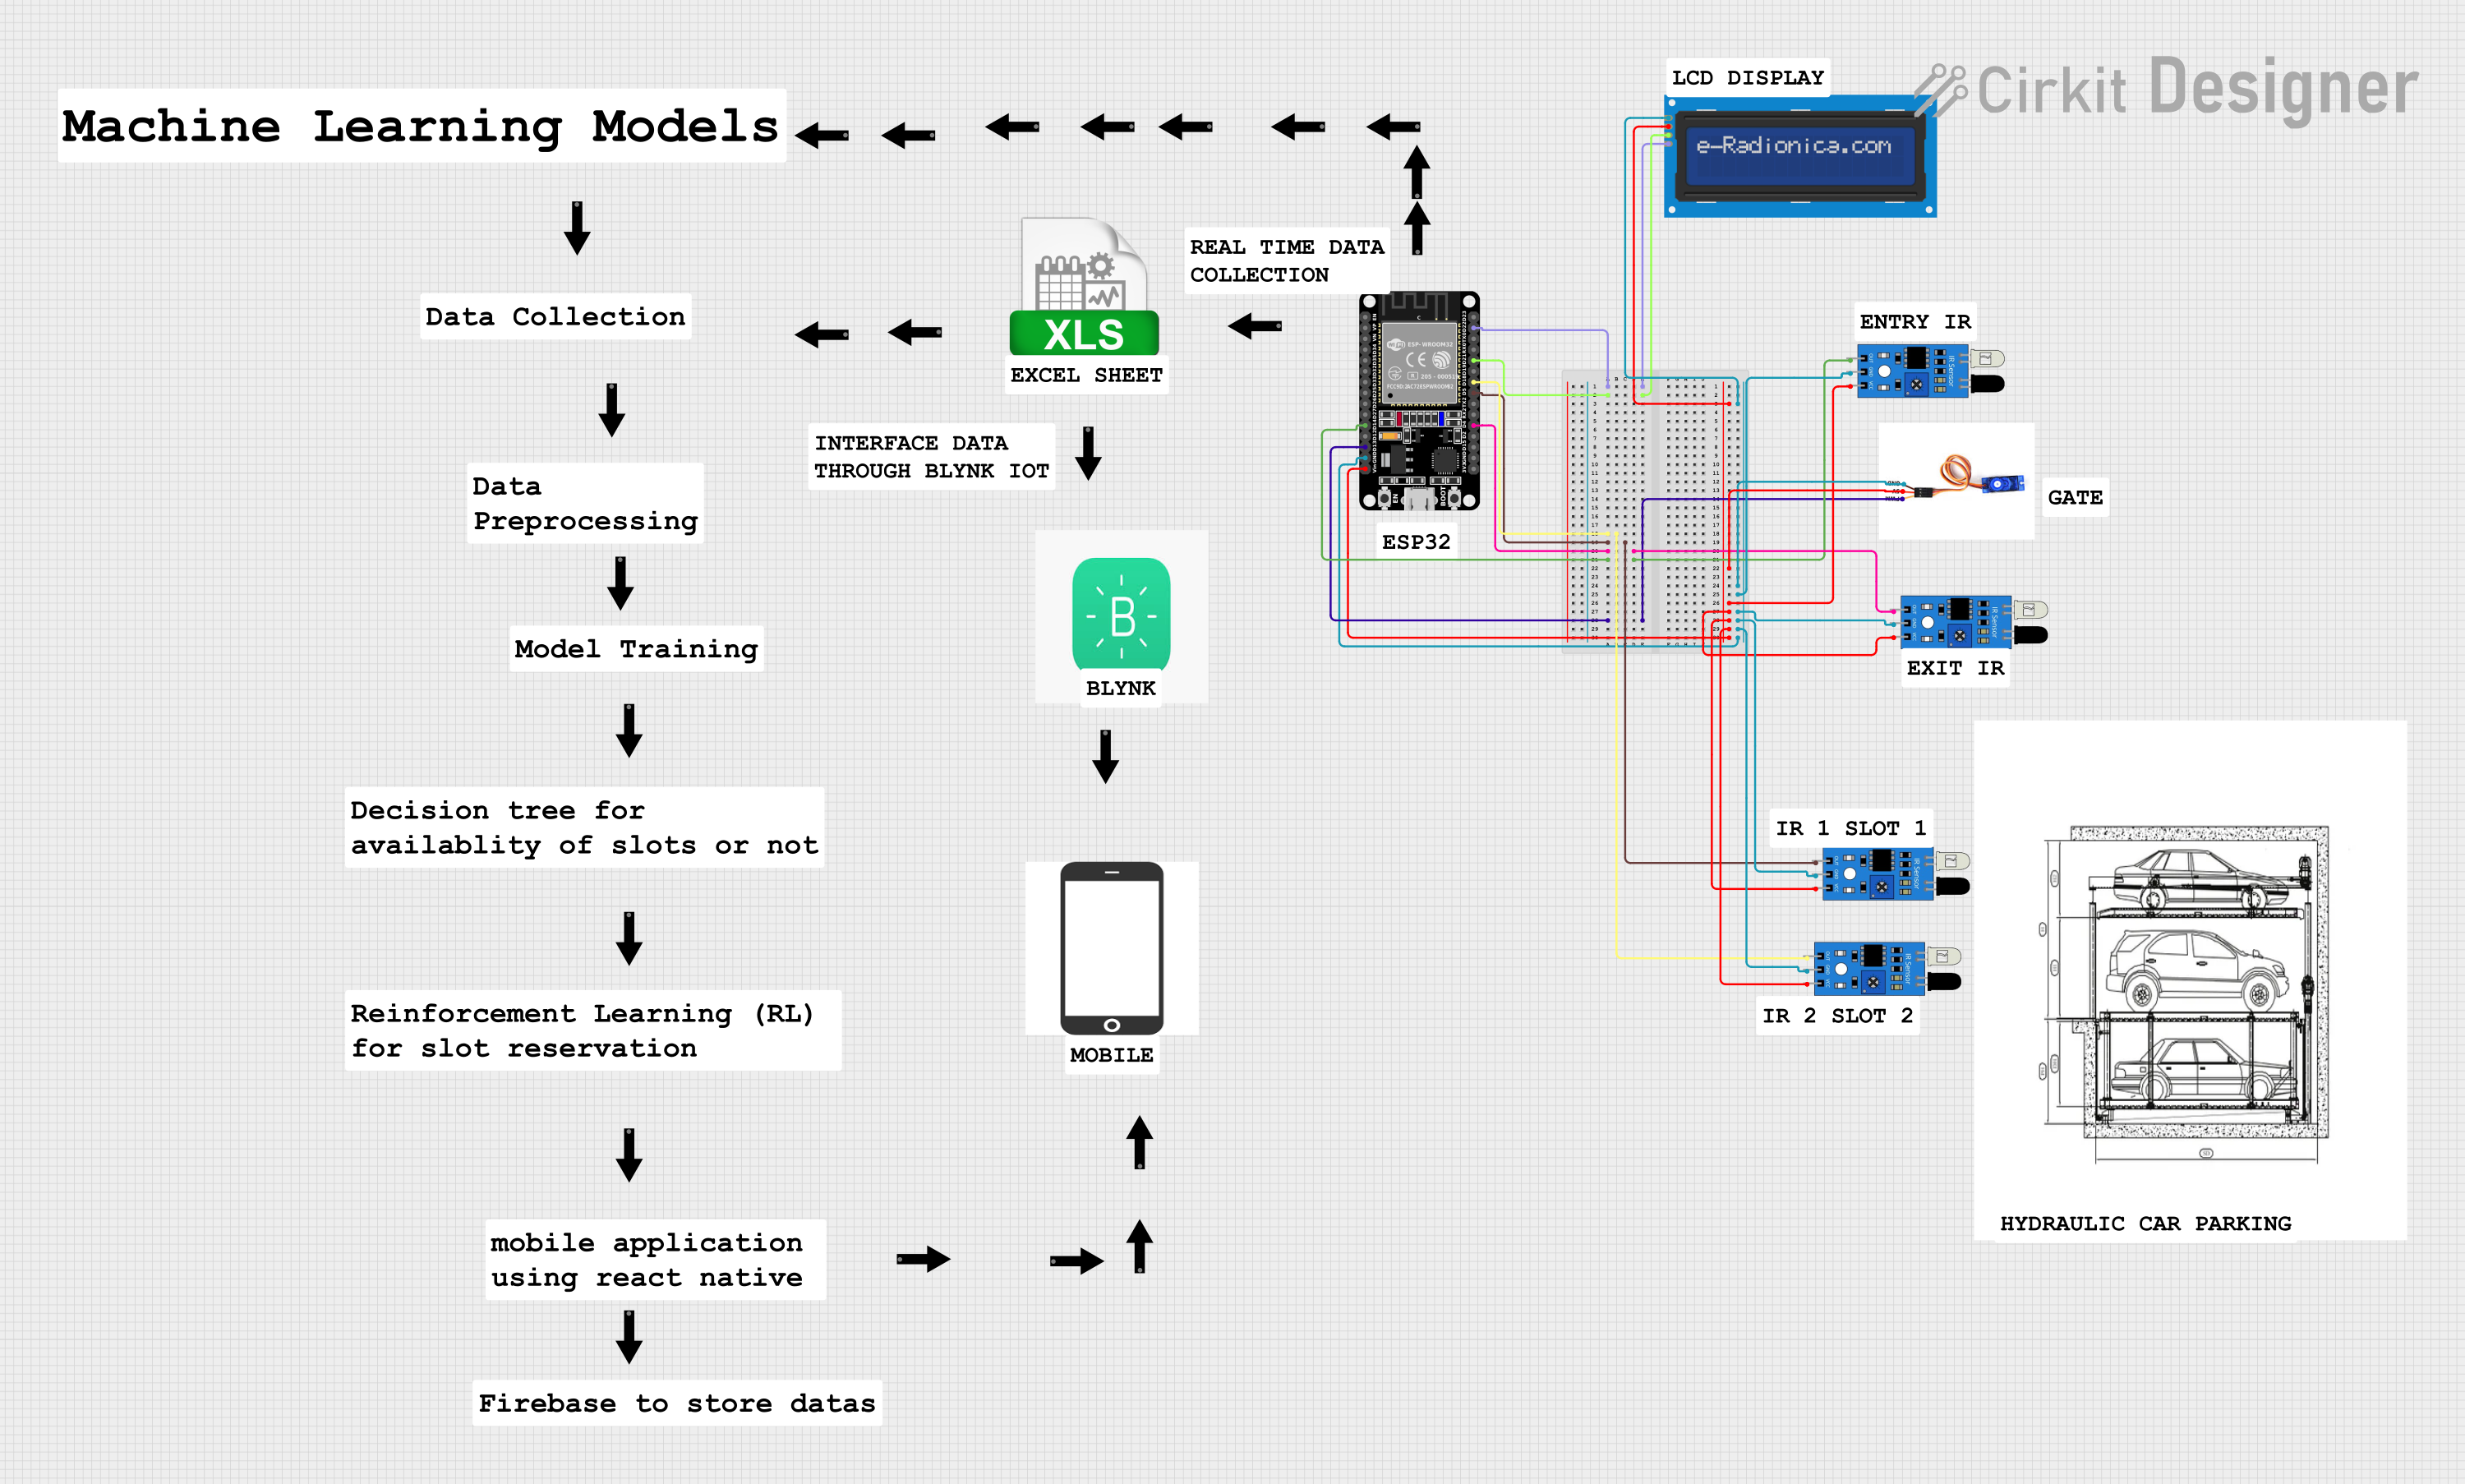
This circuit involves an ESP32 microcontroller interfacing with multiple IR sensors, an LCD screen, and an SG90 servo motor. The ESP32 reads data from the IR sensors and displays information on the LCD screen. Additionally, the ESP32 controls the SG90 servo motor based on the sensor inputs.
Component List
ESP32 (30 pin)
- Description: A powerful microcontroller with built-in Wi-Fi and Bluetooth capabilities.
- Pins: EN, VP, VN, D34, D35, D32, D33, D25, D26, D27, D14, D12, D13, GND, Vin, D23, D22, TX0, RX0, D21, D19, D18, D5, TX2, RX2, D4, D2, D15, 3V3
LCD screen 16x2 I2C
- Description: A 16x2 character LCD display with I2C interface.
- Pins: SCL, SDA, VCC, GND
IR Sensor
- Description: Infrared sensor for detecting objects.
- Pins: out, gnd, vcc
SG90 Servo Motor
- Description: A small servo motor used for precise control of angular position.
- Pins: PWM, 5V, GND
Wiring Details
ESP32 (30 pin)
- D22 connected to SCL of LCD screen 16x2 I2C
- D21 connected to SDA of LCD screen 16x2 I2C
- D18 connected to out of IR sensor
- D5 connected to out of IR sensor
- D4 connected to out of IR sensor
- D14 connected to out of IR sensor
- D13 connected to PWM of SG90 servo motor
- Vin connected to VCC of LCD screen 16x2 I2C, 5V of SG90 servo motor, and vcc of all IR sensors
- GND connected to GND of LCD screen 16x2 I2C, GND of SG90 servo motor, and gnd of all IR sensors
LCD screen 16x2 I2C
- SCL connected to D22 of ESP32
- SDA connected to D21 of ESP32
- VCC connected to Vin of ESP32
- GND connected to GND of ESP32
IR Sensor
- out connected to D18 of ESP32
- out connected to D5 of ESP32
- out connected to D4 of ESP32
- out connected to D14 of ESP32
- vcc connected to Vin of ESP32
- gnd connected to GND of ESP32
SG90 Servo Motor
- PWM connected to D13 of ESP32
- 5V connected to Vin of ESP32
- GND connected to GND of ESP32
Documented Code
ESP32 (30 pin)
void setup() {
  // put your setup code here, to run once:

}

void loop() {
  // put your main code here, to run repeatedly:

}
SG90 Servo Motor
void setup() {
  // put your setup code here, to run once:

}

void loop() {
  // put your main code here, to run repeatedly:

}
This documentation provides a comprehensive overview of the circuit, including a summary, detailed component list, wiring details, and documented code.