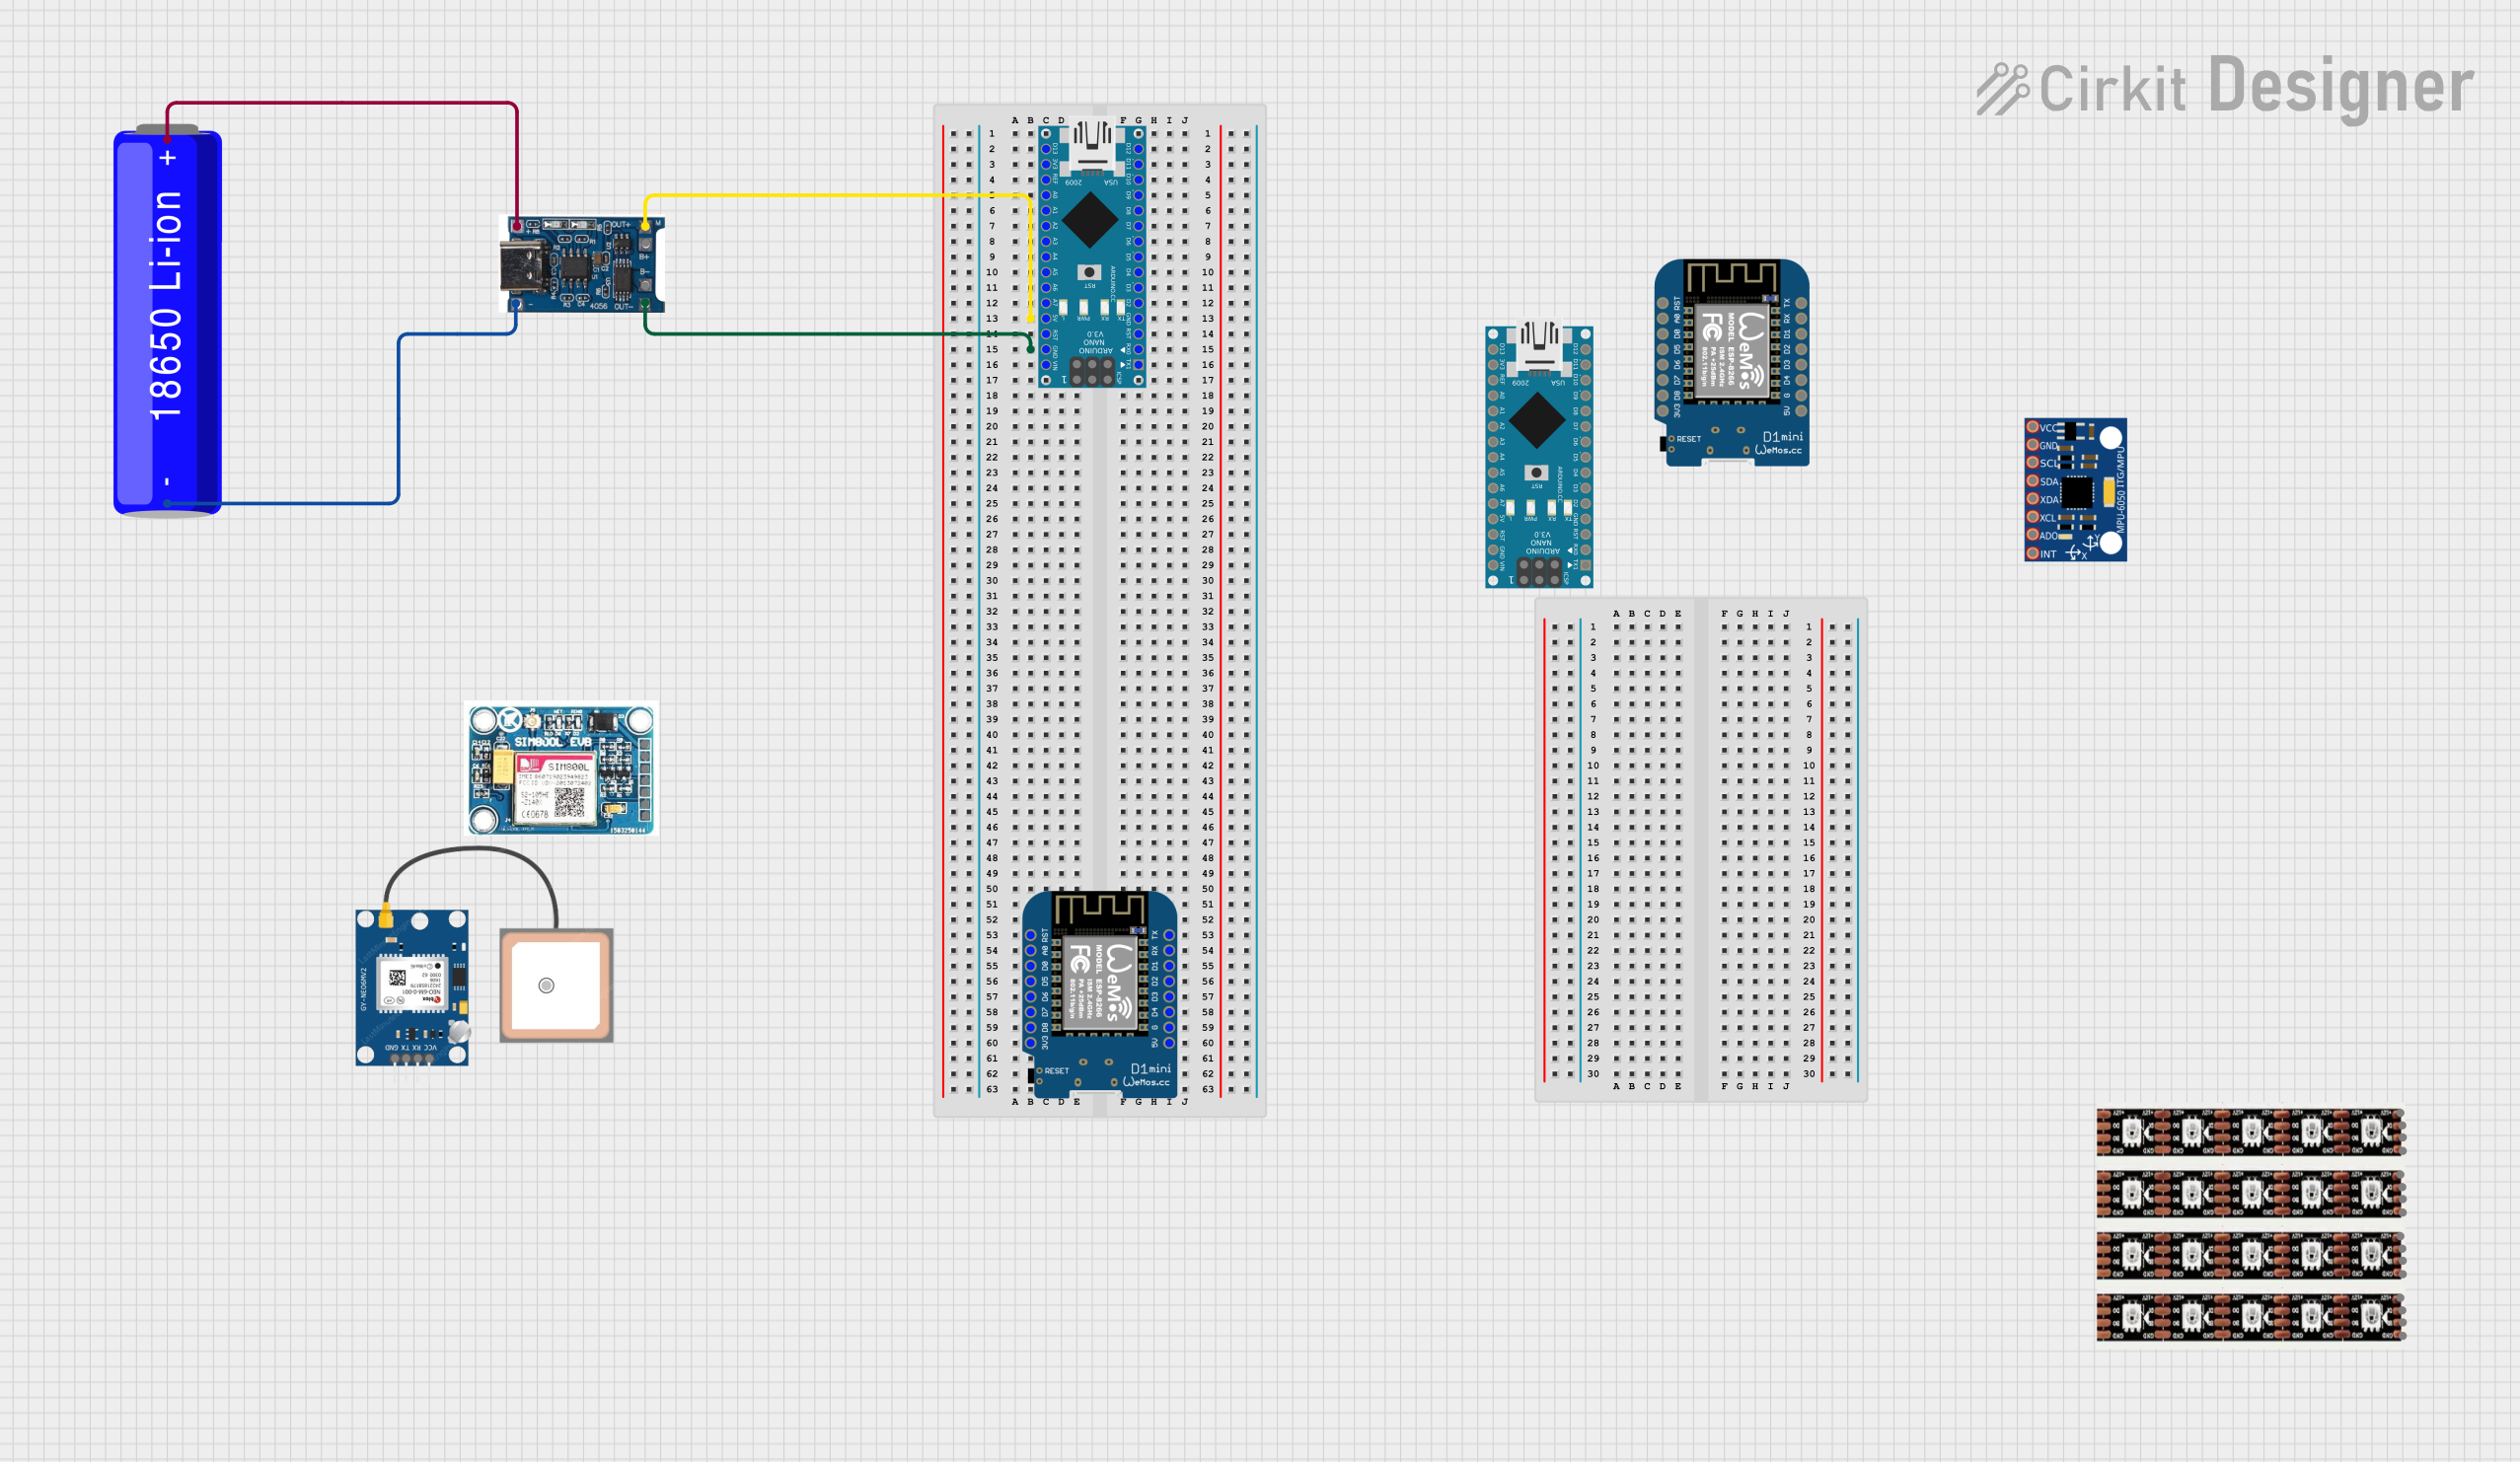
Arduino Nano Battery-Powered Base Circuit

Circuit Documentation
Summary
The circuit in question is designed to be powered by an 18650 Li-ion Battery, which is managed by a dedicated battery charger module. The circuit includes two microcontroller units (MCUs): an Arduino Nano and a Wemos D1 Mini. These MCUs are intended to interface with various peripherals, although the specific functions are not detailed in the provided information. The circuit's power system is designed to supply the Arduino Nano with power from the battery charger.
Component List
Arduino Nano
A compact microcontroller board based on the ATmega328P. It has a variety of digital and analog I/O pins and is commonly used for prototyping and small projects.
18650 Li-ion Battery
A standard rechargeable battery used in laptops, flashlights, and electric vehicles. It provides a power source for the circuit.
Battery Charger 4.2V
A charging module designed to charge Li-ion batteries like the 18650. It regulates the charging process to ensure safe and efficient battery charging.
Wemos D1 Mini
A mini Wi-Fi capable microcontroller board based on the ESP8266. It is suitable for IoT projects and can be programmed via the Arduino IDE.
SIM 800L V2.0 GSM
A GSM/GPRS module that allows the circuit to communicate over cellular networks. It can be used for SMS, data, and voice communication.
GPS NEO 6M
A GPS module capable of providing accurate location data. It is commonly used in navigation and tracking applications.
MPU-6050
A motion processing unit that contains a 3-axis gyroscope and a 3-axis accelerometer. It is used for motion sensing in various applications.
WS2815 LED Strip
An addressable LED strip that can be controlled to display various colors and patterns. It is used for decorative lighting and displays.
Wiring Details
Arduino Nano
5Vconnected to theOUT+pin of the battery charger.GNDconnected to theOUT-pin of the battery charger.
18650 Li-ion Battery
+connected to theIN+pin of the battery charger.-connected to theIN-pin of the battery charger.
Battery Charger 4.2V
OUT+connected to the5Vpin of the Arduino Nano.OUT-connected to theGNDpin of the Arduino Nano.IN+connected to the+pin of the 18650 Li-ion Battery.IN-connected to the-pin of the 18650 Li-ion Battery.
Documented Code
Arduino Nano Code (Instance 1)
void setup() {
  // put your setup code here, to run once:

}

void loop() {
  // put your main code here, to run repeatedly:

}
Filename: sketch.ino
Arduino Nano Code (Instance 2)
void setup() {
  // put your setup code here, to run once:

}

void loop() {
  // put your main code here, to run repeatedly:

}
Filename: sketch.ino
(Note: The code for both instances of the Arduino Nano is identical and is provided as a template. Specific functionality needs to be implemented within the setup and loop functions.)
This documentation provides an overview of the circuit components, their wiring, and the base code for the microcontrollers. Further details on the purpose and functionality of each part within the circuit would be necessary to complete the documentation.