Arduino UNO Controlled IR Sensor with Indicator LEDs and Buzzer Alert System

Circuit Documentation
Summary of the Circuit
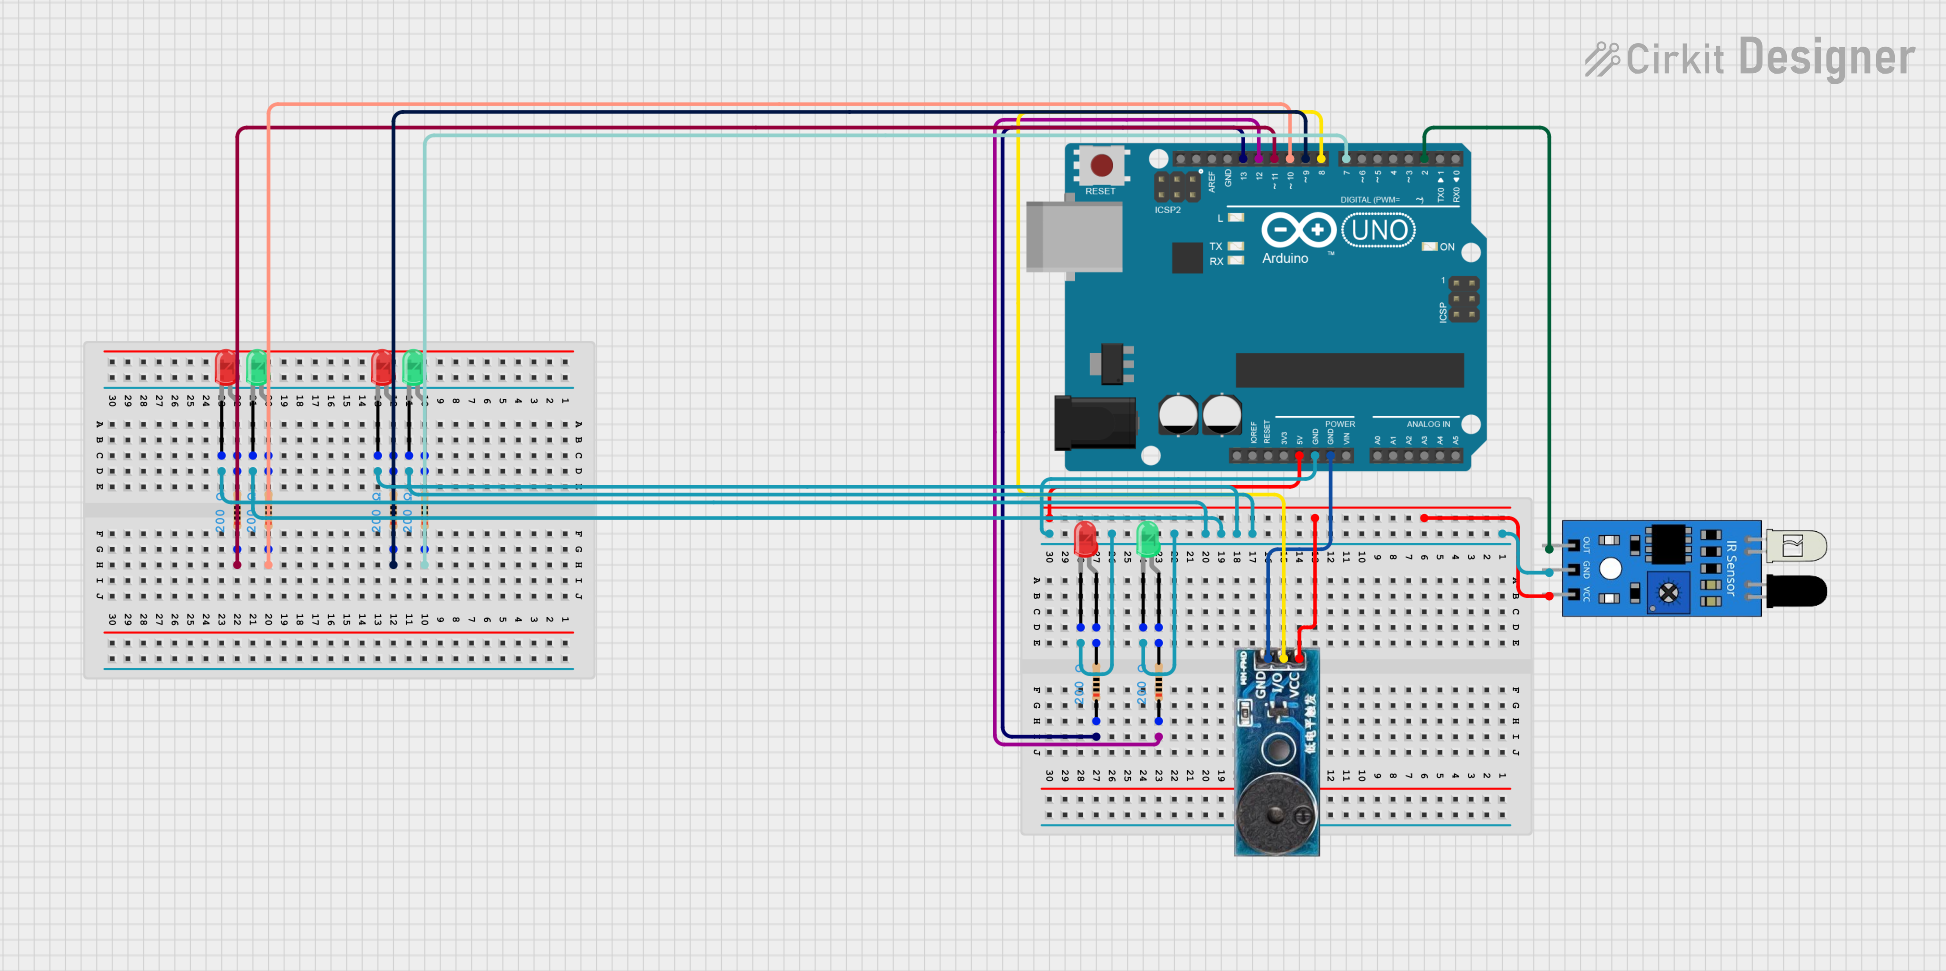
This circuit is designed to interface an IR sensor with an Arduino UNO microcontroller to detect the presence of an object. The circuit includes several LEDs (both red and green) that are likely used as indicators. A buzzer module is also included, which could be used for audible signaling. Each LED is connected in series with a resistor, presumably to limit the current through the LEDs. The IR sensor is powered by the Arduino and its output is connected to one of the digital pins of the Arduino for object detection. The buzzer module is also controlled by the Arduino.
Component List
IR Sensor
- Pins: out, gnd, vcc
- Description: An infrared sensor used for object detection.
LEDs
- Types: Red and Green
- Pins: cathode, anode
- Description: Light Emitting Diodes used as visual indicators.
Arduino UNO
- Pins: Various digital and analog pins, power, and ground.
- Description: A microcontroller board based on the ATmega328P, used as the main controller for the circuit.
Resistor
- Pins: pin1, pin2
- Description: A passive two-terminal electrical component that implements electrical resistance as a circuit element.
- Value: 200 Ohms
Buzzer Module
- Pins: GND, Vcc, I/O
- Description: An electronic buzzer for producing sound.
Wiring Details
IR Sensor
- Vcc connected to Arduino's 5V.
- Gnd connected to Arduino's GND.
- Out connected to Arduino's D2.
LEDs
- Red LED Anodes connected to the corresponding resistor's pin2.
- Green LED Anodes connected to the corresponding resistor's pin2.
- All LED Cathodes connected to Arduino's GND.
Arduino UNO
- D12, D13, D11, D10, D9, D7 connected to the corresponding resistor's pin1.
- D8 connected to Buzzer Module I/O.
- 5V connected to IR Sensor Vcc and Buzzer Module Vcc.
- GND connected to IR Sensor Gnd and Buzzer Module GND.
Resistor
- Pin1 connected to the corresponding Arduino digital pin.
- Pin2 connected to the anode of the corresponding LED.
Buzzer Module
- Vcc connected to Arduino's 5V.
- GND connected to Arduino's GND.
- I/O connected to Arduino's D8.
Documented Code
Arduino UNO Code (sketch.ino)
void setup() {
  // put your setup code here, to run once:

}

void loop() {
  // put your main code here, to run repeatedly:

}
Note: The provided code is a template and does not include any functional code. It needs to be populated with the logic for reading the IR sensor, driving the LEDs, and controlling the buzzer based on the sensor's output.