Cirkit Designer
Your all-in-one circuit design IDE
Home /
Project Documentation
Arduino UNO Based Soil Moisture Monitoring System

Soil Moisture Sensing Circuit Documentation
Summary
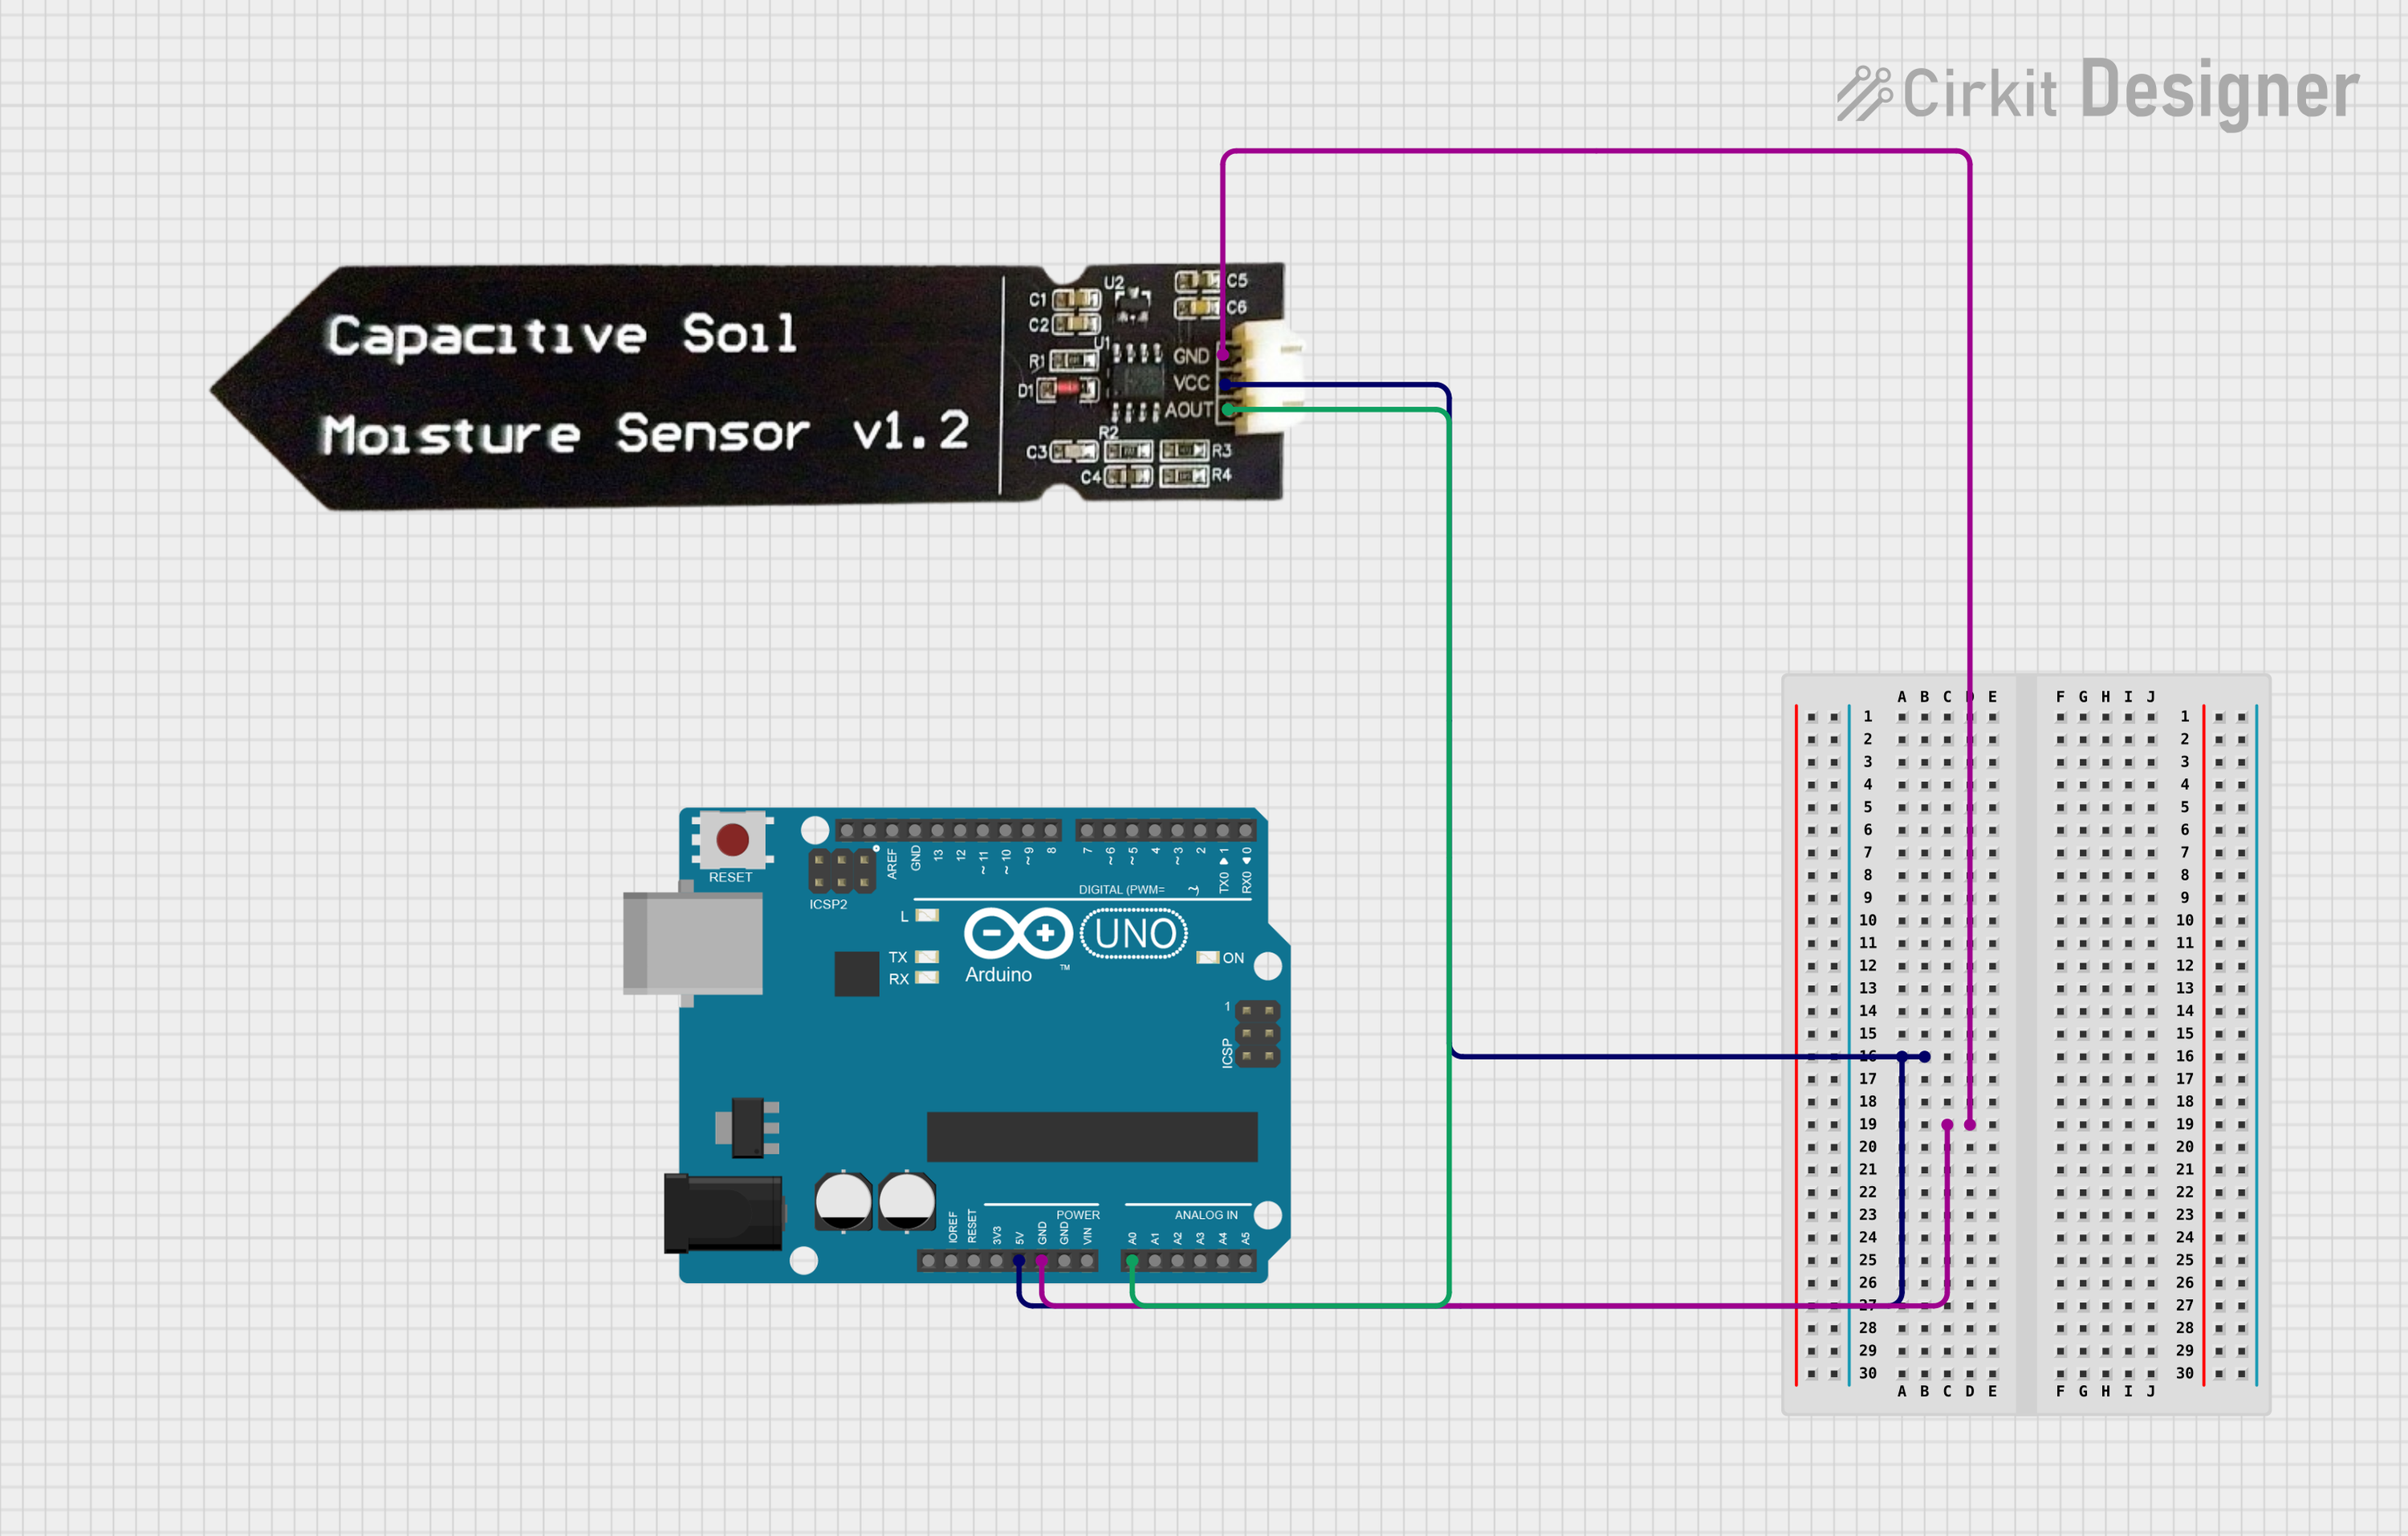
This document describes a simple soil moisture sensing circuit that utilizes an Arduino UNO microcontroller and a Capacitive Soil Moisture Sensor V1.2. The purpose of this circuit is to measure the moisture level of the soil, which can be useful for gardening or agricultural applications. The sensor outputs an analog signal that is read by the Arduino, which then processes the signal and outputs the moisture level to the serial monitor.
Component List
Arduino UNO
- Description: A microcontroller board based on the ATmega328P. It has 14 digital input/output pins, 6 analog inputs, a 16 MHz quartz crystal, a USB connection, a power jack, an ICSP header, and a reset button.
- Purpose: Acts as the central processing unit for the circuit, reading sensor data and running the embedded code to determine soil moisture levels.
Capacitive Soil Moisture Sensor V1.2
- Description: A sensor that measures the moisture content in the soil based on the capacitance between two pads. It outputs an analog voltage proportional to the moisture level.
- Purpose: To detect the moisture level of the soil and provide an analog output that can be read by the Arduino UNO.
Wiring Details
Arduino UNO
- 5V: Provides power to the Capacitive Soil Moisture Sensor V1.2.
- GND: Common ground with the Capacitive Soil Moisture Sensor V1.2.
- A0: Receives the analog output signal from the Capacitive Soil Moisture Sensor V1.2.
Capacitive Soil Moisture Sensor V1.2
- VCC: Connected to the 5V output on the Arduino UNO to receive power.
- GND: Connected to the ground (GND) on the Arduino UNO to complete the circuit.
- AOUT: Outputs an analog signal to the A0 pin on the Arduino UNO representing the soil moisture level.
Documented Code
Arduino UNO Code (sketch.ino)
#include <CapacitiveSensor.h>

const int AirValue = 520;   //you need to replace this value with Value_1
const int WaterValue = 260;  //you need to replace this value with Value_2
int intervals = (AirValue - WaterValue)/3;
int soilMoistureValue = 0;

void setup() {
  Serial.begin(9600); // open serial port, set the baud rate to 9600 bps
}

void loop() {
  soilMoistureValue = analogRead(A0);  //put Sensor insert into soil
  if(soilMoistureValue > WaterValue && soilMoistureValue < (WaterValue + intervals)) {
    Serial.println("Very Wet");
    Serial.println(soilMoistureValue);
  }
  else if(soilMoistureValue > (WaterValue + intervals) && soilMoistureValue < (AirValue - intervals)) {
    Serial.println("Wet");
    Serial.println(soilMoistureValue);
  }
  else if(soilMoistureValue < AirValue && soilMoistureValue > (AirValue - intervals)) {
    Serial.println("Dry");
    Serial.println(soilMoistureValue);
  }
  delay(100);
}
Additional Notes
- The code uses predefined values for
AirValueandWaterValueto represent the sensor readings in air and water, respectively. These values should be calibrated according to the specific sensor and conditions. - The
intervalsvariable is used to divide the range betweenAirValueandWaterValueinto three equal parts to classify the soil moisture level as "Very Wet," "Wet," or "Dry." - The
analogRead(A0)function reads the analog value from the sensor and stores it insoilMoistureValue. - The
Serial.println()function is used to output the moisture level and the raw sensor value to the serial monitor for debugging and monitoring purposes. - A delay of 100 milliseconds is included in the loop to prevent flooding the serial monitor with data.